Studies show that nearly 60% of air fryer owners never achieve the crispy results they’re dreaming of. You’ve probably experienced that disappointing, soggy disappointment too. But here’s the thing—it’s not your air fryer that’s failing you. It’s the technique. Once you nail a few key secrets, you’re gonna transform those meals from mediocre to absolutely incredible, and we’re about to uncover exactly how.
Key Takeaways
- Preheat your air fryer for three to five minutes to reach optimal temperature stability before cooking food.
- Dry food thoroughly with paper towels to remove surface moisture, which prevents steaming and enables crisping.
- Apply a light coating of high smoke-point oil like avocado to encourage browning and crisping.
- Arrange food in single layers with ventilation gaps and flip halfway through for even crisping.
- Maintain your air fryer by wiping the basket after each use and inspecting the gasket regularly.


Why Your Air Fryer Isn’t Delivering Crispy Results

You’ve invested in an air fryer, fired it up with high hopes, and… well, you’re getting results that are more “meh” than “chef’s kiss.” Here’s the thing: crispy, golden-brown perfection isn’t always automatic, and that’s actually pretty common.
Maybe you’re overcrowding that basket. Yeah, we all do it. You think, “Just one more chicken wing won’t hurt,” but it totally does. Air needs to circulate around your food like it’s at a dance party, not crammed in like rush hour subway.
Sometimes the culprit’s sneakier though. Uneven baskets or a faulty thermostat could be sabotaging you behind the scenes. Your machine might have temperature dead zones where some spots cook hotter than others. Or it’s just lying about how hot it actually is. Frustrating? Absolutely. Fixable? You betcha.
Certain high-heat capabilities and specialized technologies, like Max Crisp or cyclonic grilling, can make a big difference in achieving that restaurant-quality crunch.
The Importance of Preheating Your Air Fryer
Preheating your air fryer is basically the difference between crispy victory and soggy defeat. You’ve gotta give that basket temperature time to reach the optimal heat level. Think of it like warming up before a workout, except way more delicious. Most air fryers need about three to five minutes of preheat timing, though some fancy models get there faster. Don’t skip this step, tempting as it might be. When you toss cold food into a lukewarm basket, you’re essentially steaming instead of crisping. Your food needs that intense, immediate heat to develop that golden, crunchy exterior everyone craves. Set your temperature, let it preheat properly, and you’ll finally release those restaurant-quality results you’ve been chasing. It’s seriously that simple. For even better results, consider models with quartz heating elements for more precise and even heat distribution right from the start.
Mastering Temperature and Cook Time Settings
Now that you’ve preheated your air fryer, it’s time to crack the code on temperature and cook time—because let’s face it, nailing these settings is what seperates crispy perfection from rubbery disappointment. You’ll find that temperature matters most; different foods demand different heat levels, so you can’t just blast everything at 400°F and hope for the best, plus you’ll need to adjust your cook times accordingly depending on what you’re frying up and how thick those pieces are. The real magic happens when you start testing and fine-tuning your own technique, jotting down what works, tweaking what doesn’t, and building your personalized air fryer playbook that’ll make you look like a kitchen genius. Just like motor wattage and power are crucial for achieving smooth blending in kitchen blenders, finding the right temperature and timing for your air fryer recipes is key to reaching the perfect crisp every time.

Temperature Settings Matter Most
While it might seem like air fryers are basically magical boxes that crisp everything to perfection, the truth is that temperature’s where the real magic happens. You’ve gotta nail your heat calibration, and that’s not negotiable if you want consistently crispy results.
Here’s what you need to know:
- Accurate sensor placement inside your fryer guarantees you’re actually cooking at the temperature you think you are
- Most air fryers run hotter than their display shows, so you might need to adjust downward by 25 degrees
- Preheating for three to five minutes gives your machine time to reach true temperature stability
- Different foods demand different temps, so don’t just set it and forget it
Your air fryer’s thermometer isn’t always trustworthy. Invest in a reliable instant-read thermometer and you’ll transform your cooking game completely. For the most reliable results, take a cue from precise temperature control as recommended for electric griddles, since steady and accurate heat makes all the difference for crispiness.
Adjusting Times for Foods
Once you’ve nailed your temperature, it’s time to tackle the other half of the equation: time. Here’s the thing—cooking times aren’t set in stone. They’ll vary based on your food’s thickness, moisture content, and even your specific air fryer model. Don’t be afraid to experiment with time adjustments until you find what works best.
| Food Type | Starting Time |
|---|---|
| Chicken wings | 15 minutes |
| Frozen fries | 18 minutes |
| Fish fillets | 12 minutes |
| Vegetable medley | 10 minutes |
| Pork chops | 14 minutes |
When you’re doing batch scaling—cooking larger quantities—you’ll often need extra minutes since air circulation gets slightly compromised. Start checking food halfway through. That golden, crispy exterior you’re craving? It’s totally achievable with a little trial and error.
If you’re looking for similar guidance on other appliances, understanding timer functions and convenience in electric steamers can help you master perfectly cooked results with minimal monitoring.
Testing and Fine-Tuning Technique
The real magic happens when you stop just following recipes and start becoming your own air fryer scientist. You’ve gotta embrace batch testing and flavor mapping to unleash your fryer’s true potential.
- Start with small batches to observe how your specific machine behaves with different foods
- Document temperature and time combinations that work, noting texture and doneness levels
- Adjust incrementally in five-degree intervals rather than making drastic jumps
- Keep a simple chart tracking what worked and what didn’t for future reference
Every air fryer’s got its own personality, right? Some run hotter. Others need extra time. By experimenting deliberately, you’ll develop an instinct for perfect crispiness. You’re not just cooking anymore—you’re mastering your machine’s quirks and creating consistently delicious results that’ll impress everyone at your table.
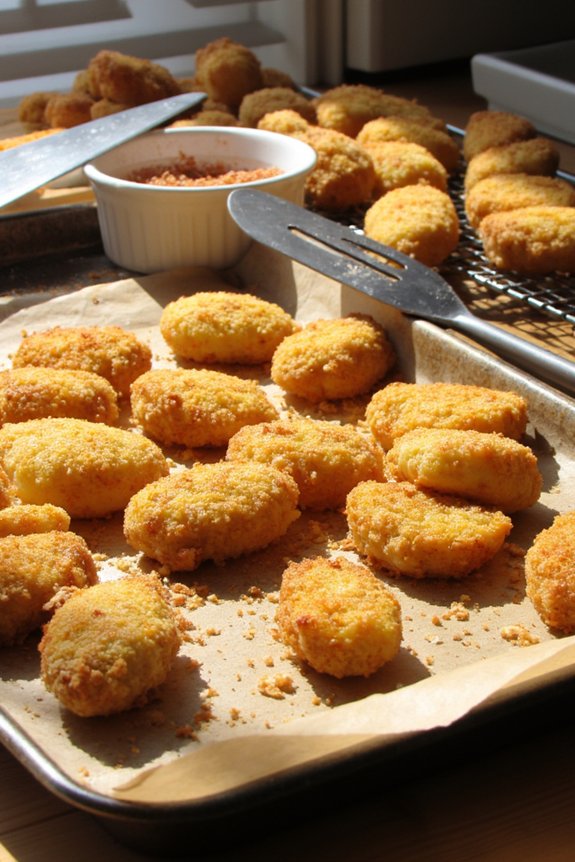
Strategic Food Placement and Spacing Techniques
By arranging your food thoughtfully in the air fryer basket, you’re basically setting yourself up for crispy success. Don’t just toss everything in there like you’re playing Tetris. Give your food breathing room. Overcrowding’s the enemy of crispiness, so space items out with ventilation gaps between each piece. This lets hot air circulate freely, hitting every surface evenly. Think of it like a concert—each food item needs its own spotlight.
Consider rack placement too. If your air fryer has multiple levels, use ’em strategically. Smaller items on upper racks, larger ones below. Flip halfway through cooking for even crisping. Single layers are your friend here. Yeah, it might take longer with multiple batches, but the results? Absolutely worth it. You’ll get that golden, crunchy exterior you’re craving.
Managing Moisture for Maximum Crispiness
Moisture is basically your crispy dreams’ worst enemy, so you’ll want to dry your food thoroughly before it even touches that basket. Pat everything down with paper towels like you’re tucking in a tiny, delicious child. Here’s the thing about steam control: it makes or breaks your crispiness game.
- Pat your food completely dry before cooking
- Use paper towels to absorb surface moisture effectively
- Let wet ingredients air-dry for a few minutes
- Avoid overcrowding, which traps steam and ruins texture
Surface dehydration isn’t just fancy talk, it’s your secret weapon. When you eliminate that extra water, your air fryer can actually focus on crisping instead of steaming. Think of it as clearing the path for golden, crunchy perfection. Don’t skip this step!


The Role of Oil in Achieving the Perfect Texture

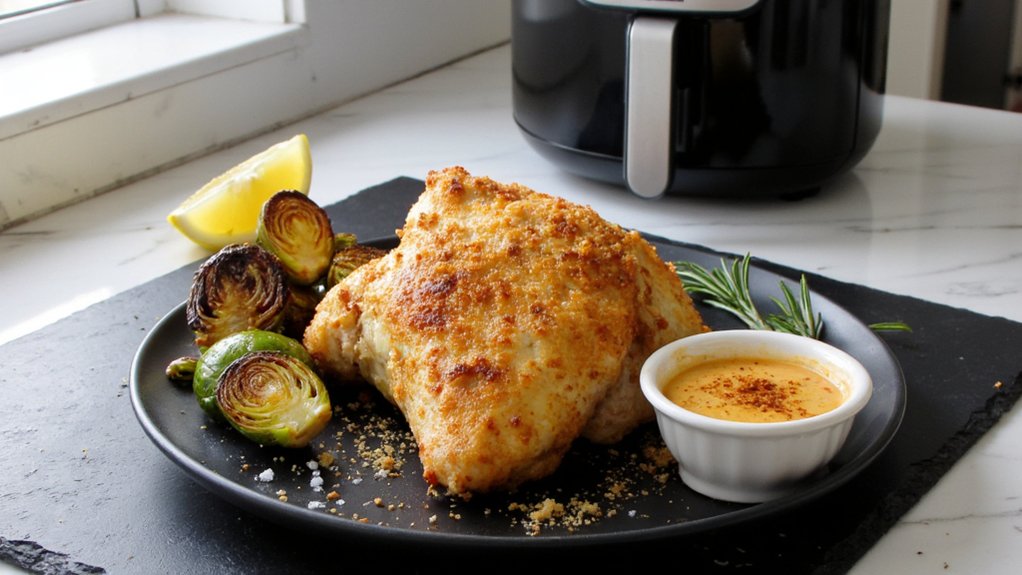
Now that you’ve got your food bone-dry and ready to rock, here’s where oil enters the chat and changes everything. A light coating of oil is your secret weapon for that golden, crispy exterior you’re craving. You don’t need much—just a thin layer works wonders. Choose oils with high smoke points like avocado or canola oil, which won’t break down under the air fryer’s intense heat. That flavor coating transforms ordinary food into something seriously delicious, adding richness and helping seasonings stick around for the ride. The oil creates a barrier that crisps up beautifully while keeping the inside tender. Think of it as your texture’s best friend. Spray or brush lightly, and you’ll nail those results every single time without any greasy mess.
Choosing the Right Foods and Cuts for Air Frying
Not all foods are created equal when it comes to air frying magic, and you’ll quickly discover that certain ingredients just nail that crispy exterior you’re craving. The secret? Picking the right cuts and thickness—think thin chicken breasts, bite-sized broccoli florets, and potato wedges that aren’t so chunky they’ll still be raw inside while the outside’s already golden and delicious. You’re basically playing matchmaker between your air fryer’s superpower and foods that’ll actually cooperate, so let’s figure out wich combos’ll make you look like a culinary genius.
Best Foods for Crisping
Success in the air fryer doesn’t happen by accident—it starts with picking the right ingredients. You’ll want to focus on foods that naturally respond well to hot, circulating air.
Here’s what’ll give you those restaurant-quality results you’re after:
- Vegetables with lower water content like broccoli, Brussels sprouts, and zucchini
- Protein options such as chicken wings, shrimp, and thick-cut pork chops
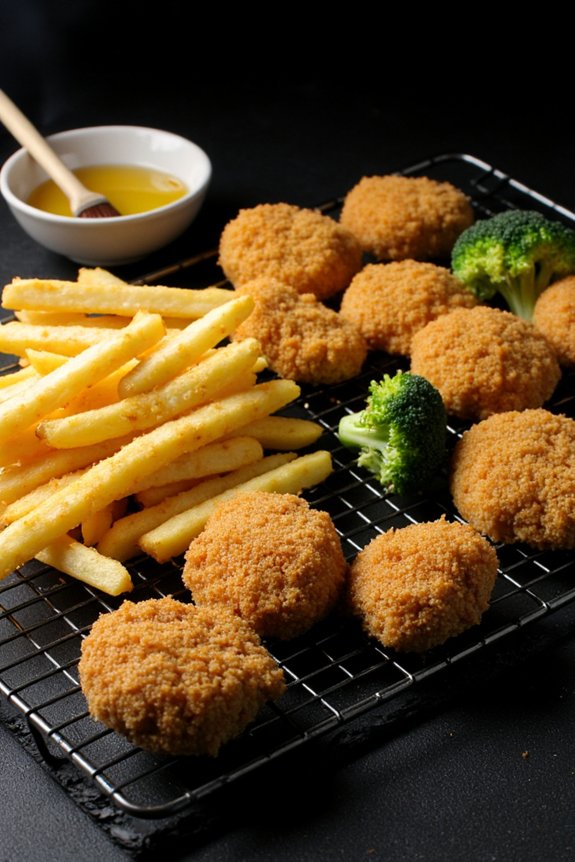
- Breaded or coated items featuring herb coatings and crispy cheese crisps
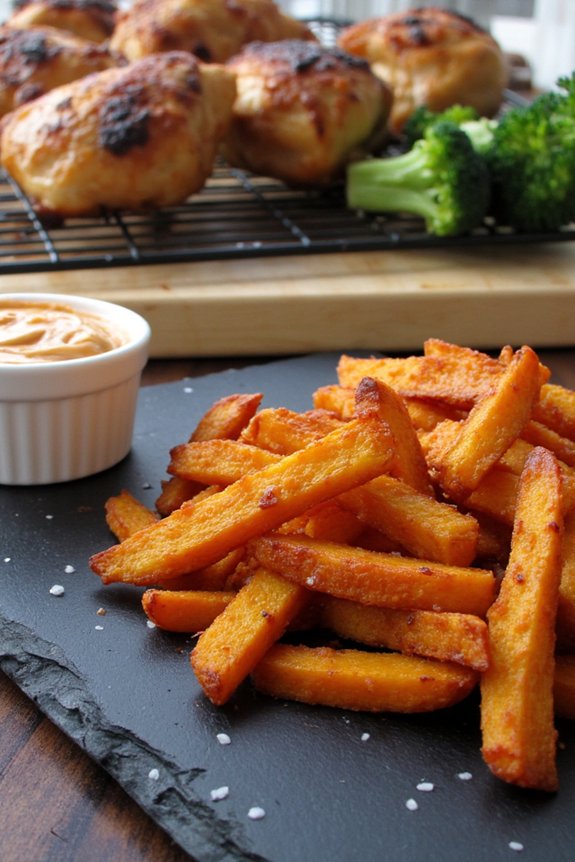
- Foods with natural starches like potatoes and sweet potato fries
Thin cuts cook faster and crisp better than thick ones. Avoid anything too wet or heavily sauced—moisture’s your enemy here. Think about it: you’re basically creating an indoor convection oven, so dryer ingredients just work smarter. Your air fryer’s gonna thank you with golden, crunchy perfection every single time.
Optimal Cuts and Thickness
While picking the right ingredients gets you halfway there, the thickness and cut of your food is what’ll actually make or break your air fryer game. You want uniform slicing across all your pieces so everything cooks at the same rate. Nothing’s worse than biting into a half-raw fry next to a charred one, right?
Consider bone in versus boneless options carefully. Boneless cuts tend to cook faster and more evenly, which is clutch for beginners. Bone in pieces? They’re trickier but totally doable if you give ’em extra time. Keep your cuts consistent—aim for quarter-inch thickness on most items. Too thin and they’ll incinerate. Too thick and you’ll wait forever for that crispy exterior with a tender inside you’re craving.
Shaking and Flipping: When and How to Do It Right
One of the biggest mistakes folks make with their air fryer is just setting it and forgetting it, trusting that everything’ll turn out golden and crispy on its own. That’s simply not how it works, my friend.
Here’s the real deal with shaking and flipping:
- Shake halfway through cooking to make certain even heat distribution and prevent hot spots from burning your food unevenly
- Use the tongs technique for delicate items like fish or chicken breasts to avoid damaging their exterior
- Time your seasoning before you start cooking so flavors bond properly with your food
- Flip denser items like thick-cut fries or veggie chunks for maximum crispiness on all sides
Don’t be lazy about it. Those few extra seconds make all the difference between mediocre and absolutely delicious results that’ll impress everyone at your table.
Cleaning and Maintenance for Consistent Performance
If you’ve been nailing those crispy air fryer recipes but your machine’s starting to look like it survived a food fight, it’s time to talk maintenance. A clean air fryer isn’t just about looks—it’s your secret weapon for consistent, golden results every single time.
| Maintenance Task | Frequency |
|---|---|
| Wipe basket and tray | After each use |
| Deep clean interior | Weekly |
| Filter replacements | Monthly or as needed |
| Gasket inspection | Every two weeks |
| Check heating element | Quarterly |
Regular gasket inspection prevents air leaks that tank your crispiness. Don’t skip filter replacements—they’re cheap insurance. Built-up grease and food particles? They’re basically sabotaging your next batch. Keep things spotless, and you’ll keep crushing those crispy dreams with every cook.
Troubleshooting Common Air Fryer Problems
Even with a spotless air fryer, things don’t always go according to plan. You might encounter issues that leave you scratching your head wondering what went wrong. Don’t worry, though—most problems have simple solutions.
- Food isn’t crisping properly – Check your sensor calibration; it might need resetting to guarantee accurate temperature readings.
- Excessive fan noise – Some noise is normal, but grinding sounds mean something’s stuck in there, so investigate immediately.
- Uneven cooking results – You’re probably overcrowding the basket, which blocks airflow and creates hot spots.
- Error codes appearing – Restart your unit or consult the manual for specific guidance.
These troubleshooting steps will get you back on track quickly. Your crispy, delicious meals are just around the corner!
Frequently Asked Questions
Can I Use My Air Fryer for Multiple Batches Without Preheating Between Each One?
Yes, you can skip preheating between batches because your air fryer’s preheat retention keeps temperatures stable. Just maintain proper batch pacing by allowing brief cooling intervals to guarantee consistent cooking results throughout your multiple batches.
What’s the Best Way to Reheat Leftovers in an Air Fryer While Maintaining Crispiness?
Perfectly positioned for crisp revival, you’ll preserve texture preservation by reheating leftovers at 350°F for 3-5 minutes. You’re avoiding moisture buildup by using your air fryer’s basket without overcrowding it.
Are Air Fryer Liners and Accessories Worth Using for Crispy Cooking Results?
Yes, you’ll find non-stick liners and parchment rounds worthwhile investments. They’re not essential, but they’ll protect your air fryer basket, reduce cleanup, and maintain crispiness by allowing proper air circulation around your food.
How Do I Convert Traditional Oven Recipes to Air Fryer Cooking Times and Temperatures?
You’ll reduce your oven temperature by 25°F and cut cooking time by 25%. Temperature adjustments and time scaling aren’t guesswork—they’re essential for converting recipes successfully. Start checking food early; you’re monitoring, not assuming.
Can Frozen Foods Be Air Fried Without Thawing, and Will They Still Get Crispy?
Yes, you can air fry frozen foods directly. You’ll get crispy results if you add extra time and use oil mist for coating adhesion. Proper steam control prevents frozen texture issues, ensuring consistent crispiness.
Conclusion
You’ve now got the secret sauce to air fryer greatness. It’s litterally a million times easier once you nail the basics—proper spacing, that essential preheat, and knowing when to shake things up. Your kitchen’s gonna smell amazing, and you’ll finally get those crispy results you’ve been chasing. So go forth, experiment with small batches, and watch your air fryer transform into a crispy-creating machine that’ll make you wonder how you ever lived without it.


