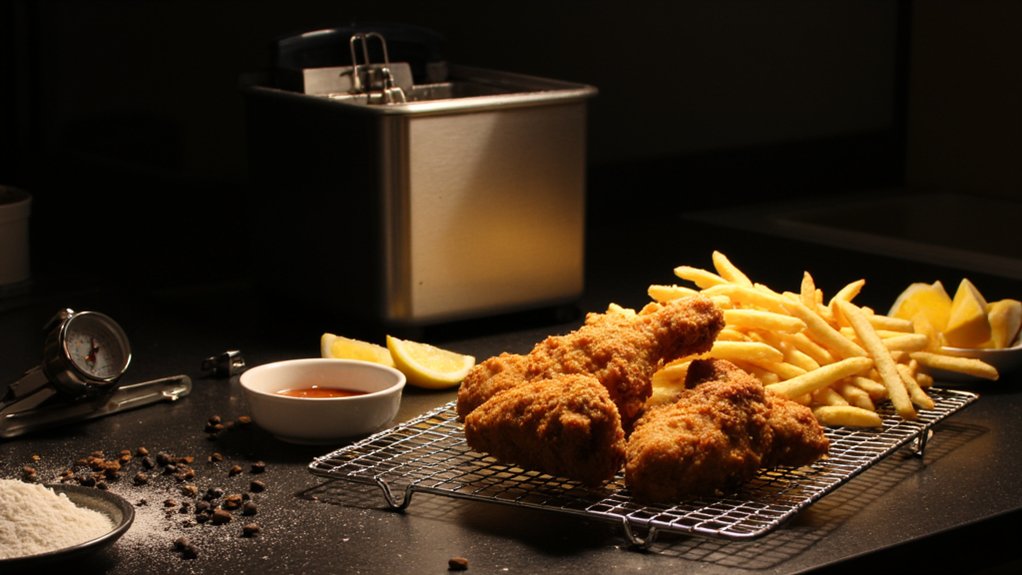
You’ve probably experienced it—that disappointing moment when you bite into what should’ve been crispy fried chicken, only to find a greasy, soggy mess instead. Frustrating, right? Well, here’s the thing: the secret isn’t some fancy technique or expensive equipment. It’s actually about one deceptively simple factor that most home cooks totally overlook, and once you nail it, you’ll never serve mushy fried food again.
Key Takeaways
- Maintain precise oil temperature (325–375°F depending on food type) to seal exteriors and prevent oil absorption that causes sogginess.
- Allow oil 1–3 minutes recovery time between batches so temperature stabilizes before adding the next batch of food.
- Use a calibrated digital thermometer with consistent probe placement to monitor temperature accurately and prevent dangerous temperature swings.
- Avoid overcrowding the fryer; smaller, spaced batches reduce temperature drops that lead to greasy, soggy results instead of crispy outcomes.
- Start with room-temperature, thoroughly dried food to prevent instant heat theft from oil and rapid temperature plunges during frying.
Why Oil Temperature Matters More Than You Think

See, oil viscosity changes dramatically based on heat. Too cool, and your food soaks up oil like a sponge. Too hot, and you’ll burn the outside while leaving the inside raw. Temperature variance of even ten degrees shifts everything. You want that sweet spot where the exterior sets instantly, trapping moisture inside and creating that satisfying crunch you’re after. It’s kinda like Goldilocks, except with bubbling hot oil and way higher stakes for your taste buds! Maintaining precise temperature control not only ensures crispier results, but also reduces oil absorption for healthier fried foods.
3. The Science Behind Crispy Exteriors and Moist Interiors
When you drop food into properly heated oil, something almost magical happens on a molecular level. The exterior undergoes what we call crispness mechanics, where moisture rapidly evaporates from the surface. That’s your golden-brown crust forming! Meanwhile, thermal gradients create this awesome temperature difference between the outside and inside of your food. The heat pushes inward gradually, cooking the interior while that outer layer’s already getting crispy. It’s like nature’s perfect timing. You’ve got intense heat sealing everything up on the outside, trapping all those delicious juices inside where they belong. That’s the secret sauce, folks. Get your oil hot enough, and you’re not just cooking food, you’re engineering texture perfection. It’s physics meets flavor, and honestly, it’s pretty darn cool. For even better results, using cookware with exceptional heat retention—like a quality cast iron skillet—can help maintain the optimal oil temperature and ensure consistently crisp fried food.
4. Understanding the Maillard Reaction in Deep Frying
you’ve gotta nail that sweet spot temperature where your food starts browning instead of just getting soggy, and that’s all thanks to the Maillard reaction doing its delicious work. When proteins and sugars meet heat around 300 degrees Fahrenheit, they’re basically having a chemical party that creates those golden-brown flavors we crave, while the moisture inside gets sealed in like a delicious little secret. It’s not just about turning up the heat and hoping for the best; understanding this reaction means you’re actually controlling how much crispiness you get on the outside and how juicy your food stays on the inside. Just like with precise temperature control in top electric smokers, maintaining the right heat is key to achieving that perfect crispy texture without overcooking or drying out your food.

Browning Temperature Sweet Spot
Envision this: your food’s turning a gorgeous golden-brown in the oil, and you’re wondering what’s actually happening down there at the molecular level. You’ve found the sweet spot, my friend. That magical temperature range between 325 and 375 degrees Fahrenheit is where the real magic happens. Surface reactions kick into high gear, creating that crispy exterior while keeping the inside tender and juicy. This is where flavor development truly shines through. The proteins and sugars are basically dancing together, forming new compounds that make your taste buds sing. You’re not just cooking anymore—you’re crafting something delicious. Get it right, and your fried foods won’t turn into sad, soggy disappointments. It’s all about finding that perfectly balanced temperature zone. For consistently crisp results, choosing a fryer with precise temperature control can help you reliably hit that golden-brown sweet spot every time.
Moisture Control Through Chemistry
As that oil hits the perfect temperature, something incredible’s happening that goes way beyond just making things crispy. You’re actually triggering a chemical party called the Maillard Reaction, and it’s your secret weapon against soggy disasters.
Here’s the science-y stuff that matters:
- Water activity decreases dramatically when temps exceed 300°F
- Vapor pressure forces moisture out instead of trapping it inside
- Rapid surface sealing happens in milliseconds
- Amino acids and sugars bond, creating that golden crust
- Interior stays juicy while exterior gets perfectly crisp
When you nail this temperature sweet spot, you’re not just frying food, you’re orchestrating a moisture evacuation mission. The heat’s so intense that water molecules literally escape as steam before they can make anything soggy. Pretty wild, right? That’s pure chemistry doing the heavy lifting.
Just like in electric pressure cookers, where rapid pressure and heat drive moisture out for perfectly tender results, deep frying at the right temperature uses a similar principle to keep your food crisp and never soggy.
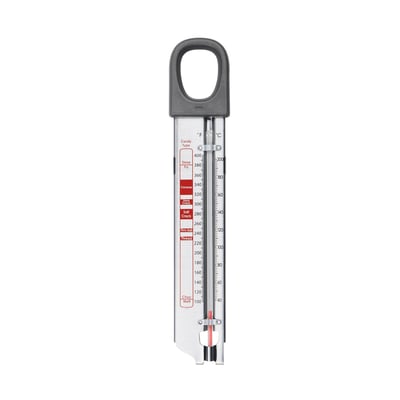
5. How to Accurately Measure Oil Temperature
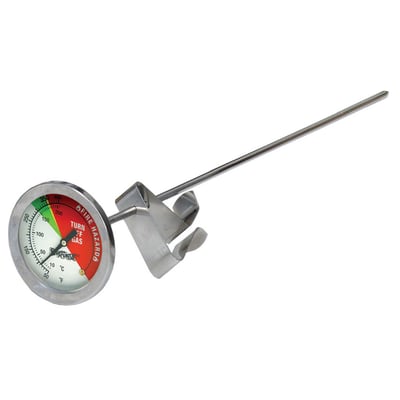
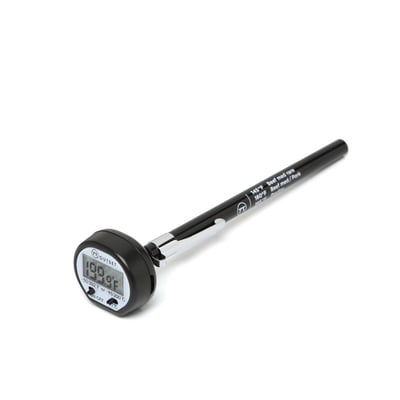
Getting your oil to the right temperature is where the real magic happens—it’s the difference between crispy perfection and a greasy, soggy dissapointment. You’ll want a reliable thermometer for accurate readings. Probe placement matters enormously. Stick it about halfway down into the oil, away from the pan’s bottom, since heat distributes unevenly. Don’t just trust the dial once. Your calibration routine should happen before every frying session. Dunk that thermometer in boiling water—it should read 212°F. If it doesn’t? Adjust accordingly. Digital thermometers rock because they’re precise and quick. Analog ones work too, just take your time reading them. The difference between 325°F and 350°F might seem small, but it’s the difference between triumph and disaster. Get this step right, and you’re already winning.
6. The Ideal Temperature Range for Different Foods
Now that you’ve nailed your thermometer technique, it’s time to talk about what temperature actually works best for your food—because not everything deserves the same heat treatment. Different foods need different temps to achieve that crispy-on-the-outside, juicy-on-the-inside perfection you’re after.
Here’s your temperature roadmap:
- Thin crust pizzas: 375°F for that perfectly charred exterior
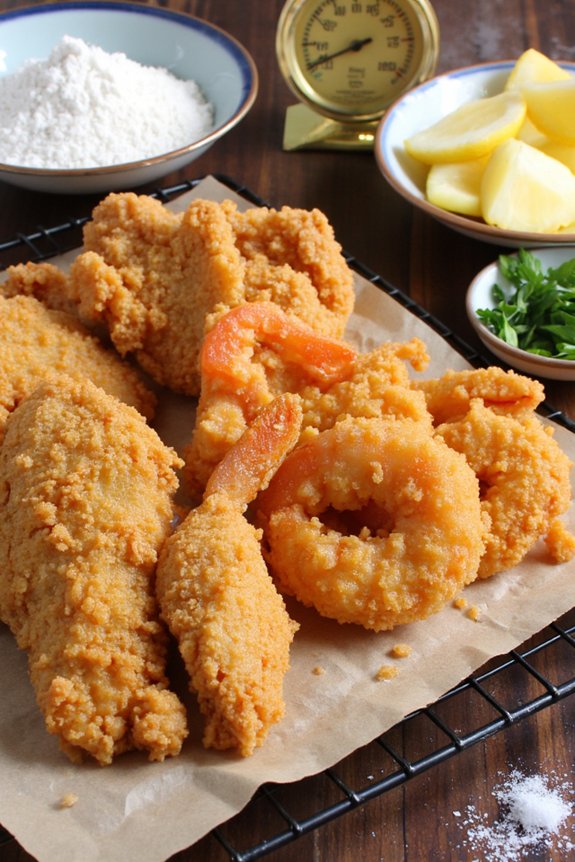
- Fish temp: 350°F keeps delicate fillets from falling apart
- Veg starches (fries, chips): 325°F initial dunk, then 375°F for crunch
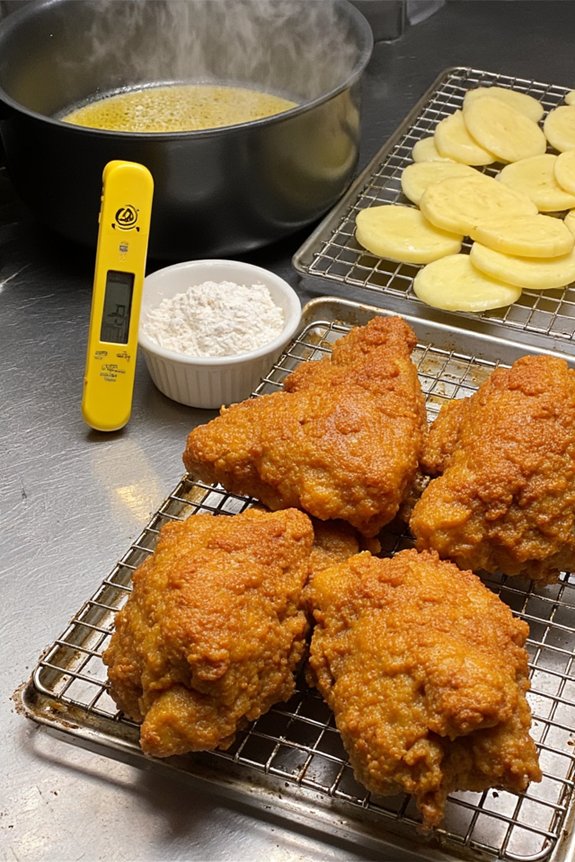
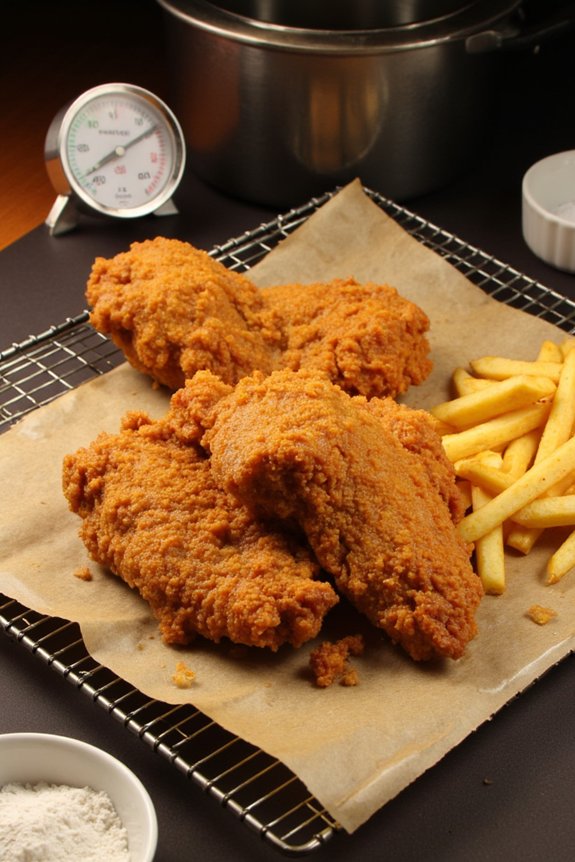
- Chicken: 350°F guarantees it’s cooked through without drying out
- Donuts: 375°F prevents batter viscosity from creating greasy disasters
You’ll notice the pattern here. Delicate stuff goes lower, starchy items need that second dunk strategy, and protein sits somewhere in the middle. Nailing these temps? That’s your secret weapon against soggy, disappointing food.
7. Common Temperature Mistakes That Make Food Soggy
Temperature swings are probably the biggest culprit behind your soggy disasters, and the good news is they’re totally fixable. When you’re dropping food into oil that’s too cool, you’re basically asking for trouble. Here’s why: cooler oil takes forever to cook the outside, which means more oil absorption happens while your food’s still got moisture inside. Not ideal. You’re also likely making your batter thickness too thin, thinking it’ll fry faster. Wrong move. A thinner batter absorbs more oil like a sponge, leaving you with greasy disappointment instead of crispy perfection. Keep your oil steady at the right temperature, and don’t skimp on batter—thickness matters big time. Consistency wins the battle against sogginess every single time.

8. Using a Thermometer vs. Traditional Testing Methods
While you’ve now got the temperature science down, the real question is how you’re actually measuring it—and that’s where things get interesting. You’ve basically got two camps here: the thermometer devotees and the old-school pokers. Here’s the breakdown:
- Digital thermometers give you instant, precise readings with proper probe placement
- Candy thermometers clip right onto your fryer’s side for continuous monitoring
- The bread cube test tells you if oil’s ready in about 60 seconds
- Wooden skewer method works, but it’s kinda hit-or-miss honestly
- Calibration routine keeps your equipment accurate and trustworthy
Look, thermometers win for consistency. They eliminate guesswork and keep your food perfectly crispy every single time. Sure, grandma’s instinct was impressive, but science? Science doesn’t lie. You’ll never regret investing in a reliable thermometer.
9. Temperature Recovery: Why It’s Critical Between Batches
When you drop that first batch of frozen fries into your fryer, you’re gonna watch the oil temperature plummet like a rock—it’s not your imagination, it’s physics, baby. You’ve gotta let that oil bounce back to the proper temp before you load up the next batch, or you’ll end up with greasy, soggy disappointments instead of golden, crispy perfection, and honestly, what’s the point of deep frying if you’re not gonna do it right? Keep that trusty thermometer handy between batches, give your oil a few minutes to recover, and you’ll be frying like a pro who actually knows that patience and consistent monitoring are the real secrets to temperature control.
Oil Temperature Drops Rapidly
One of the most frustrating things that’ll happen in your deep fryer is watching your oil temperature plummet the moment you drop in a batch of food. That sudden shock? It’s totally normal, but it’ll wreck your dinner if you’re not careful.
Here’s why this happens:
- Cold food steals heat from the oil instantly
- Your fryer’s heating element needs time to recover
- Larger batches cause bigger temperature drops
- Oil insulation matters, so don’t skimp on quantity
- Batch staggering prevents catastrophic temperature loss
The trick is giving your oil enough time to bounce back before frying more. If you rush it, you’ll end up with greasy, soggy disappointment instead of crispy perfection. So take a breath. Let that heat recover. Your taste buds’ll thank you.
Waiting Between Each Batch
After you pull out that golden-brown batch, your instinct might be screaming to drop in the next load immediately—resist it. Your oil’s temperature has just taken a nosedive, and you need resting intervals to let it recover. Think of it like a runner catching their breath between sprints. Proper batch pacing isn’t just some fancy technique; it’s the secret weapon against soggy disasters. When you wait those vital two to three minutes, your oil climbs back to its ideal temperature. This recovery time means your next batch’ll fry up crispy and delicious instead of turning into a grease-soaked disappointment. Yeah, it requires patience, but honestly? Your taste buds’ll thank you for respecting the process. Temperature recovery’s your ticket to frying perfection.
Thermometer Monitoring Best Practices
Your thermometer’s basically your best friend at this point, and honestly, you can’t wing it without one—guessing at oil temperature is how you end up with undercooked interiors and burnt exteriors that taste like sadness. Proper monitoring requires attention to detail and consistency.
Here’s what you need to nail:
- Keep your probe placement consistent—same spot every single time
- Establish a calibration schedule and actually stick to it, monthly works great
- Read temperatures slowly; don’t rush the numbers
- Clean your thermometer between batches to avoid residue interference
- Let it stabilize for a full minute before trusting the reading
You’re protecting your food’s future here. When you take thermometer monitoring seriously, you’re effectively guaranteeing that golden, crispy exterior everyone craves. That’s the real magic happening.
10. Maintaining Consistent Heat Throughout Your Frying Session
Since temperature swings can totally wreck your deep frying game, keeping that heat stable is absolutely crucial. You’ll want to invest in consistent thermostats that monitor your oil without constant babysitting. Here’s the thing: oil temperature fluctuates when you drop food in, so understanding heat zoning helps you manage those dips like a pro.
| Temperature Zone | Best For | Recovery Time |
|---|---|---|
| 325°F | Thick items | 2-3 minutes |
| 350°F | Most foods | 1-2 minutes |
| 375°F | Thin/crispy stuff | 30-45 seconds |
Don’t crowd your fryer. Seriously. Too much food at once? That’s a temperature disaster waiting to happen. Space things out, let your oil recover between batches, and you’re golden. Your patience pays off with perfectly crispy results every single time.
11. Pro Tips for Perfect Results Every Single Time
Once you’ve nailed the temperature game, it’s time to raise your deep frying from “pretty good” to “absolutely legendary.” The real magic happens when you combine technique with a few clever tricks that’ll have you producing restaurant-quality results in your own kitchen.
Here’s what seperates the pros from the amateurs:
- Master batch timing to avoid overcrowding your oil
- Practice oil turnover schedules for fresher, cleaner results
- Let food reach room temperature before frying
- Use a spider strainer for precision and finesse
- Pat everything dry like you’re preparing for surgery
Don’t rush between batches. Give your oil recovery time. Space out your timing strategically. When you’re thoughtful about these details, you’ll notice the difference immediately. Crispier exteriors. Better flavor. Less grease. That’s the sweet spot where technique meets excellence, my friend.
Frequently Asked Questions
Can I Reuse Oil After Deep Frying, and Does Temperature Affect Its Lifespan?
You can reuse oil, but temperature markedly affects its lifespan. Higher heat causes faster oil degradation and lowers smoke points. You’ll notice decreased performance and quality after repeated use at raised temperatures.
What’s the Best Way to Reheat Leftover Fried Food Without Making It Soggy?
You’ll get the best results using an air fryer for crisping your leftovers, which takes just minutes. Alternatively, oven reheating at 350°F on a wire rack restores crunchiness better than microwaving ever will.
How Does Altitude or Humidity Impact Oil Temperature and Frying Results?
You’ll find altitude effects lower your oil’s boiling point, requiring temperature adjustments. High humidity impact means moisture enters food faster, creating sogginess. You’ll need to compensate by increasing heat slightly and reducing frying time.
Are Infrared Thermometers More Accurate Than Traditional Meat Thermometers for Oil?
You’ll find infrared thermometers aren’t necessarily more accurate for oil than traditional probes. They’re affected by surface emissivity issues—you’re reading misleading numbers. Infrared accuracy falters with oil’s reflective surface, making contact thermometers your better choice.
What Safety Precautions Should I Take When Working With Extremely Hot Oil?
You’ll want to wear heat-resistant gloves, an apron, and goggles for protection. Secure the lid properly and maintain distance markers around your fryer to prevent accidents with extremely hot oil.
Conclusion
You’re literally just one thermometer away from crispy-on-the-outside, juicy-on-the-inside perfection. Studies show that maintaining steady oil temps reduces grease absorption by up to 30 percent, so you’re not just making better food, you’re making healthier food too. Keep that temperature steady, let your oil recover between batches, and you’ll never bite into a soggy disappointment again. It’s that simple.


