
Picture melted cheese crusted on the sides of your fondue pot like hardened lava—yeah, that’s not fun to clean. But here’s the thing: you don’t actually need to scrub like your life depends on it. With the right approach, that stubborn buildup practically dissolves on its own, and you’ll discover why hot water and a little chemistry might just become your new secret weapons.
Key Takeaways
- Unplug and cool the fondue pot for 10–15 minutes before cleaning to ensure safety and ease of handling.
- Soak the interior with hot water and dish soap for 15 minutes to loosen crusty residue without scrubbing.
- Apply a baking soda paste to stubborn spots and let sit 15 minutes before gentle wiping with microfiber cloths.
- Use a vinegar and water bath to create a chemical reaction that dislodges tough, burnt-on material naturally.
- Air dry completely with the lid off in a well-ventilated area to prevent water spots and preserve finish.

Unplug and Let It Cool First
Before you even think about scrubbing that fondue pot, you’ve gotta let it cool down first—and that means unplugging it right away. Seriously, don’t skip this step. Your fingers’ll thank you later. Once you’ve yanked that power cord from the wall, give the pot a solid ten to fifteen minutes to chill out. We’re talking completely cool to the touch, not just sorta warm. This cooling period ain’t just about comfort, either. It’s a vital safety check that protects you from nasty burns while you’re cleaning. Hot melted cheese and chocolate don’t mix well with bare skin, trust me. You might feel impatient waiting around, but patience here prevents pain. Let that baby cool completely before moving forward with your cleaning adventure. Some electric fondue pots even come with heat-resistant handles to help protect your hands during handling, but always wait until the unit is fully cool before cleaning.
Soak Away the Mess With Hot Water
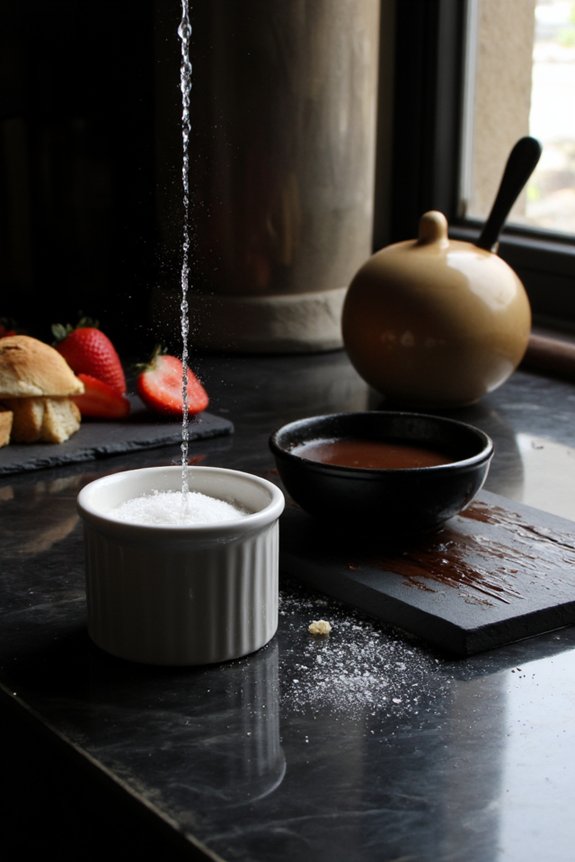
Once that electric fondue pot’s cooled down completely, it’s time to work some magic with hot water. Fill your pot with steaming hot water and let the steam loosening do its thing on all that crusty, stuck-on cheese or chocolate. It’s seriously like giving your pot a spa day. Let it sit for about fifteen minutes, giving the heat time to work its magic on stubborn residue.
Here’s where an enzyme soak comes in handy. Add a bit of dish soap and let everything soak together. The combination of hot water and enzymes breaks down grease and burnt-on bits without you breaking a sweat. Your future self will thank you for this effortless approach. No elbow grease required! For the best results, using a self-cleaning cycle—like those found in modern kitchen appliances—can simplify maintenance even further.
Use Vinegar and Baking Soda for Stubborn Buildup
If the soaking didn’t quite do the trick, it’s time to bust out the heavy hitters. You’re gonna love this combo. Mix baking soda with a little water to create a baking soda paste, then spread it generously over those stubborn, crusty spots. Let it sit for about fifteen minutes—patience is your friend here. While that’s working its magic, fill your pot with equal parts white vinegar and water for a vinegar bath. The chemical reaction between these two ingredients? Pure cleaning gold. Scrub gently with a soft cloth, and watch that buildup surrender. It’s like watching a tiny volcano erupt inside your fondue pot, except way less messy and infinitely more satisfying. Your pot’ll be sparkling in no time. For tough residue, consider how borosilicate glass handles heat to avoid thermal shock when rinsing with hot water after cleaning.


Wipe Down the Interior With Soft Cloths
Now that you’ve tackled that stubborn gunk, it’s time to give your fondue pot’s interior the TLC it deserves with some soft cloth action. You’ll want to know which fabrics won’t scratch your pot’s surface, how to wipe things down without being too aggressive, and the best way to dry and stash your pot so it’s ready for your next fondue party, because let’s be honest—nobody wants to clean it twice. If you want your fondue pot to last as long as durable cast iron cookware, be sure to avoid abrasive sponges and always hand dry thoroughly to prevent any risk of rust or residue.
Soft Cloth Selection Tips
What’s the secret to keeping your fondue pot’s interior gleaming without accidentally scratching it? It’s all about picking the right cloth. You’ll want microfiber or cotton materials because they’re gentle yet effective. Higher thread count fabrics work better, offering superior softness that won’t damage your pot’s surface. Skip the rough stuff like terry cloth or anything scratchy and abrasive—trust us, your fondue pot will thank you!
Linen’s another solid option if you’ve got it lying around. The key is testing your cloth first on a small area. Dampen it slightly with warm water. You’re basically giving your pot’s interior a spa day, not a scrubbing marathon. Soft fabrics paired with patience? That’s the winning combo that’ll keep things pristine and scratch-free. If you have an electric fondue pot with a borosilicate glass body, this gentle approach is especially important to prevent accidental scratches or cracks.
Gentle Interior Wiping Technique
Once you’ve let that fondue pot cool down completely, it’s time for the gentle interior wipe-down. Grab your soft cloth and temperature safe wipes—they’re your best friends here. You’ll want to focus on nonabrasive swabbing to avoid scratching that precious nonstick surface. Gently wipe in circular motions, letting the cloth do the work without any pressure from you.
| Area | Method | Cloth Type | Time |
|---|---|---|---|
| Bottom | Circular motions | Microfiber | 2 mins |
| Sides | Up and down | Cotton blend | 3 mins |
| Rim | Edge detail | Soft cotton | 1 min |
| Heating element | Extra care | Lint-free | 2 mins |
Don’t scrub like you’re mad at your pot—that’s counterproductive. Just let those temperature safe wipes glide across those surfaces. Your fondue pot’ll thank you by staying pristine for years.
Drying and Storage Methods
After you’ve wiped down that interior with your soft cloths, the real magic happens—proper drying and storage.
- Pat everything dry with a clean towel folding technique, working from the bottom up to catch any drips.
- Leave the lid off for a few minutes so moisture can escape and your pot can breathe freely.
- Store in a cool, dry place with good climate control—avoid humid basements or steamy kitchens where condensation loves to hang out.
- Keep the cord wrapped loosely so you don’t accidentally crimp it and create a fire hazard.
Here’s the thing: rushing this step is how fondue pots become breeding grounds for mold and mildew. Nobody wants that! Taking five extra minutes now means your pot stays pristine for your next delicious melted adventure.
Clean the Heating Element Safely
Since the heating element does all the heavy lifting in your fondue pot, you’ll want to treat it with some respect when it comes time to clean it up. Never submerge the heating element in water—that’s basically asking for trouble. Instead, unplug it first and let it cool completely. Once it’s safe to touch, use a slightly damp cloth to wipe away any residue or burnt-on gunk. Pay special attention to cord protection, ensuring you’re not yanking or twisting the cable around. The thermal sensors buried inside are delicate little things, so gentle touches are your best friend here. If there’s stubborn buildup, a soft brush works wonders without damaging anything critical. You’re basically giving your heating element a spa day, not a scrubbing marathon.

Remove and Wash Detachable Parts
Now that you’ve given your heating element its gentle treatment, it’s time to tackle the parts that actually come off—and trust me, this is where the real cleanup happens.
- Unplug everything first. Safety’s not negotiable.
- Pop off the fondue pot bowl, forks, and any other removable components—they’re your main culprits for sticky cheese residue.
- Fill your sink with warm soapy water and let those pieces soak for ten minutes. This softens up the stubborn stuff without damaging the nonstick coating.
- Gently scrub with a soft sponge and rinse thoroughly. Check your manual for replacement parts if anything’s damaged.
Your detachable pieces will come clean way easier than you’d expect. That’s the beauty of removing them first!
Dry Thoroughly to Prevent Water Spots
Now here’s where you’ll want to get a bit obsessive about drying, because water spots are basically the fondue pot’s arch nemesis. You’ve got two solid game plans: grab a microfiber cloth and buff everything down like you’re prepping for a fancy dinner party, or just let the pieces air dry on a clean towel if you’re feeling the patient route and don’t mind waiting around. Either way, you’re protecting all that hard work you just did from ending up looking like a mineral deposit convention happened on your pot.
Microfiber Cloth Method
Microfiber cloths are your secret weapon for getting that fondue pot to shine without leaving those pesky water spots behind. These magical little helpers work wonders when you’re ready to buff your pot to perfection.
Here’s how to master microfiber polishing like a pro:
- Grab a soft, lint-free microfiber cloth (not your old t-shirt, trust me)
- Gently buff the pot’s exterior in circular motions for that professional gleam
- Use microfiber dusting techniques on the heating base to catch every speck
- Pay extra attention to handles and crevices where water loves to hide
The best part? You’re not scrubbing like crazy. You’re just gliding that cloth across the surface, letting the microfiber do its thing. Your fondue pot’ll look brand spanking new, spotless and absolutely gorgeous. No water marks. No frustration. Just pure, sparkling victory.
Air Drying Techniques
After you’ve wiped down your electric fondue pot with that trusty microfiber cloth, here’s the thing—you can’t just call it done and walk away. Your pot needs proper air circulation placement to dry completely and prevent those annoying water spots that’ll make it look shabby. Find a spot in your kitchen with good airflow, maybe near a window or away from tight cabinets. Let gravity do the heavy lifting while air moves around every nook and cranny.
For stubborn moisture, toss a few desiccant packets nearby—they’ll absorb lingering dampness like tiny moisture ninjas. Give everything at least an hour to air dry completely. Your fondue pot’ll thank you by looking absolutely pristine and ready for your next cheesy adventure. Skip this step and you’re basically asking for water spots to photobomb your cookware.
Preventative Maintenance Tips for Easy Cleanup
The best way to keep your electric fondue pot sparkling is to stop gunk from building up in the first place. Prevention beats scrubbing every single time. Here’s your maintenance game plan:
- Do regular inspections of your pot’s interior and exterior for any residue or discoloration before they become stubborn.
- Wipe down the heating element after each use when it’s cool, preventing chocolate or cheese from hardening on there.
- Check seal maintenance monthly, ensuring gaskets aren’t cracked or loose, which keeps your pot functioning properly and prevents leaks.
- Season your pot occassionally with a light oil coating to protect the surface and reduce sticking.
You’ll find that these simple habits transform cleanup from a nightmare into a breeze. Your future self will thank you!
Frequently Asked Questions
Can I Put My Electric Fondue Pot in the Dishwasher?
You shouldn’t put your entire electric fondue pot in the dishwasher. However, you can remove the removable insert and wash it safely. Keep plastic components and the cord storage away from dishwashers for peak dishwasher safety.
How Often Should I Clean My Fondue Pot to Maintain It Properly?
You should do weekly inspections to catch buildup early. For peak maintenance, you’ll want seasonal deep cleaning to prevent mineral deposits and guarantee your fondue pot functions properly year-round.
What’s the Safest Way to Remove Burnt-On Cheese or Chocolate Residue?
You’ll find the steam method works best—fill your pot with water, heat it, and let steam loosen residue. For stubborn buildup, you can soak burnt areas in lemon water overnight before gently wiping clean.
Are Commercial Fondue Pot Cleaners Better Than Natural Solutions?
You’ll find commercial cleaners work faster on tough buildup, but natural alternatives like vinegar and baking soda are gentler on your pot’s nonstick surface and safer for food contact areas.
Can I Use Abrasive Sponges on the Non-Stick Coating Without Damage?
No—you’re playing with fire if you use abrasive sponges on your non-stick coating. They’ll scratch it like nails on a chalkboard. Always avoid abrasives and test patch any cleaner first.
Conclusion
You’ve officially opened the secret to fondue pot nirvana—no brutal scrubbing required! Your pot’s gonna shine like it’s brand new, and you’ll spend way less time wrestling with crusty cheese residue. Follow these steps religiously, and you’re basically a fondue maintenance wizard. Your future self will thank you big time when cleanup takes minutes instead of hours. Happy dipping!


