Your rotisserie oven’s looking pretty grimy, huh? Yeah, that baked-on grease doesn’t stand a chance against the right approach. You’ll need to tackle this smartly—starting with safety and the right supplies—because there’s a difference between a clean oven and one that actually sparkles. The good news? It’s totally doable, and we’re about to walk you through exactly how to do it without breaking a sweat.
Key Takeaways
- Allow the oven to cool for 30–45 minutes, then apply a baking soda and vinegar paste to greasy spots and let it sit 12–24 hours before wiping.
- Remove racks and soak them in hot water with heavy-duty degreaser for at least one hour to loosen baked-on grease.
- Use commercial oven cleaners for stubborn, heavily carbonized buildup that baking soda and vinegar cannot remove.
- Apply steam cleaning or plastic scrapers to dislodge stuck-on deposits without harsh scrubbing that may damage interior surfaces.
- Ensure proper ventilation by opening windows or running exhaust fans, wear gloves and eye protection, and test cleaners on small areas first.


Gather Your Cleaning Supplies and Prepare Your Workspace

Before you dive headfirst into scrubbing down your rotisserie oven, you’ll want to gather everything you need so you’re not halfway through the job hunting for a missing sponge. Stock up on degreasing spray, dish soap, sponges, and sturdy scrub brushes. Grab some old towels and rags you don’t mind getting grimy. You’ll also want rubber gloves to protect your hands from all that baked-on grime.
Next, set up your workspace with proper ventilation setup by opening windows or turning on exhaust fans. This keeps those chemical fumes from building up around you. Organize your supplies with ingredient organization so everything’s within arm’s reach. Clear the area around your oven, removing any clutter that might get in your way. A little prep work now saves major frustration later. For an even easier cleanup, consider models with dishwasher-safe removable parts and non-stick coatings, as recommended when selecting a rotisserie oven.
Safety First: Disconnect and Cool Down Your Oven

Safety is genuinely the most important step you can take before tackling your rotisserie oven, and it all starts with the power. You’ll want to unplug that power cord right now—don’t skip this part. Your oven needs time to cool down completely, and we’re talking hands-on cool, not just warm.
Here’s what you need to do:
- Disconnect the power cord from the outlet to eliminate any electrical hazards
- Wait at least 30 to 45 minutes for the oven to reach a safe temperature
- Avoid thermal shock by not using cold water on hot surfaces
Trust me, patience here saves you from burns and potential damage. Let that beast sit. Once it’s genuinely cool to the touch, you’re ready to tackle the grease and grime without risking injury. If your rotisserie oven features any detachable trays or dishwasher-safe components, now is also the perfect time to remove them, as this will make cleaning much simpler and safer.
Remove Loose Debris and Soak the Racks
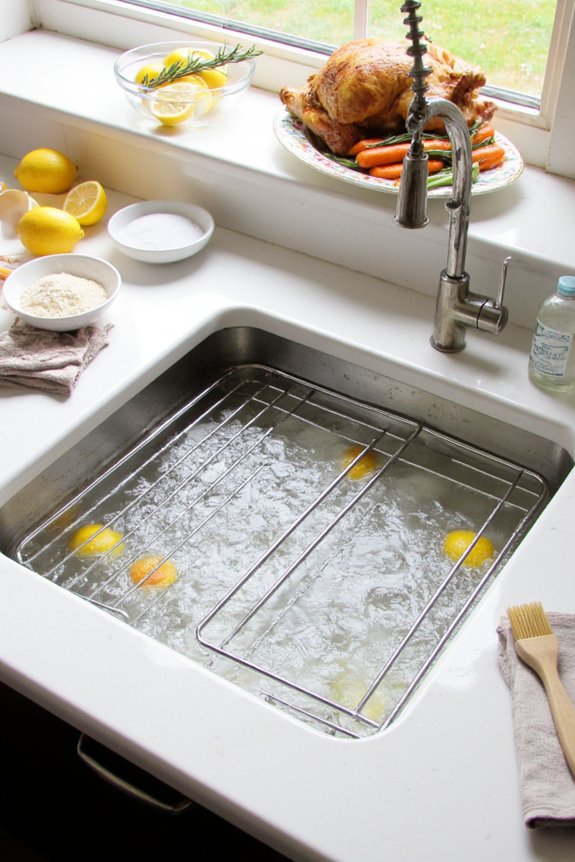
Now that your oven’s cooled down, it’s time to clear out all the charred bits and crusty buildup that’s been hanging around. Start by removing the racks and giving them a good shake outside to dislodge loose debris. You’ll be surprised how much stuff comes loose.
Next, fill your bathtub or a large container with hot water and add some heavy-duty degreaser. Submerge those racks completely and let them soak for at least an hour, longer if they’re really grimy. While they’re soaking, you can tackle the oven’s interior with a brush.
For best airflow enhancement and rack alignment techniques, make sure you’re positioning everything back correctly when reinstalling. This simple soak-and-shake combo makes scrubbing way easier later on.
If your oven includes dishwasher-safe accessories, take advantage of this feature for an even easier cleanup process.


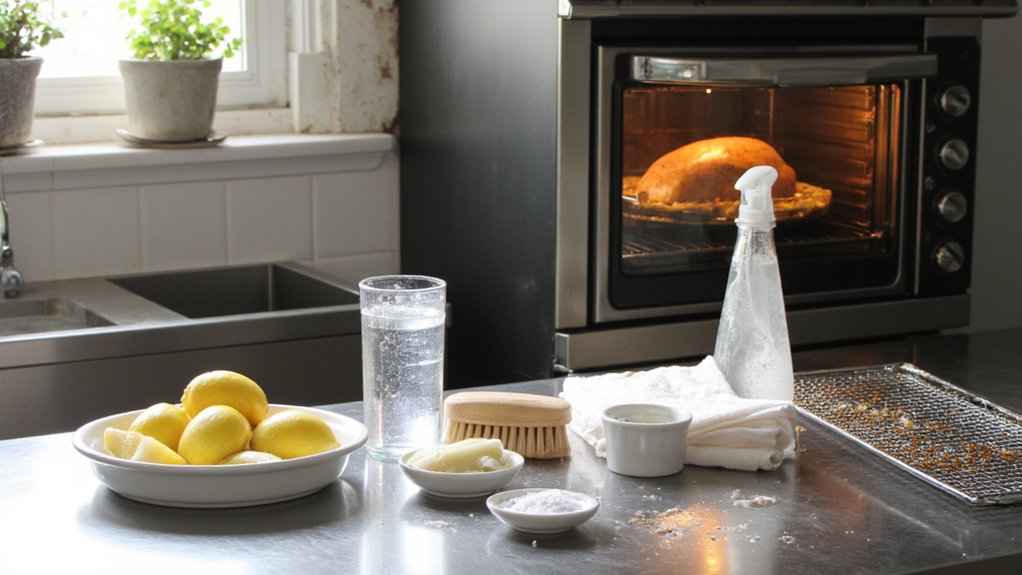
Apply Baking Soda and Vinegar Paste to Interior Surfaces
Now you’ll want to mix up a paste that’s got the right consistency, which means combining baking soda and vinegar until you’ve got something that’ll stick to your oven’s interior without sliding off like you’re buttering toast. You’ve gotta be strategic about where you slap this stuff—focus on the greasy spots, crusty buildup, and anywhere the rotisserie’s done its damage, letting the paste settle in those problem areas for maximum impact. Give it some time to work its magic, usually 15 to 30 minutes depending on how gnarly things look, and you’ll start seeing results that make all this effort worth your while. For especially stubborn grease, let the paste sit a bit longer, similar to how proper seasoning on cast iron skillets improves performance the more time and care you give it.
Mixing the Perfect Paste
Creating a baking soda and vinegar paste is basically your secret weapon for cutting through all that baked-on gunk inside your rotisserie oven. The key to success lies in nailing the right paste viscosity, which means you want something thick enough to stick to surfaces without sliding right off.
Here’s what you’ll need:
- One cup of baking soda mixed with a few tablespoons of white vinegar
- A consistency similar to peanut butter, not too runny or stiff
- Enough paste to coat all interior surfaces generously
Think of it like marinating techniques for cleaning—you’re letting those powerful ingredients work their magic. Stir everything together until you’ve got that perfect, spreadable texture. Don’t overthink it. You’ve got this. For best results, make sure to avoid applying the paste on any dishwasher-safe components, as these can be cleaned more efficiently with a regular wash cycle.
Strategic Application Methods
With your paste ready to go, it’s time to get strategic about where you’re spreading it. Start with the interior walls where grease buildup’s thickest. Apply generous amounts around the cooking chamber, paying special attention to corners and crevices where heat distribution creates stubborn deposits. Don’t forget the ceiling—grease loves collecting up there. Work the paste into areas around the rotisserie maintenance ports and any vents. Spread it evenly across surfaces, making sure you’re coating problem spots thoroughly without overdoing it. The goal here’s creating good contact between your paste and the gunk, not just slathering everything. Take your time with this step because thorough application now means easier scrubbing later. You’re basically giving that baked-on mess fair warning.
Dwell Time and Results
After you’ve applied that baking soda and vinegar paste, here’s where patience becomes your best friend. The ideal dwell time is typically 12 to 24 hours, though you can check progress at the halfway mark if you’re antsy. This waiting period lets the paste do the heavy lifting, breaking down those stubborn, baked-on grease deposits.
Here’s what happens during your dwell time:
- The acidic vinegar reacts with the alkaline baking soda, creating a gentle chemical reaction that loosens grime
- Surface outcomes improve dramatically as the paste penetrates layers of buildup
- You’ll notice crusty spots soften, making scraping way easier
After the wait, you’ll see real results. The greasy, crusty mess transforms into something manageable. Just spray with water, let it sit briefly, then wipe everything down. Your oven’ll thank you.
Use Commercial Oven Cleaner for Stubborn Buildup

When baking soda and vinegar don’t cut it, you’ll want to grab a commercial oven cleaner designed specifically for heavy grease and carbonized buildup. You’ve got to pick a product that’s safe for your oven’s interior materials, follow the instructions to the letter, and wear gloves because this stuff isn’t messing around, then you’ll systematically work through removing all that stubborn residue without damaging your equipment or your lungs.


Choosing the Right Cleaner
Choosing the right cleaner makes all the difference between a quick cleanup and hours of frustrated scrubbing. You’ve got options, and picking the best one depends on how grimy your oven really is.
Here’s what you should consider:
- Natural enzyme cleaners work great for light to moderate grime and won’t fill your kitchen with harsh fumes
- Citrus solvent products cut through baked-on grease effectively while smelling way better than traditional chemicals
- Commercial oven cleaners pack serious punch for stubborn buildup that laughs at gentler methods
For everyday messes, go natural. When you’re dealing with months of accumulated char and grease splatter, you’ll want something stronger. Test any new cleaner on a small area first. Your rotisserie’s interior will thank you for finding the perfect balance between effectiveness and practicality.
Application and Safety Steps
Now that you’ve picked your commercial oven cleaner, it’s time to actually use the stuff safely and effectively. First, make sure you’re wearing gloves and eye protection because, well, this isn’t exactly face wash. Open your windows or get some ventilation going since these cleaners pack serious fumes that’ll make your eyes water.
Check the product label for temperature monitoring guidelines before applying anything. You’ll want your oven to be cool or only slightly warm. Spray the cleaner generously on those baked-on grease spots and let it sit for the recommended time, usually fifteen to thirty minutes.
Pay attention to chemical compatibility with your oven’s interior materials. Don’t mix cleaners, ever. Wipe everything down thoroughly with damp cloths afterward to remove all residue completely.
Removing Residue Effectively
Once you’ve let that commercial cleaner work its magic for the recommended time, it’s time to wipe down and see what you’re dealing with. You’ll probably notice some stubborn spots that won’t budge with just a cloth. Here’s where you get strategic about tackling what remains:
- Use steam cleaning to loosen those really baked-on bits without scrubbing like crazy
- Try enzymatic sprays for grease that’s basically become part of the oven
- Grab a plastic scraper for anything that’s genuinely stuck
Don’t be discouraged if you need a second pass. Commercial oven cleaners are powerful, but sometimes that crusty buildup needs extra convincing. Take your time, work methodically, and you’ll get there. Your rotisserie oven’ll look practically brand new when you’re finished.
Clean the Glass Door Without Streaks or Damage
Want your rotisserie oven’s glass door to sparkle like new instead of looking like it’s been through a smoky battle? You’re in luck because cleaning it doesn’t require fancy magic, just the right technique. Here’s what works best:
| Method | Best For | Time Needed |
|---|---|---|
| Steam cleaning | Baked-on gunk | 15 minutes |
| Newspaper polishing | Final shine | 5 minutes |
| Vinegar solution | Stubborn spots | 10 minutes |
| Baking soda paste | Heavy buildup | 20 minutes |
Start by softening that crusty residue with steam cleaning, which loosens everything without scratching. Then grab some crumpled newspaper for polishing because it actually works better than paper towels. The texture prevents streaks while you buff away moisture. Avoid abrasive scrubbers that’ll damage your glass permanently. Your door’ll look crystal clear.
Scrub and Rinse All Components Thoroughly
After you’ve gotten that glass door looking pristine, it’s time to tackle everything else—and yeah, this part matters just as much. The interior components collect grease buildup that needs serious attention, so don’t skimp here.
Here’s what you’ll want to focus on:
- Remove the rotisserie rod and any removable racks for deep scrubbing with hot soapy water
- Wipe down interior walls using a microfiber cloth to catch all that stubborn residue
- Clean the heating elements carefully, avoiding water contact on electrical parts
Once you’ve scrubbed everything thoroughly, rinse each component with clean water and dry them completely with microfiber rinsing cloths. This prevents water spots and mineral deposits. Reassemble parts only when they’re totally dry. Your oven’ll be gleaming inside and out, ready for its next delicious rotation.
Maintain Your Rotisserie Oven to Prevent Future Grease Buildup
Regular maintenance is your best friend when it comes to keeping that rotisserie oven in top shape. You’ll want to schedule routine inspections every couple months, checking for grease accumulation before it becomes a nightmare. Quick airflow checks guarantee your oven’s ventilation system isn’t getting clogged, which happens faster than you’d think. Wipe down the interior weekly if you’re using it regularly, catching splatters while they’re still fresh. Don’t let grease harden into those stubborn crusty layers that’ll haunt you later. A little bit of preventative work now saves you from scrubbing for hours down the road. Trust me, your future self will thank you. Keep a small brush handy for quick cleanups between deep cleans, and you’re golden.
Frequently Asked Questions
How Often Should I Clean My Rotisserie Oven to Maintain Optimal Performance?
You’ll want to clean your rotisserie oven weekly based on usage frequency. Monitor performance indicators like uneven cooking or smoke buildup. Follow a maintenance checklist after each use, adjusting your cleaning schedule according to how often you’re operating it.
Can I Use Vinegar and Baking Soda on Stainless Steel Components Safely?
Yes, you can safely use vinegar and baking soda on your stainless steel components. Apply a baking soda paste to affected areas, let it sit briefly, then follow with a vinegar rinse. This combination effectively removes grease without damaging the surface.
What’s the Safest Way to Clean Heating Elements Without Causing Damage?
You’ll want to wear protective gloves and perform element inspection first. Gently wipe heating elements with a damp cloth, avoiding moisture pooling. Never soak them, and make certain they’re completely dry before reactivating your oven.
How Do I Remove Grease From Hard-To-Reach Corners and Crevices?
You’ll want to use microfiber swabs and angled brushes to access those tight corners. Pair them with a degreasing solution, working carefully so you don’t scratch surfaces. These tools bend easily, reaching spots regular cloths can’t.
Are Commercial Oven Cleaners Safe for Food Preparation Surfaces?
No, you shouldn’t use commercial oven cleaners on food prep surfaces. They contain chemical residues harmful if ingested. Always wear protective gear, rinse thoroughly, or choose food-safe alternatives instead.
Conclusion
You’ve tackled that greasy beast! Your rotisserie oven’s now sparkling clean and ready to spin out delicious meals again. The key’s staying on top of maintenance now—regular wipe-downs between deep cleans’ll save you from battling stubborn buildup next time. Plus, your oven’ll last longer when you treat it right. So go ahead, fire it up and enjoy those perfectly roasted chickens knowing you’ve got this cleaning thing down.


