
You’ve probably noticed that some baristas pull off silky microfoam that looks almost too perfect, while yours comes out bubbly and thin. It’s not magic—it’s technique, and honestly, it’s easier than you’d think once you nail the basics. The difference between mediocre froth and that velvety texture that makes latte art actually possible comes down to a few key moves with your steam wand. Let’s figure out what you’re missing.
Key Takeaways
- Use whole milk or higher fat content, kept fresh and cold, heated to 150–155°F for optimal microfoam stability and velvety texture.
- Position steam wand slightly off-center about a quarter-inch below milk surface at a 20-degree angle to create a whirlpool effect.
- Listen for gentle, consistent hissing while gradually opening the steam valve like a dimmer switch to incorporate air and heat evenly.
- Tilt the pitcher slightly and use rolling motions to distribute heat uniformly while building silky microfoam with tiny, stable air bubbles.
- Maintain steam wand cleanliness by purging before and after frothing to prevent clogging and ensure consistent microfoam texture across drinks.

Understanding Microfoam: What Makes It Different

If you’ve ever wondered why your cappuccino looks nothing like the one your barista made, microfoam’s probably the culprit. See, microfoam isn’t just regular bubbles—it’s a velvety, dense layer of tiny air pockets suspended in milk. The magic happens when you understand density gradients, which create that smooth texture instead of chunky foam.
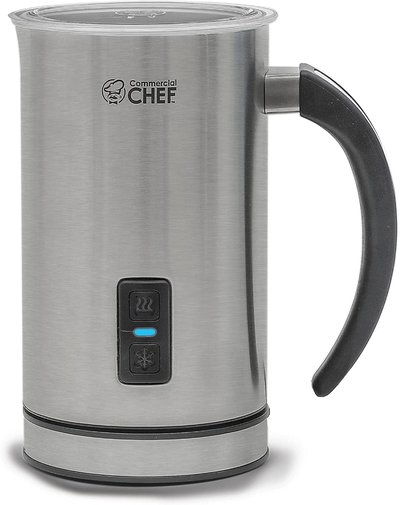
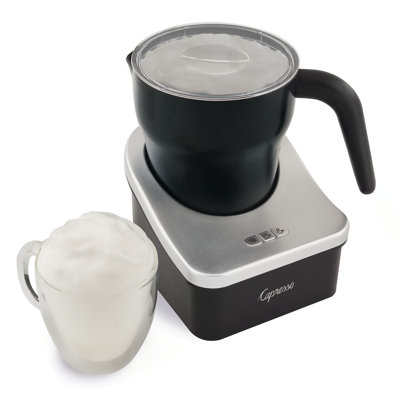
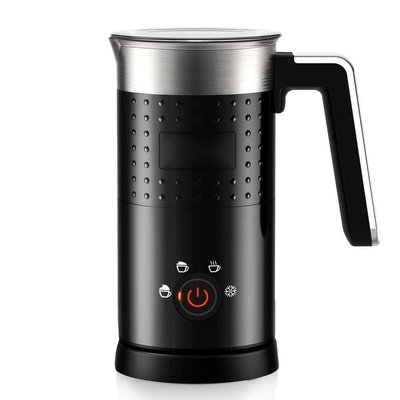
Here’s the thing: bubble dynamics matter way more than you’d think. When you’re frothing, you’re basically incorporating air at just the right speed and angle, creating bubbles so small they feel silky on your tongue. Regular foam’s got bigger bubbles that feel rough and separate from the milk. Microfoam integrates with the liquid, giving you that professional café experience at home. It’s all about technique and patience. The type of milk frothing technology you use—whether a steam wand or automatic frother—can significantly impact the quality and texture of the microfoam you achieve.
Essential Equipment: Choosing the Right Steam Wand

Now that you’ve got the microfoam concept down, it’s time to talk about the tool that’ll actually make it happen—your steam wand. Not all wands are created equal, though. You’ll want one with a small opening, ideally around 0.5mm, because that’s what creates those tiny bubbles you’re after. Conical wands work great for beginners since they’re pretty forgiving.
Here’s the thing about wand alignment: position it slightly off-center in your pitcher. This creates a whirlpool that distributes heat evenly. Regular steam maintenance keeps everything running smooth. Purge your wand before and after frothing to prevent milk buildup. A clogged wand’ll frustrate you faster than anything else, so stay on top of cleaning it properly and you’ll be golden.
If you’re looking for additional kitchen upgrades, consider electric kettles with temperature control to ensure precise water temperatures for brewing, which can level up your coffee and tea game.
Milk Selection and Temperature Control

You’ll want to grab whole milk or at least something with decent fat content, since that’s what actually creates those velvety microfoams you’re after. Getting your temperature right matters too—you’re aiming for somewhere between 150 to 155 degrees Fahrenheit, which is hot enough to taste good but not so scorching that you’ve basically turned milk into a sad, burnt disappointment. The fat content is kinda the MVP here, working together with heat and steam to trap air and create that smooth, glossy texture instead of just a pile of big bubbles floating on top. For best results, it’s also important to use a built-in milk frother or steam wand, as found on quality cappuccino machines, to achieve the creamy microfoam needed for lattes and cappuccinos.

Selecting Quality Milk Types
The foundation of great microfoam actually starts before you ever pick up the steam wand, and it all comes down to what’s in your pitcher. You’ve got choices, and they matter way more than you’d think.
Here’s what’ll boost your game:
- Whole milk with higher fat content creates that silky, luxurious texture that makes your heart skip a beat
- Barista education teaches you why fresh, cold milk performs better than milk that’s been sitting around
- Milk sustainability means choosing brands that care about their practices, so you’re frothing with purpose
Whole milk’s your sweet spot for microfoam. The fat content gives you that velvety consistency. Two-percent works okay, but it’s honestly a compromise. Skim milk? Skip it entirely. You’ll struggle getting proper microfoam, and that’s frustrating when you’re really trying to nail your technique. For anyone interested in outdoor coffee adventures, knowing about heat retention capability in coffee gear can be as crucial as milk selection for your cappuccino’s final quality.
Optimal Temperature Range Settings
Getting your milk to the right temperature is honestly where a lot of folks either nail it or completely bomb their microfoam, and it’s not nearly as complicated as you’d think. You’re aiming for somewhere between 150-155°F, which is hot enough to create steam but not so scorching that you scald everything.
Temperature mapping helps you understand how heat distributes throughout your pitcher. Invest time in thermostat calibration too, making sure your thermometer’s actually accurate. A cheap one’ll throw you way off course. Here’s the thing though: you’ll feel the pitcher getting hot through your hands before your thermometer even registers it. Trust both your gauge and your instincts. Getting this balance right transforms ordinary milk into silky, luxurious microfoam that’s genuinely impressive. The type of steam wand you use also plays a significant role, since manual wands provide greater control over milk texture and can help you perfect your microfoam technique.
Fat Content Impact Frothing
While temperature’s essential, milk’s fat content is honestly the real MVP when it comes to getting that velvety microfoam you’re after. Here’s why it matters so much:
- Whole milk creates dreamy, silky bubbles that actually stick around, making your drinks look like barista perfection
- Skim milk froths up fast but deflates quicker, leaving you disappointed and frustrated
- Higher fat content means better protein stability, which gives you that luxurious texture everyone craves
You see, fat molecules help stabilize those tiny air bubbles you’re creating. When protein stability’s compromised, your foam becomes grainy and sad. Whole milk, with its richer fat content, gives you better control and longer-lasting results. It’s genuinely the difference between “meh” and “wow.”
The Air Incorporation Phase: Positioning and Technique

You’re gonna want to position that steam wand about a quarter-inch below the milk’s surface, tilting it slightly so you’re creating a whirlpool rather than just blasting bubbles into the top. Your steam flow rate’s gotta be dialed in just right—too much pressure and you’ll get big, ugly bubbles that’ll ruin your microfoam dreams, but too little and you’re basically just heating milk without incorporating any air. Think of it like finding that sweet spot where you hear a gentle, consistent hissing sound and feel the milk starting to spin, which means you’ve nailed the balance between aeration and heat that makes silky microfoam actually possible.
Wand Depth and Angle
The positioning of your steam wand is honestly where the magic starts happening, and getting this part right makes everything else fall into place. You’ll want to angle your wand at about 20 degrees, positioning it slightly off-center in the pitcher. This ain’t random, I promise.
Here’s what matters most:
- Listen for that crisp, crackling wand acoustics that tells you you’re nailing the air incorporation phase
- Watch for visual cues like a whirlpool forming, which means you’re creating that perfect vortex
- Feel the pitcher getting warm gradually, signaling you’re building microfoam correctly
Keep your wand depth just below the surface initially. Submerge it slightly deeper as foam builds. The angle and depth work together, creating the ideal turbulence for incorporating air evenly throughout your milk.

Steam Flow Rate Control
Once you’ve got your wand positioned just right, controlling how much steam flows through becomes your secret weapon for nailing the air incorporation phase. This is where flow modulation really matters. You’ll want to start with the valve nearly closed, then gradually open it as you tilt your pitcher. Think of it like a dimmer switch rather than an on-off button.
Pressure balancing is equally important here. Too much steam flow and you’ll get big, ugly bubbles instead of that silky microfoam you’re after. Too little and you’re basically just heating milk without incorporating any air. You’re aiming for that sweet spot where steam and air blend together smoothly. Listen for a gentle hissing sound, adjust your wand depth slightly, and let the magic happen.
Rolling and Texturing: Creating Silky Consistency

Creating that silky microfoam isn’t just about steam and speed, it’s about understanding how to move your pitcher with intention and finesse. You’ll want to master the rolling motion, which creates that velvety texture everyone craves for latte art. Think of it like this:
- The satisfying swirl when you finally nail that perfect milk stretching technique
- The confidence boost when your microfoam looks professional enough for Instagram
- The genuine pride in pulling off smooth, glossy foam without the chunky bubbles
Keep your pitcher tilted slightly, letting the milk roll from the bottom up. This motion incorporates air gradually while heating evenly. You’re not just whisking randomly, you’re orchestrating a dance between temperature and texture that transforms ordinary milk into something truly special.
Common Mistakes and How to Avoid Them
Even with the best intentions, most people mess up their milk frothing in pretty predictable ways, and honestly, it’s easier to fix than you’d think. The biggest culprit? You’re probably holding your pitcher at the wrong angle or not paying attention to steam temperature. If your milk’s scorching instead of steaming, that’s a sign your steam’s too hot. Another common slip-up involves using the wrong pitcher shape, which totally messes with how the milk rolls and textures. Make sure you’re using a tapered pitcher that lets you control the milk’s movement properly. Keep your steam wand positioned just below the surface, not buried deep in there. These small adjustments make a massive difference in creating that silky microfoam you’re after.
Troubleshooting Problems With Your Microfoam
If your microfoam isn’t turning out quite right, don’t worry—you’re probably dealing with one of a handful of fixable issues.
Common culprits behind lackluster foam include:
- Foam collapse that happens seconds after you pour, leaving you frustrated and your latte looking sad
- Steam wand sanitization neglect, which clogs your equipment and ruins your milk texture faster than you’d think
- Positioning your pitcher wrong, causing uneven heating and wimpy, disappointing bubbles
Check your steam wand first. If it’s clogged with dried milk residue, clean it immediately after every use. Purge steam through it before and after frothing to prevent buildup. Angle your pitcher so the wand sits just below the milk’s surface, creating that gentle whirlpool action. Your foam should hold together beautifully, creating silky microfoam that doesn’t disappear instantly.
Practice Drills to Perfect Your Technique
Once you’ve got your technique dialed in, the real magic happens through deliberate practice. Start with simple pitcher movements, focusing on your wrist angle and steam wand positioning. Pay attention to the subtle sounds and vibrations, building your sensory training so you can feel when the milk’s hitting that sweet spot.
Next, dedicate time to latte art practice. You’ll want to pour milk into espresso repeatedly, experimenting with cup heights and pouring speeds. Don’t worry if your designs look wonky at first—everyone’s do. Grab a friend and make tons of drinks together. The repetition builds muscle memory faster than anything else.
Set mini-goals: nail microfoam consistency this week, then work on pouring technique next week. You’ve got this.
Frequently Asked Questions
How Long Does Microfoam Typically Last Before It Breaks Down or Separates?
Your microfoam’s foam longevity typically lasts 5-10 minutes before separation timing begins. You’ll notice it breaks down faster if you’ve overheated the milk or created larger bubbles. Proper technique keeps it stable longer.
Can I Use Non-Dairy Milk Alternatives to Create Quality Microfoam Consistently?
You can create quality microfoam with non-dairy alternatives, though results vary. Oat milk froths excellently due to its protein content, while almond milk struggles to hold stable foam consistently. Oat’s your best non-dairy option.
What’s the Ideal Milk Pitcher Size for Beginners Learning Microfoam Technique?
You’ll find a 12 ounce pitcher ideal for starting out—it’s manageable and forgiving. Once you’ve mastered the basics, you can graduate to a 20 ounce pitcher for larger drinks and greater control.
How Often Should I Clean and Descale My Steam Wand Properly?
You should purge your steam wand daily after each use for daily maintenance. Schedule descaling weekly with a commercial cleaner to prevent milk buildup and guarantee peak microfoam performance on your machine.
Does Water Hardness or Tap Water Quality Affect Microfoam Quality Significantly?
Yes, you’ll find that water hardness noticeably impacts your microfoam quality. Hard water’s dissolved solids and mineral content affect milk protein interaction, potentially compromising your foam’s texture and stability during steaming.
Conclusion
You’ve got this. Mastering microfoam isn’t some impossible art form, it’s just practice and patience. Start with quality milk, keep your steam wand clean, and nail that positioning. You’ll mess up a few times, sure, but that’s how you learn. Before long you’ll be pouring beautiful latte art and impressing everyone with silky smooth cappuccinos. Keep practicing, stay consistent, and you’ll become the microfoam master you’re meant to be.


