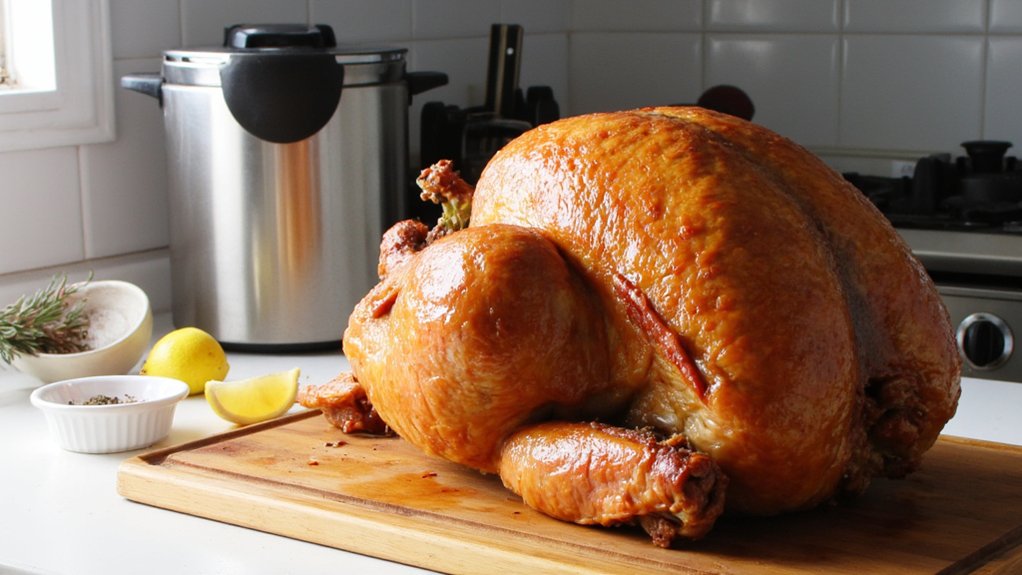
If you’re thinking about deep frying your Thanksgiving turkey, you’re smart to worry about doing it safely before you even touch the propane. Hot oil, open flame, big bird…it can go wrong fast if you wing it, no pun intended. The good news is, with the right setup, a dry turkey, and a few simple habits, you can get insanely juicy meat and crispy skin without a fireball. The trick is what you do *before* you light the burner…
Key Takeaways
- Set up the fryer outdoors on level concrete, far from buildings, with a stable base, wind awareness, and a nearby Class K or ABC extinguisher.
- Use a 10–14 pound fully thawed, unstuffed turkey; brine or season as desired, then pat completely dry inside and out before frying.
- Determine safe oil level with a water displacement test, dry the pot thoroughly, then fill with high‑smoke‑point oil below the marked line.
- Heat oil gradually to 325–350°F, turn off the burner, and lower the turkey very slowly using hooks or basket, then relight once bubbling subsides.
- Fry 3–4 minutes per pound, monitor temperature continuously, then turn off burner, lift turkey slowly, rest 25–30 minutes, and never leave fryer unattended.
Choosing the Right Turkey Fryer and Tools

Start by thinking of your turkey fryer like any other big kitchen gadget: it’s gotta be safe, sturdy, and not a total pain to use. Look for a wide, stable base so it’s not wobbling like a bad bar stool. A built‑in thermometer and a solid lid are huge pluses for control and safety.
If you’re using propane, Propane maintenance really matters. Check hoses for cracks, make sure connections are snug, and keep the tank upright and a good distance from the burner. No shortcuts here.
Pay close attention to Basket compatibility. The basket should fit the pot neatly, with room for oil to circulate, and have a strong handle you can lift comfortably. If it feels sketchy now, it’ll feel worse full of hot oil.
When picking a fryer, always check for CSA-certified safety features to reduce accident risks and guarantee peace of mind while cooking.
Picking and Preparing the Perfect Turkey

Before you even heat the oil, you’ve gotta start with the right bird, because size, weight, and even how it’s packaged can make or break your fry. You’ll want to know how to pick a turkey that fits your fryer, how to thaw it safely without turning your kitchen into a science experiment, and how to season it so the flavor actually soaks in. Let’s walk through the basics so your turkey’s not just cooked safely, but comes out seriously good. For best results, consider the size and kitchen space you have available—just like choosing an espresso machine, making sure your turkey fits your fryer and workspace can help guarantee a smooth, safe cooking process.
Choosing the Right Bird
A good turkey for deep frying isn’t just “any big bird on sale,” it’s one that actually fits your pot, cooks evenly, and doesn’t turn into a dangerous grease volcano. You’re looking for the sweet spot of size, weight, and quality, not just whatever’s cheapest in the frozen bunker.
Here’s what to look for:
- Pick a turkey in the 10–14 pound range so it cooks safely and stays juicy.
- Make sure it fits your fryer with several inches of oil clearance on top.
- Choose natural or minimally processed birds, skip heavy brining injections.
- Heritage breeds taste great but can be smaller, so plan portions carefully.
- If you love huge turkeys, save those giants for roasting alternatives instead.
Thawing and Seasoning Basics
If deep frying a turkey has a secret boss level, it’s this part right here: getting the bird fully thawed and seasoned without turning your fryer into a horror story. Make sure your turkey’s 100% thawed, no frozen spots hiding in the middle. In the fridge, plan about 24 hours for every 4 to 5 pounds. No shortcuts with hot water, you’re just begging for trouble.
Now for flavor. Brining essentials are simple: water, salt, a bit of sugar, maybe some garlic and citrus. Submerge the bird, keep it cold, and let it soak. Pat it very dry after, inside and out, like “new towel” dry. Then hit it with herb rubs, salt, pepper, and a little oil so everything sticks.
For the seasoning rub, using a cast iron skillet is ideal for toasting your spices before application, since it gives even heat and intensifies their flavor.
Thawing and Drying the Bird the Safe Way

Before that turkey ever hits hot oil, you’ve got to give it time to thaw the right way, or you’re basically prepping a tiny poultry explosion. You’ll want to plan out a proper thawing timeline, use safe methods that keep the bird out of the danger zone, and skip any shortcuts that sound like something your cousin saw on the internet at 2 a.m. Once it’s thawed, you’ll pat it dry like you mean it so the skin gets crazy crisp and the oil doesn’t pop and snap like a fireworks show in your driveway. If you’re using any kitchen appliances to help with prep, remember that capacity and serving size are crucial for both safety and even results when working with large poultry.
Proper Thawing Timeline
Getting your turkey properly thawed is where deep-fry success really starts, because a half-frozen bird dropped into hot oil is pretty much a kitchen disaster waiting to happen. You need a clear thaw schedule so you’re not panic-defrosting a rock-hard turkey the night before Thanksgiving.
Use simple fridge timelines so you know when to start:
- Plan on about 24 hours of fridge thawing for every 4–5 pounds of turkey.
- A 12-pound bird needs roughly 3 full days in the fridge to thaw.
- A 16-pound turkey needs closer to 4 days, sometimes a bit more.
- Add an extra day if your fridge runs cold or you open it a ton.
- After it’s thawed, give it another 24 hours uncovered to dry the skin nicely.
Safe Thawing Methods
If you’re short on time, you can use a cold waterbath. Keep the bird in a sealed wrapper, submerge it in cold tap water, and change the water every 30 minutes so it stays truly cold, not “kinda chilly.” Never thaw on the counter, in a garage, or in hot water. That’s not rustic, that’s bacteria camp. For best results, always ensure your workspace is clean and dry, much like cleaning the ice basket and water reservoir in a countertop ice maker to prevent bacterial growth.
Pat Dry for Crispness
Usually the biggest secret to shatteringly crisp turkey skin is stupidly simple: you’ve gotta get that bird dry, really dry. Water and hot oil don’t get along, and that moisture sitting on the outside kills good skin texture anyway. So after safe thawing, you’re on towel duty.
Here’s what you do:
- Pull the giblets, pat the cavity dry with paper towels.
- Pat every surface, front and back, like you’re drying a car you actually like.
- Separate the skin gently over the breast and blot underneath for better skin texture.
- Let the turkey sit uncovered in the fridge for 30 to 60 minutes so the skin air-dries.
- Don’t worry, interior moisture stays locked in while the outside crisps like crazy.
Measuring Oil Capacity to Prevent Dangerous Spillovers

Before you even think about firing up that burner, you’ve gotta figure out how much oil your pot can safely handle so it doesn’t turn into a bubbling volcano. That’s where oil displacement comes in. You’re not guessing here, you’re measuring.
Start with a completely thawed, bag‑and‑giblet‑free turkey. Place it in the empty, cool pot, then fill with water until the bird’s just covered. Check any capacity markings on the pot so you know exactly how high that water line sits.
Now pull the turkey out and mark that level yourself if you need to, this is your personal fill line. Dry the pot really well. That water level is your immersion test result, telling you how much oil to use while avoiding ugly overflow risk.
Setting Up a Safe Outdoor Frying Station

Now that you know how much oil you need, it’s time to set up a safe outdoor frying station so you’re not turning Thanksgiving into a call to the fire department. You’ll want to pick the right spot outside, keep the fryer rock-solid on level ground, and give yourself plenty of space so people, pets, and random soccer balls don’t get too close. We’ll also go over simple fire safety steps, like where to put your extinguisher and what not to do when things get a little too hot.
Choosing the Right Location
Even though it’s tempting to just plop the fryer down near the back door, the spot you pick can make or break how safe your turkey adventure turns out. You want enough backyard proximity to keep an eye on things, but not so close that your siding becomes a cautionary tale.
Think of your location like a little outdoor kitchen zone, where splatters, heat, and smells can do their thing without causing drama.
- Choose a wide, open area far from the house, garage, or deck.
- Check wind direction so hot oil vapor and smoke blow away from people.
- Stay clear of trees, shrubs, dry leaves, or clutter.
- Keep kids, pets, and curious relatives well back.
- Make sure there’s easy, quick access to you from the house.
Stable Fryer Setup
A rock-solid fryer setup is kind of like putting your grill on “hard mode” safety, because hot oil is way less forgiving than burgers. Start by putting your fryer on a flat, solid surface like concrete, not on grass that can sink or shift. If the ground’s a little uneven, use leveling blocks under the fryer legs so the pot sits perfectly flat and the oil depth is consistent.
Check that nothing wobbles. Give the stand a good shove test. If it rocks, reset it. Set up simple wind barriers, like sturdy plywood sheets or heavy folding tables, to keep gusts from pushing flames or cooling one side of the pot. Just don’t block airflow around the burner completely.
Fire Safety Precautions
Your fryer stand might be rock solid, but the real wild card is fire, because that burner and big pot of oil can turn sketchy real fast if you don’t respect it. So treat your frying spot like a mini construction zone, not a backyard hangout.
- Set up on concrete or bare dirt, far from the house, cars, sheds, and flammable landscaping.
- Give yourself serious vegetation clearance, moving dry leaves, wood piles, and bushes way back.
- Keep a Class K or at least an ABC fire extinguisher right next to you, and know how to use it.
- Assign one “fry boss” who never leaves the burner unattended, not even for pie.
- Make simple escape plans, and double‑check nearby smoke alarms in case things go sideways.
Selecting and Heating the Best Oil for Frying
Think of choosing oil for turkey frying like picking the right fuel for a race car, because the wrong one can smoke, burn, or flat-out ruin dinner. You want a clean, neutral oil flavoring, so your turkey tastes like turkey, not a french fry gone wild. Go for oils with a high smoke point, like peanut, canola, or refined sunflower.
Check your fryer’s manual for how much oil you need, then pour slowly, staying under the fill line. Heat the oil gradually with the burner on medium, then ease it higher. Use a deep-fry thermometer clipped to the pot and bring the oil to about 325 to 350°F. Don’t rush it, and don’t wander off like it’s simmering soup.
Lowering the Turkey Into Hot Oil Safely
Once that oil’s hot and ready, the real “don’t end up on the news” moment kicks in: getting the turkey into the pot safely. You’re not just dropping a bird, you’re controlling a slow, steady entry so the oil doesn’t explode like a volcano.
- Put on heat-resistant gloves and eye protection, no shortcuts.
- Turn off the burner briefly before lowering, so a flare-up can’t catch a flame.
- Use the basket hoist or lifting hook, and lower the turkey an inch at a time, pausing so the oil calms down.
- Keep your face and arms back, no leaning over to “check.”
- Once the turkey’s fully submerged and the bubbling settles, relight the burner, then handle glove removal carefully so you don’t brush hot metal.
Monitoring Temperature and Fry Time for Juicy Results
Dial in the heat like you’re running a tiny, delicious science experiment, because from here on out, temperature and time are what decide if you get juicy perfection or dry disappointment. Keep your oil holding steady around 350°F, adjusting the burner in small nudges so it doesn’t creep too high or crash too low.
Use the classic rule of thumb, about 3 to 4 minutes per pound, but don’t trust time alone, it’s just a guide. Your real boss is internal temp. Start checking early with a probe thermometer in the thickest part of the breast and thigh, aiming for 165°F.
Once you hit it, lift the turkey, let it drip and settle a moment, almost like a mini rest time in midair.
Removing, Resting, and Carving Your Fried Turkey
You’ve hit temp, the skin’s looking like pure gold, and now it’s time for the most nerve‑racking part: getting that bird out of the bubbling cauldron without a trip to the ER. Turn off the burner, then very slowly lift the turkey with the hook, letting oil drip back into the pot. No rushing here.
Now guide it onto a sheet pan with a rack, not straight onto the table like a rookie. Let it rest 25 to 30 minutes so juices settle.
- Use thick gloves and closed‑toe shoes
- Double check your utensil selection before lifting
- Tent loosely with foil, don’t wrap tight
- Carve off legs, then breasts, slicing against the grain
- Finish with simple plate presentation that shows off that crispy skin
Cleaning Up and Storing Your Frying Equipment Safely
After the feast and the applause, the least glamorous part kicks in: dealing with that giant pot of liquid turkey gold sitting in your yard. Let the oil cool completely, usually overnight with the lid on. Then strain it through a fine mesh or cheesecloth into clean containers if you’ll reuse it, or follow your city’s disposal rules.
Scrub the pot, lid, and basket with hot, soapy water, then rinse and dry everything. Think “equipment sterilization,” not “eh, good enough.” Any leftover gunk can go nasty fast.
For electric fryers, unplug first, then wipe the outside. Do a quick cord inspection for cracks or melted spots. Store the burner, pot, and hoses together, dry and dust-free, so next year’s setup’s easy.
Frequently Asked Questions
Can I Safely Inject Marinades or Brines Into a Turkey Before Deep Frying?
Yes, you can, but you’ve got to keep the turkey completely dry outside. Inject marinades deeply and evenly, then chill for flavor diffusion. Pat skin bone-dry before frying to prevent dangerous oil splatter.
How Do I Handle a Small Backyard Fire Caused by Hot Oil Splatter?
You immediately kill the heat, smother flames with a lid, baking soda, or fire blankets—never water. Use metal containment barriers to isolate burning oil, keep people back, and call emergency services if it’s not instantly controlled.
Is It Safe to Deep Fry Multiple Turkeys in the Same Oil Batch?
Yes, it’s safe if you monitor oil degradation and avoid batch contamination. Filter out crumbs between birds, keep oil below smoke point, don’t exceed four turkeys, and discard oil if it darkens, smells rancid, or foams.
What Should I Do if Hot Oil Comes in Contact With My Skin?
If hot oil hits your skin, immediately remove clothing, run cold water over the burn for 15–20 minutes, don’t apply ice or butter, loosely cover with a clean bandage, and seek medical care for serious burns.
Can I Deep Fry a Turkey in Cold or Snowy Weather Conditions?
You can, but you’ll need strict cold precautions and careful snowy adjustments. Keep the fryer outside, sheltered, level, and dry. Prevent ice on the bird, monitor oil temperature closely, and keep kids, pets, and snowbanks far away.
Conclusion
So now you’ve got the game plan for frying a turkey that’s crispy, juicy, and not a call to the fire department. You pick the right gear, keep that bird dry, watch your oil level, and mind the temp. Take it slow lowering and lifting, let it rest, then carve like a hero. Do all that, and you’ll serve a Thanksgiving turkey that pretty much disappears before you even sit down.


