
If you’ve ever popped open your outdoor cooler at noon only to find sad, lukewarm drinks by 3 p.m., you know the struggle. Keeping stuff ice cold all day isn’t just “dump in a bag of ice and hope.” It’s about how you chill the drinks, pack the cooler, where you put it, and how often folks go digging around. Get those parts right, and your ice lasts way longer than you’d think, so let’s fix that melt-fest problem.
Key Takeaways
- Choose a thick-walled, well-insulated cooler with a tight, vented lid, sized for your group so it stays full and cold.
- Pre-chill both the drinks and the empty cooler, then load with fully frozen ice packs and fresh ice right before heading outside.
- Mix long-lasting block ice with loose cubes and some meltwater so cold water surrounds every can and bottle.
- Pack drinks tightly, put the most popular items on top, and open the lid briefly and infrequently to reduce warm air intrusion.
- Keep the cooler shaded and off hot surfaces, away from grills or firepits, and drain only when quickly replacing warm meltwater with fresh ice.

Choose the Right Outdoor Beverage Cooler

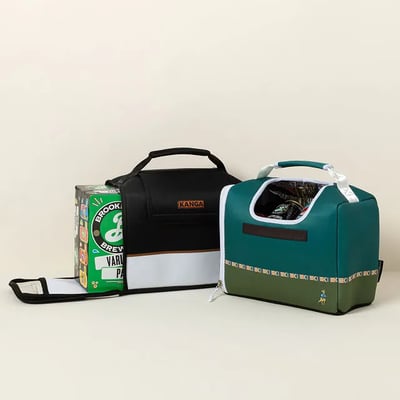
When it comes to backyard-chilling and party-hosting, the cooler you pick matters way more than people think. You’re not just buying a plastic box, you’re choosing how relaxed your day’s gonna be.
Look for thick walls and insulated liners, since that’s what keeps the cold in and the heat out. Cheaper coolers feel flimsy, and yeah, they usually perform like it. Vented lids help control pressure when it’s blazing hot, and they’re less likely to warp or jam, which saves you from wrestling your own cooler.
Think about size too. Too small, and you’re constantly reloading. Too big, and you’re lugging around a bulky beast for no reason. Wheels, sturdy handles, and a good latch are your new best friends. If you want your drinks to stay cold for hours, check out coolers with 48-hour ice retention and built-in features like bottle openers and drain plugs.
Pre-Chill Your Drinks and Cooler

Before you even pack the cooler, you’ll want your drinks already chilled so they’re not guzzling up all the cold from your ice in the first ten minutes. It also really helps to pre-cool the empty cooler itself, so that big plastic box isn’t acting like a mini heater on your fresh ice. Think of it like this, you’re setting the stage so the ice can actually do its job instead of fighting an uphill battle from the start. For even colder results, consider using ice from a countertop ice maker since these machines are designed to produce clear, odor-free ice that lasts longer and keeps your drinks colder compared to regular freezer ice.
Chill Beverages In Advance
Ever wonder why some coolers seem to stay icy all weekend while yours taps out by lunchtime? A big part of the secret is chilling your drinks in advance. Don’t load in warm cans or bottles and expect miracles. Get your pre chill timing right by putting drinks in the fridge the night before, or at least 6 to 8 hours ahead.
If you’re hosting a long cookout, use a simple beverage rotation. Keep extra drinks in the fridge, then swap them into the cooler as people grab the cold ones. That way you’re not dumping in a bunch of room‑temp bottles that warm everything up. Think of it like tag-team wrestling, only with fewer bruises and more invigorating.
Just as proper maintenance is crucial for outdoor griddles to ensure long-lasting performance, pre-chilling your drinks and cooler is a key step to maximize ice retention for your outdoor events.
Pre-Cool The Cooler
Treating your cooler like a mini fridge instead of just a bucket with ice is the real game changer here. You want the inside cold before the party even starts. A few hours before you load drinks, fill the cooler with a bag of cheap ice, close the lid, and let it chill the walls.
If your cooler has thermal liners, this pre-cooling step works even better, since they hold the cold instead of letting it leak out. Dump that “sacrificial” ice, wipe out any puddles, and you’ve already done some smart condensation management, which helps slow melting later. Now add your pre-chilled drinks, then fresh ice. Your cooler’s not fighting a losing battle anymore, it’s just quietly winning all afternoon. Just like heat retention capability is essential for keeping coffee hot in camping gear, pre-chilling your cooler helps maintain cold temperatures for longer-lasting icy drinks.
Use the Right Ice for All-Day Cold

If you really want your cooler to stay cold all day, you’ve gotta be a little picky about the ice you use. You’ll get the best results when you mix slow-melting block ice with fast-cooling cubes, add properly pre-chilled ice packs, and maybe even play mad scientist with a salty ice slurry that gets extra frosty. It’s not as complicated as it sounds, and once you get the hang of it you’ll wonder why you ever just tossed in one sad little bag of cubes. For even longer-lasting cold, consider using reusable, food-grade bags designed to handle freezer-to-boiling temperatures, since they help contain melting ice and reduce mess in your cooler.
Block Ice vs. Cubes
Cold strategy matters more than you’d think, and a big part of that is choosing the right kind of ice for your cooler. Big block ice melts slower because there’s less surface area, so it’s your all-day anchor, keeping the whole cooler temp down without turning everything into a slushy mess right away.
If you freeze water in a cooler-safe pan or jug, you’ll get a nice clear block formation that lasts for hours. For quick chill, though, cubes still win. An insulated cube comparison shows they cool drinks faster, but they also disappear faster. So use blocks for long-lasting cold, then pour cubes around the drinks you’ll grab first, kind of like giving them VIP access to the cold.
Pre-Chilling Ice Packs
Pre-chilling your ice packs is like preheating an oven, it’s one small step that completely changes the results. If you toss warm packs into your cooler, they’ll waste their power cooling themselves down instead of your drinks, which is kind of rude when you think about it.
Here’s how to make those packs actually pull their weight:
- Stash ice packs in the coldest part of your freezer for at least 24 hours
- Use packs filled with phase change materials so they hold a steady chill longer
- Pair packs with a bit of evaporative cooling, like a slightly damp towel on top
- Chill your drinks in the fridge first so the packs don’t have to work overtime
Do this, and your cooler suddenly feels a lot more “pro.”
Salt-Enhanced Ice Slurries
You’ve got your ice packs working smarter, not harder, so now it’s time to bring in one of the coolest tricks in the book: salt-enhanced ice slurries. This is where you turn regular ice and water into a super-chilled salt slush that keeps drinks crazy cold.
Here’s the deal. When you mix rock salt with ice and a bit of water, you lower the freezing point, so the slurry drops below 32°F without turning rock solid. That extra-cold mix hugs your cans and bottles, chilling them faster and keeping them cold longer.
Fill a shallow tray or corner of your cooler with ice, sprinkle in salt, add a splash of water, then nestle drinks right in. Science, but make it party-friendly.

Add Cold Packs and Inserts to Your Cooler

For extra backup on a hot day, cold packs and inserts are like your cooler’s little sidekicks, quietly doing the hard work in the background. They help your ice last longer, so you’re not stuck with a sad puddle by noon. Think of them as insurance for your drink stash.
Here’s how you can put them to work:
- Use slim gel lined inserts along the walls to create a cold “shell” around your drinks.
- Toss in a few hard plastic packs that won’t leak, even if they crack or get tossed around.
- Look for packs with evaporative coolants for longer lasting chill in really brutal heat.
- Keep a rotation in your freezer, so you’ve always got fresh cold packs ready to swap in.
Layer and Pack Your Outdoor Cooler Like a Pro
Think of packing your cooler like building a lasagna, just colder and with better beverages. Start with a tight bottom layer of cans or bottles, standing upright, so there’s as little empty space as possible. Gaps are your enemy because they kill good insulation techniques.
Put a flexible cold pack or two over that first layer, then add another layer of drinks, then more cold packs. Keep repeating. You’re basically making a chill sandwich. Put what you’ll grab most on top, so you’re not digging around, bleeding out cold air.
Keep the drain plug closed while you’re using it, unless it’s filling with warm water. Smart drainage solutions let you dump that out fast and re-close before things heat up.
Boost Cold Time With Ice, Water, and Salt
Now that your cooler’s packed, let’s talk about what’s actually going on inside with the ice, water, and a little salt magic. You’ll get way more cold time if you use the right balance of ice to water, instead of just chucking in a random bag and hoping for the best. And if you really want superchilled drinks that feel like they came from a movie montage, a small hit of salt in that ice-water mix can help drop the temp even more.
Optimal Ice-To-Water Ratio
A little science goes a long way when you’re trying to keep drinks icy in a cooler, and the ice-to-water ratio is where the magic really happens. You’re basically juggling ice proportion and thermal balance so everything stays cold without wasting space or cubes. Too much water and things warm up fast. Too much ice and you’re just chilling…mostly ice.
Here’s a simple way to think about it:
- Aim for roughly 2 parts ice to 1 part drinks
- Let some ice melt so there’s cold water hugging every can
- Pack cans tightly so cold water and ice surround them on all sides
- Close the lid often, or you’re just cooling the whole neighborhood
Dial this in, and your cooler acts like a portable fridge.
Salt For Superchilled Drinks
Salt is where you really start to cheat the system and crank your cooler into overachiever mode. When you add salt to your ice water, you create saltwater brines that get colder than regular ice water, thanks to something called freezing point depression. Fancy term, simple idea.
Here’s how you use it. Fill the cooler with a solid ice base, then add just enough water so the ice can hug your cans and bottles. Now toss in a few generous handfuls of regular table salt and stir things around a bit. The mix will drop below 32°F and chill drinks faster, keeping them super cold longer.
One warning though, don’t use this trick with glass bottles, they can crack.
Place Your Cooler Where Ice Melts Slowest
In the battle against melting ice, where you park the cooler matters just as much as how much ice you dump in. Shade placement is huge, because direct sun turns your cooler into a sad little oven. You also want decent ground insulation so heat doesn’t creep in from below like a sneaky villain.
Try this:
- Tuck the cooler in constant shade, like under a tree, table, or canopy, not “sometimes shade.”
- Set it on grass, foam, or a mat instead of bare concrete or hot wood decking.
- Point the lid away from the sun so it doesn’t soak up heat all afternoon.
- Keep it near the action but not right next to the grill, firepit, or that one friend who always blocks the shade.
Open the Cooler Less to Keep It Cold
Most of the cold you lose from a cooler doesn’t slowly leak out, it rushes out every time someone pops the lid like they’re opening a treasure chest. Every peek lets warm air in, and your ice has to work overtime. So try to limit access by having one “cooler captain” instead of a crowd digging around.
Think of it like this:
| Scene | What Happens | Result |
|---|---|---|
| Lid closed | Cold air stays put | Ice lasts longer |
| Constant opening | Warm gusts rush inside | Fast melt |
| One person grabbing | Fewer, shorter lid opens | Better chilling |
| Quick scooping only | Drinks grabbed in seconds | Happy guests |
Keep choices simple, grab what you need, then shut it quick.
Adjust Your Cooler Setup for Different Drinks and Events
Part of keeping drinks ice cold is knowing how to tweak your setup for what you’re actually doing, because a solo backyard chill-out doesn’t need the same cooler game plan as a kids’ birthday party or an all-day tailgate. Think about drink pairing and event timing before you toss everything on ice, since different crowds grab different cans at different speeds.
- For kid-heavy events, keep juice pouches and sodas on top so small hands aren’t digging forever.
- For a mellow hang, bury beer and seltzer deeper, with ice packed tight around them.
- For all-day tailgates, restock in small waves so stuff stays colder.
- For mixed groups, label cooler zones so people actually close the lid fast.
Clean and Reset Your Outdoor Beverage Cooler for Next Time
You’ve got your cooler game figured out for different events, but once the last drink’s gone and the ice is a sad puddle, it’s cleanup time if you want everything staying ice cold next time instead of kinda funky. Start by draining all the meltwater, then pull out any baskets or racks and give them a quick scrub with mild soap. Wipe the interior walls, corners, and lid seal, since that’s where grime likes to hide.
Set a simple cleaning schedule, like a quick rinse after every use and a deeper scrub once a month. If your cooler’s powered, check the vents and fan area, knocking out dust. Don’t forget filter replacement according to the manual, or your “cold” turns sorta meh.
Frequently Asked Questions
How Can I Keep Drinks Cold Without Using Any Ice at All?
You can keep drinks cold by using pre-frozen phase change packs, insulating sleeves, and shade, plus evaporative cooling wraps around bottles. Don’t open containers often, pre-chill everything, and use reflective covers to reduce heat gain.
Are There Eco-Friendly Alternatives to Traditional Ice Packs for Coolers?
You’ve got several eco-friendly options: reusable gelpacks made from biodegradable or plant-based gels, insulated woolwraps using natural fibers, stainless-steel ice cubes, water-filled silicone pouches, and even frozen homemade soup stock that doubles as future meals.
How Do Altitude or Climate Affect Cooler Performance and Ice Longevity?
You’ll notice High altitude with Reduced boiling slightly improves cooler efficiency, but dry climates boost Evaporation rates, warming contents faster. High Humidity impact slows evaporation, so ice melts slower, while wind and direct sun always shorten ice longevity.
Can I Safely Store Mixed Alcoholic and Nonalcoholic Drinks Together in One Cooler?
You can, but you’ll want clear alcohol separation to avoid confusion and cross-contamination. Use beverage labeling, separate zones, or baskets, and keep alcoholic cans/bottles sealed and away from kids’ reach inside the cooler.
What Are the Best Ways to Prevent Drink Cans From Rusting Inside Coolers?
You prevent rust by drying cans, avoiding standing water, and reducing aluminum corrosion. Raise cans in baskets, drain meltwater often, use ice packs, keep the vent capillary action area clear, and wipe cans before long-term cold storage.
Conclusion
So now you’ve basically turned your cooler into a little portable fridge. Nice. When you pre-chill, pack smart, and baby that lid a bit, your ice lasts way longer and your drinks stay frosty instead of sad and lukewarm. Use blocks, cubes, and cold packs, stash the cooler in the shade, and don’t let people stand there browsing forever. Do this, and your only problem is running out of snacks, not cold drinks.


