
You’ve probably wondered why your homemade pizza doesn’t quite match that incredible Neapolitan slice you had in Naples. The secret isn’t just tossing dough in the air or cranking up your oven—though those things help. It’s actually about understanding a few key principles that separate authentic Neapolitan pizza from everything else. Once you nail the fundamentals, you’ll reveal what makes this style so special and addictively good.
Key Takeaways
- Use Italian “00” flour with 12-13% protein and cold ferment dough for 24-72 hours to develop authentic flavor and texture.
- Hand-stretch dough to quarter-inch thickness with a thicker rim, creating the characteristic cornicione crust edge.
- Heat your pizza oven to 800-900°F for the rapid 60-90 second bake essential to authentic Neapolitan style.
- Top minimally with San Marzano tomatoes, fresh mozzarella, basil, and olive oil to preserve crust performance.
- Watch for leopard-spotted crust with slight charring, then serve immediately after one minute cooling for optimal texture and flavor.


Understanding the Essentials of Neapolitan Pizza

When you’re craving authentic Neapolitan pizza, you’re not just looking for any pie with some toppings thrown on—you’re chasing something specific. This Italian classic comes from Naples, and it’s got rules. You’ll find regional variations across Italy, but the Neapolitan style stays pretty true to tradition. The dough’s gotta be simple: flour, water, salt, and yeast. That’s it. Your sauce should be San Marzano tomatoes, fresh mozzarella, basil, and olive oil. Nothing fancy or complicated.
Understanding serving etiquette matters too. Neapolitan pizza is eaten with your hands, folded in half or quarters. It’s meant to be hot, fresh, and devoured quickly. You won’t find it sitting around getting cold. That’s the whole point of making it right.
Selecting and Preparing Your Flour and Dough

Because flour’s the foundation of your entire pizza, you’ll want to take a second and think about what you’re actually buying. You’re looking for Italian “00” flour, which has a super fine texture that’ll give you that perfect crust. The 00 flour blending process matters more than you’d think.
| Flour Type | Protein Content | Best For |
|---|---|---|
| Type 00 | 12-13% | Authentic Neapolitan |
| Bread Flour | 14-16% | Chewier crust |
| All-Purpose | 10-12% | General baking |
| Tipo 1 | 13% | Rustic style |
| Whole Wheat | 14% | Nutty flavor |
Mix your flour with water and let it rest. That autolyse timing, usually around thirty minutes, lets the flour fully hydrate. This step’s honestly a game-changer for developing gluten naturally without overworking your dough. For the best dough handling and crust results, consider how heat retention and distribution in your cooking surface will complement your flour choice.
Mastering the Fermentation Process

After your dough’s had that essential autolyse time, the real magic happens during fermentation, and honestly, this is where patience becomes your best friend. You’ve got two main routes here: room temperature fermentation or cold retardation. The cold retardation method involves sticking your dough in the fridge for 24 to 72 hours, which develops flavor way better than rushing it at room temp. This slow process lets wild fermentation work its thing, creating complex tastes that really shine through in your crust. If you’re going traditional, cold retardation’s the move. Just keep your dough loosely covered so it doesn’t dry out. Your future pizza self will seriously thank you for taking this time seriously. For even better results, consider using a ceramic non-stick pot if you need to store your dough—these help prevent sticking and make cleanup much easier.


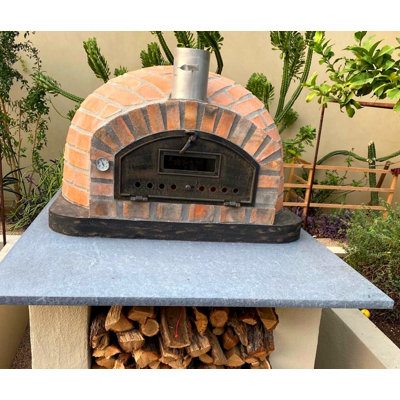
Setting Up Your Pizza Oven for Optimal Temperature

You’re gonna want to nail down the heat situation before you start tossing dough around, so let’s talk about achieving that perfect temperature sweet spot where your crust gets all bubbly and charred without turning into a hockey puck. Thermometer placement is key here, and you’ll want to stick one right in the middle of your oven’s cooking surface, maybe slightly off to one side so it’s reading the actual pizza zone and not just chilling near a cool spot. Traditional wood-fired ovens typically cruise around 800 to 900 degrees Fahrenheit, though honestly you can start getting great results anywhere in the 700-degree range if that’s what your setup hits. For truly authentic results, make sure your oven offers precise temperature control so you can maintain a consistent, high-heat environment throughout the entire cook.
Achieving the Perfect Heat
Getting your pizza oven to the right temperature is where the magic really happens, and honestly, it’s easier than you might think. You’ll want to hit around 900°F for that authentic Neapolitan crust. Here’s what’ll get you there:
- Monitor oven airflow to keep heat circulating evenly throughout the chamber
- Use quality dome insulation so heat stays trapped inside where it belongs
- Build your fire toward one side and let it establish for 30-45 minutes
- Check temperature with an infrared thermometer for accuracy
The dome insulation is clutch because it maintains consistent heat, preventing those annoying cold spots. Good oven airflow means your fire’s getting proper oxygen and distributing warmth efficiently. Once you’ve nailed this part, you’re pretty much set. The rest is just confidence and a little practice with your timing. For those interested in other heat-retaining appliances, electric smokers use solid insulation to maintain stable cooking temperatures and efficient energy use.
Thermometer Placement Techniques
Since you’ve got your oven fired up and humming at 900°F, it’s time to figure out where your thermometer actually goes. Your probe placement matters way more than you’d think. Mount it on the dome’s interior, roughly in the center where the heat’s most consistent, avoiding spots right above the fire. For infrared readings, aim at the cooking surface itself, not the walls, since that’s where your pizza’s actually hanging out. Keep the sensor about six inches from the floor for accurate dome temps. Don’t just eyeball it though—take multiple readings from different spots to get the full picture of your oven’s hot zones and cool pockets. This helps you nail perfect crust every single time. Just like with infrared sensors to prevent overflow in top countertop appliances, using the right tools and placement ensures your measurements are spot-on and your results are consistently great.
Stretching and Shaping Your Dough

Now that your oven’s heating up nicely, it’s time to transform that ball of dough into an actual pizza base, and honestly, this is where things get fun. You’ve got two main approaches: hand stretching, which lets you feel the dough and work with it gently without any equipment, and a proper shaping method that uses your knuckles and a light toss to create that perfect thin, even circle. Either way, you’re basically coaxing that dough into submission, and with a little practice, you’ll figure out which technique feels most natural for your hands and your style.
Hand Stretching Techniques
With your dough properly proofed and ready to go, it’s time to transform that sticky ball into a thin, even circle that’ll make your pizza dreams come true. Start by gently pressing the dough with your fingertips, working from the center outward. Here’s your game plan:
- Use finger flicking motions to stretch the edges gradually
- Apply wrist rotation to rotate the dough between stretches
- Keep your hands lightly floured to prevent sticking
- Work the perimeter to create that signature thin crust
Don’t rush this process. You’re aiming for about a quarter-inch thickness, nice and uniform. As you work, you’ll feel the dough getting thinner and more cooperative. Once it’s nearly there, you can toss it if you’re feeling confident, or just keep stretching by hand. Either way, you’ve got this.
Proper Shaping Method
Once you’ve got your dough stretched to that quarter-inch sweet spot, it’s time to nail the final shaping that’ll make your pizza actually look like pizza. You’re almost there. Now comes the fun part where everything comes together. Work those edges with gentle pressure, creating an even thickness throughout. Some folks use knife scoring on the underside to prevent bubbling, while edge docking (poking small holes around the rim) keeps things from puffing up unevenly.
| Technique | Purpose |
|---|---|
| Knife Scoring | Prevents large air bubbles |
| Edge Docking | Guarantees even rise |
| Rim Thickening | Creates crust character |
| Center Pressing | Maintains thin base |
| Final Stretching | Achieves uniformity |
You’ll want that outer edge slightly thicker than the center. This gives you that beautiful cornicione—that’s the fancy crust rim everyone loves. Don’t rush it.
Baking and Perfecting Your Neapolitan Pizza
The temperature of your oven is basically everything when you’re making authentic Neapolitan pizza, and if you don’t get it right, you’ll end up with something that’s more sad flatbread than the crispy-yet-chewy masterpiece you’re after. You’re aiming for around 900°F, which sounds insane but trust me, it works.
Here’s what’ll make your pizza sing:
- Watch for that perfect leopard-spotted crust with slight charring
- Your sauce pairing should complement, not overpower, the dough
- Cheese selection matters—fresh mozzarella’s your best friend here
- Bake for just 60 to 90 seconds, tops
Pull it out when the edges bubble and darken slightly. That’s when you know you’ve nailed it. Let it cool for a minute before devouring, though honestly, who has that kind of patience?
Frequently Asked Questions
What’s the Ideal Pizza Oven Size for a Home Kitchen or Backyard Setup?
You’ll want a countertop model with a small footprint for kitchens or a backyard favorite with a large dome for outdoor spaces. Both options give you authentic results without overwhelming your setup.
How Do You Maintain and Clean Your Pizza Oven After Regular Use?
You’ll want to remove ash regularly for proper oven maintenance. After each use, you’re sweeping out cooled debris and ash removal from the cooking surface. This keeps your oven functioning efficiently and ready for next time.
Can You Make Neapolitan Pizza in a Conventional Kitchen Oven Instead?
You can’t achieve authentic Neapolitan pizza in a conventional home oven, but you’ll get closer using a baking steel at high temperatures. Try the steam trick by adding water to create moisture, mimicking traditional results.
What Are the Best Toppings and Ingredient Brands for Authentic Neapolitan Pizza?
You’ll want San Marzano tomatoes, Buffalo mozzarella, and fresh basil as your core toppings. Use Tipo 00 Italian flour for your dough, quality extra virgin olive oil, and you’ve got authentic Neapolitan pizza.
How Long Does It Take to Build Skills for Consistently Perfect Neapolitan Pizzas?
You’ll typically need six to twelve months of consistent practice to master authentic Neapolitan pizza. Your practice frequency matters most—aim for weekly sessions. You’ll develop dough intuition over time, recognizing perfect hydration and fermentation by feel alone.
Conclusion
You’ve now got all the tools to make genuinely great Neapolitan pizza at home. Sure, it takes patience—that slow fermentation’s non-negotiable—but you’re basically just waiting for flavor to happen. Once you nail the stretch, nail the temperature, and respect those simple toppings, you’ll be turning out leopard-spotted pies that’ll make you forget about delivery. Your pizza oven’s about to become your new favorite place.


