
Your cooler’s melting ice is like sand slipping through an hourglass—and you’re probably doing it all wrong. Here’s the thing: most folks just toss ice and drinks together and hope for the best. But what if I told you there’s a system? A method that actually keeps your beverages ice-cold for hours longer than traditional approaches. Turns out, the way you layer matters way more than you’d think, and the difference between a lukewarm disaster and perfectly chilled drinks comes down to understanding one essential principle.
Key Takeaways
- Use ice blocks on the bottom layer instead of cubes for slower melting and extended cold retention.
- Layer beverages in the middle section surrounded by ice to maximize cooling contact and efficiency.
- Pack ice cubes densely across the top to create an insulating shield blocking warm air penetration.
- Pre-chill the cooler overnight and freeze beverages beforehand so drinks act as additional cooling elements.
- Combine block ice foundation, alternating beverage layers, and crushed ice topping for superior ice longevity.

Why Ice Melts Faster Than You Think

You’d think ice is basically indestructible—solid, cold, unchanging. Wrong. Your cooler’s ice is melting way faster than you realize, and it’s not just because summer’s hot. Here’s the thing: rapid conduction happens the moment ice touches warmer surfaces inside your cooler. That aluminum or plastic? It’s basically a heat highway transferring warmth directly to your frozen blocks. Then there’s solar gain—the sun beating down on your cooler’s exterior, slowly cooking everything inside. Add in the ambient air temperature, and you’ve got a perfect storm of melting factors working against you. Even a “well-insulated” cooler can’t completely stop this thermodynamic reality. The ice doesn’t stand a chance without proper layering strategies. You need to understand these forces if you’re gonna keep your beverages cold. Choosing a cooler with thicker foam liners and thoughtful design can significantly slow down this melt, but only if you use the right packing technique too.
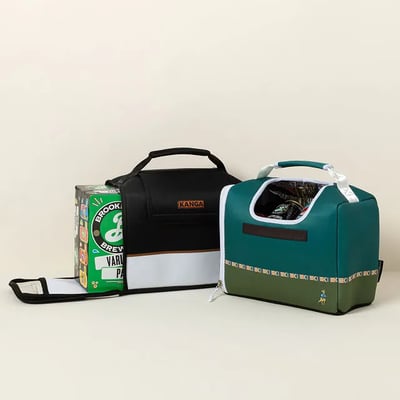
Choosing the Right Cooler for Maximum Insulation
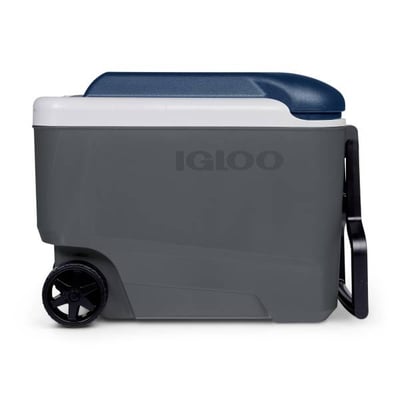
Since you now know ice melts faster than a popsicle in July, it’s time to talk about your cooler’s actual performance—because not all coolers are created equal. The secret lies in understanding insulation materials and cooler construction. You’ll want thick walls packed with foam, fiberglass, or polyurethane. These materials trap cold air like a boss. Thicker walls mean slower melting. Period.
Look for coolers with tight-fitting lids and solid hinges that actually seal properly. Cheap construction? That’s basically inviting warmth inside. Your cooler’s walls should feel substantial when you touch ’em. Quality coolers cost more upfront, but they’ll keep your beverages frosty way longer than budget options. Think of it as an investment in better camping trips and backyard hangouts.
If you care about long-term performance and durability, it’s worth checking the warranty length on your cooler, as products with longer coverage tend to be built for reliability.
Pre-Cooling Your Cooler Before the Trip

Before you even pack your cooler, you’ve gotta freeze it overnight—yeah, really—because a cold cooler keeps your drinks chilled way longer than one sitting at room temperature. Start with ice blocks instead of regular cubes; they’re like the MVPs of cooling, melting slower and taking up less space while doing heavy lifting. Think of it this way: you’re basically giving your cooler a head start, so when you load it up on trip day, everything’s already chillin’ in an arctic environment ready to rumble. If you want to make your own ice at home, consider using a countertop ice maker with rapid supply production to quickly stock up on enough ice blocks before your trip.
Freeze Your Cooler Overnight
One of the simplest yet most effective tricks for keeping your stuff cold is giving your cooler a little head start before you even pack it. You’ve gotta embrace the overnight freezeup method—it’s basically a game-changer for pre trip chilling.
Here’s the deal: stick your cooler in the freezer or a really cold spot the night before your adventure. Sounds weird, right? But this overnight freezeup strategy drops the internal temperature way down. When you pack it with ice and beverages the next morning, everything stays colder longer because you’re not fighting against warm walls.
Think of it like priming a pump. You’re not just adding ice; you’re starting with a frozen foundation. Your cooler becomes a cold-holding powerhouse instead of playing catch-up all day. That’s pre trip chilling done right. If you want to take it up a notch, try using double-wall insulation to keep the cold in even longer, just like the best portable kettles do.
Use Ice Blocks First
After you’ve got your cooler pre-chilled overnight, the next power move is loading it strategically with ice blocks before you actually hit the road. This is where the magic happens, my friend.
Here’s your ice block game plan:
- Layer ice blocks on the bottom first—they’re the foundation of your cooling empire
- Add your beverages and snacks in the middle section
- Top it off with coolant packs and smaller ice cubes for maximum chill
Ice blocks melt slower than regular cubes, which means your drinks stay frosty way longer. The trick? Don’t skimp on quantity. Pack those ice blocks tight and create that arctic environment. Your cooler becomes a legitimate temperature fortress. Trust us, you’ll be the hero when everyone else’s drinks get warm while yours stay perfectly revitalizing.
The Foundation Layer: Starting With Proper Drainage
Getting your cooler ready to keep drinks ice-cold starts with what happens at the very bottom, and honestly, this foundation layer is where most people mess up. You’ll want to create drainage channels so water doesn’t pool and make everything soggy. Think of it like building a tiny civilization for melting ice—you’re basically a water architect now.
Here’s the trick: use a raised mesh system or some kind of grate at the bottom. This keeps your beverages from sitting in a gross puddle of diluted disappointment. Without proper drainage, you’re basically creating a swimming pool for your sodas and beers, which nobody wants.
Get this foundation right, and you’re setting yourself up for success. Your drinks’ll stay colder longer because you’ve given that meltwater somewhere to go. Smart move.
If you want your cooler to work even better, try using detachable trays or inserts that are easy to clean, just like the best electric steamers—this keeps things cleaner and makes post-party cleanup a breeze.
Strategic Ice Placement and Distribution Techniques

Now that you’ve got your drainage sorted, it’s time to stack your ice like you actually know what you’re doing—and here’s the thing: you gotta think about where each layer goes and how it’ll keep your drinks frosty without melting into a sad puddle. You’ll want to build from the bottom up, strategically placing that initial foundation of ice chunks to maximize cold retention, then layering the middle section with smaller pieces that nestle together like puzzle peices and create pockets of insulation, and finally topping it all off with a dense, tightly-packed crown of ice that’ll make your cooler look like the Arctic just moved into your backyard. Get this part right, and you’re basically a cooler sensei.
Bottom Layer Foundation Strategy
The bottom layer’s where the magic really starts, and you’ve got to get this part right if you want your drinks staying frosty for hours. This foundation makes or breaks your entire cooling operation.
Here’s what you need to do:
- Lay down drainage matting first to let water escape and prevent soggy bottoms
- Create an elevated base using blocks or racks so air can flow underneath
- Pack crushed ice densely across the entire foundation for maximum cold retention
You’re basically building a cooling fortress here. The drainage matting keeps things from turning into a slushy swamp, while that elevated base lets gravity do its thing. Pack that ice tight—no air pockets allowed. This setup guarantees your cooler stays cold longer and your beverages stay invigoratingly chilled throughout the day. Smart planning now equals happy guests later.
Middle Zone Insulation Technique
Once you’ve nailed that bottom layer, it’s time to get strategic with what goes in the middle—this is where you’ll really control the temperature game. Think of this zone as your cooler’s thermal curtains, creating barriers that’ll keep cold air trapped inside. You want to layer ice with your beverages, alternating between them to maximize cooling contact. Don’t pack everything tight, though. Air gaps are your secret weapon here. They actually help insulate and circulate the cold more evenly. Arrange bottles so there’s space between ’em, then fill those pockets with ice. This middle section? It’s basically the MVPs of your cooling setup. Strategic placement now means your drinks’ll stay invigoratingly cold way longer than you’d expect.
Top Coverage Density Placement
After you’ve strategically layered your middle section, it’s time to crown your cooler with a top coverage that’ll act like a freezing fortress. Your surface coverage is gonna be the MVP of ice longevity, so don’t skimp here. Think of density mapping as your secret weapon—you’re basically creating an icy shield that’ll keep everything frosty for hours.
Here’s how to nail it:
- Pack ice cubes tightly across the top, leaving zero gaps for warm air to sneak through
- Layer crushed ice over your cubes for maximum surface contact and insulation
- Add a final thin layer of larger chunks to distribute weight evenly and prevent settling
This ain’t rocket science. You’re just building a protective barrier. When you get the density right, you’ll be amazed at how long your drinks stay cold.
Organizing Your Beverages for Optimal Cold Retention

If you’ve ever pulled a lukewarm soda from your cooler halfway through a backyard barbecue, you’ll appreciate how smart beverage organization can save the day. Here’s the thing: placement matters just as much as ice does. Try vertical stacking your drinks instead of laying them flat—you’ll maximize space and improve airflow around each bottle and can. Rotate your beverages strategically, keeping frequently grabbed items toward the top so you’re not digging through layers of ice every five minutes. This beverage rotation system keeps your most-wanted drinks coldest longest. Think of your cooler like a library, not a junk drawer. Put the drinks you’ll consume first on top, then work your way down as the day progresses. Smart organization? That’s the real MVP of outdoor entertaining.
Advanced Layering Methods for Extended Ice Life
Now that you’ve got your beverages positioned like a pro, it’s time to get serious about what’s underneath them—because here’s the real secret to keeping your cooler frosty all day long: the ice itself. You need a strategic approach that harnesses phase change technology and smart layering.
- Use reflective liners on your cooler’s walls to bounce heat away and create an insulating barrier that keeps cold air trapped where it belongs
- Layer dense ice blocks on the bottom, then add crushed ice on top for better contact with your drinks and faster cooling power
- Sandwich beverages between ice layers rather than sitting them on top, which maximizes phase change efficiency and extends ice life dramatically
This method? It’s a game-changer for keeping everything perfectly chilled.
Pro Tips and Tricks From Experienced Cooler Users

The veterans of cooler culture—those sun-weathered folks who’ve forgotten more about ice preservation than most of us’ll ever know—they’re sitting on some seriously gold-worthy secrets. You’ll want to listen up.
These seasoned tips come straight from years of backyard barbecues and fishing expeditions. One killer user habit? Pre-chill your cooler the night before. Sounds simple, but it’s a total game-changer. You’re basicly giving your ice a fighting chance from the moment you pack it.
Another pro move: freeze your beverages beforehand. That way, they’re doing double duty, keeping everything cold while staying cold themselves. And here’s the kicker—experienced cooler enthusiasts swear by using block ice instead of cubes. It melts slower, lasts longer, and honestly, it’s just cooler. Pun intended.
Frequently Asked Questions
How Often Should I Replace the Ice During a Full Day Outing?
You’ll want to rotate daily and monitor meltwater throughout your outing. Check ice levels every few hours, replacing it as needed to maintain cooling efficiency. Proper layering helps, but you’ll still need midday replacements for full-day trips.
Can I Mix Different Types of Ice for Better Cooling Performance?
You’ll create an ice fortress of efficiency by mixing crushed cubes and clear blocks. Crushed cubes mold around beverages for rapid cooling, while clear blocks maintain temperatures longer, giving you the best of both worlds.
What’s the Ideal Cooler-To-Ice Ratio for Maximum Temperature Retention?
You’ll want a 2:1 ice-to-cooler ratio for ideal proportions and maximum temperature retention. Consider insulation upgrades like foam liners or reflective barriers to enhance cooling performance and extend your cooler’s effectiveness markedly.
Does the External Temperature Significantly Affect Ice Layering Effectiveness?
Yes, external temperature markedly impacts your ice layering effectiveness. You’ll experience faster melting in high heat, while solar exposure and ambient humidity accelerate ice loss. Shade placement helps considerably.
How Can I Prevent Ice From Freezing Beverages Solid During Storage?
You’ll want to use insulated dividers and beverage spacers strategically separating your drinks from direct ice contact. This barrier prevents brutal freezing, keeping your beverages perfectly positioned and pleasantly chilled—not frozen solid.
Conclusion
You’ve now got the ice-packing skills of a thousand cooler legends. Your drinks’ll stay colder than the north pole (okay, maybe not quite). Follow this layering game, and you’re basically freezing time itself. Drain that meltwater, keep your foundation solid, and crown that cooler tight. You’re ready. Your next outdoor adventure? It’s gonna be invigoratingly, perfectly, undeniably cold. Go forth, and chill.


