You want weeknights to stop feeling like a chopping marathon, right? Try stacking uniform pieces and running them through a mandoline or a sharp straight blade to make quick planks and shaves. You’ll get even cook times, faster flavor soak, and tidy portions that pack up clean. Set up a stable station, go firm-to-soft, and batch similar textures. Safety guards on, fingers happy. Keep blades honed. Do that, and meal prep shrinks—now here’s how to make it stick.
Key Takeaways
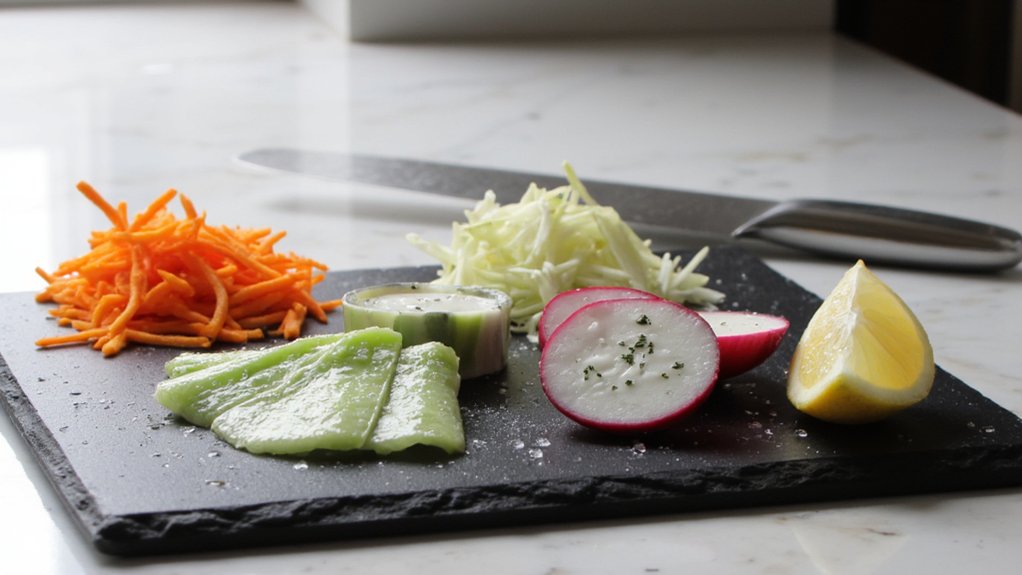
- Batch-slice on a mandoline for ultra-even, adjustable thickness that cooks uniformly and slashes prep time for salads, slaws, and gratins.
- Sequence firm-to-soft produce and stack like items to slice continuously without tool changes or cleanup interruptions.
- Freeze proteins 15 minutes, then thinly slice across the grain for quick marinades, fast stir-fries, and tender texture.
- Use micro-perforations or shallow scoring to accelerate marinade absorption and seasoning, maximizing flavor during batch prep.
- Set a safe, efficient station: non-slip board, blade guard or cut glove, labeled bins, and containers dated for first-in, first-out.

Why Slicing Changes Everything in Home Cooking

Even if you’ve been cooking for years, slicing is the quiet move that changes everything in your kitchen. When you slice with intention, flavors hit faster, cook times drop, and meals feel a little restaurant-y without the drama. Uniform cuts mean even heat, so nothing’s mushy or half-raw. You also control texture profiles, from crisp onions to silky mushrooms, which makes every bite more interesting.
Good slicing starts with knife etiquette. Keep fingers tucked, tip planted, and let the blade do the work. No sawing frenzy, please. Thinner slices speed marinades, thicker ones hold juiciness, and a smart angle can turn a tough carrot into something friendly. You’ll notice your salads crunch better, your stir-fries actually stir, and your sandwiches stop falling apart. Small change, big win. If you want to save even more time and get consistent, professional-quality slices, investing in an electric food slicer can transform your meal prep routine.
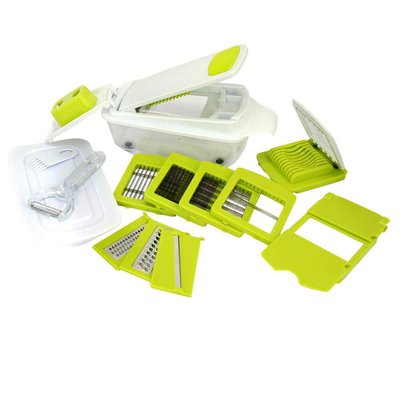
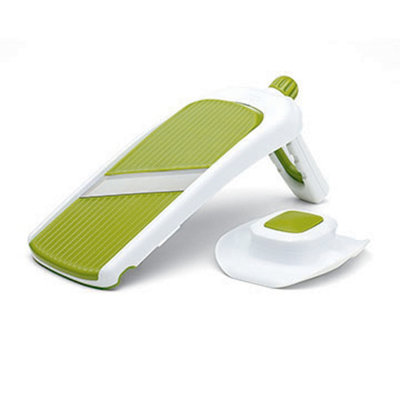
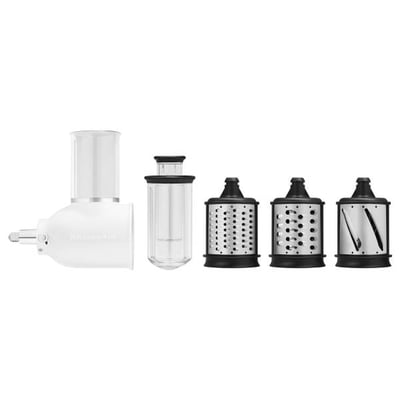
Essential Slicers and When to Use Each

You’ve got options, and they’re not all fussy or fancy. A mandoline gives you ultra-even slices for salads and gratins, while a food processor shines when you want speed with big batches, though it’s a bit less precise. For blades, reach for serrated when tackling tomatoes, citrus, or crusty bread, and stick with a sharp straight blade for clean cuts on cucumbers, onions, and pretty much everything else—no drama, just neat slices. Many top mandolines also offer adjustable thickness control so you can easily switch between paper-thin or hearty slices without swapping blades.
Mandoline vs. Food Processor
A good rule of thumb: reach for the mandoline when you want razor-thin, uniform slices fast, and grab the food processor when you’ve got volume or tougher tasks. You’ll love the mandoline for quick prep on salads, slaws, and gratins, especially when countertop ergonomics matter and you want minimal cleanup. Use blade guards and mind those fingertips, please. The processor shines for mountains of veg, firm roots, and speedy shreds. For longer-term storage or prepping in advance, pairing your slices with a vacuum sealer’s food-type versatility can help maintain freshness and cut down on food waste.
1) Choose the tool:
- Mandoline for paper-thin, showy slices.
- Processor for batches, grates, and consistent dice-like cuts.
2) Safety tips:
- Wear a cut glove, lock the mandoline, use blade guards.
- With processors, seat the lid fully and never push by hand.
3) Workflow:
– Stage ingredients, slice, then bag or pan immediately for momentum.

Serrated vs. Straight Blades
While both get called “sharp,” straight and serrated blades are built for different fights in the kitchen, and picking the right one makes prep way easier. You want clean, even cuts for most produce, so reach for straight slicing when you’re tackling cucumbers, onions, carrots, and raw meats. It glides, gives thin shavings, and stacks nicely for quick cooking. Serrated precision shines with crusty bread, tomatoes, citrus, and anything with a tough outside and soft inside. The teeth grab without squashing.
Keep a small serrated utility for tomatoes and sandwiches, and a longer bread knife for loaves. For everything else, your chef’s knife or a sharp santoku does the heavy lifting. Sharpen straight edges often, and just hone serrations occasionally. Your prep will fly, promise. For ingredients that require exceptional heat retention, cast iron skillets can maximize your efforts after slicing by providing even and reliable cooking.
Setting Up a Safe, Speedy Prep Station

You’ll move faster and stay safer when your board sits on a stable, non-slip surface—no skating onions today, please. Keep knives and the slicer within easy reach, blades facing away, with handles pointed the same direction so you grab without thinking and don’t play fingertip roulette. Set up clear waste and scrap bins nearby, one for compost and one for trash, so you can sweep as you go and keep your station clean without stepping away every two minutes. When organizing your prep station, consider the ease of use and maintenance of your tools to streamline cleanup and minimize interruptions.
Stable, Non-Slip Surface
From the jump, a solid, non-slip setup is what makes slicing feel smooth and safe, not like a nerve-wracking skate rink for veggies. You want grip, not drift. So give your counter a quick wipe, then lay down non slip matting that stays put when things get splashy. Set your board on top, and check that its rubber feet actually touch the surface, no wobble, no tilt. If they’re worn, swap ’em.
1) Test for slide by nudging the board with two fingers. If it moves, fix it.
2) Add a barely damp kitchen towel under the mat for bonus traction. Old-school trick, still works.
3) Keep the area dry, wiping spills as they happen, because moisture sneaks under gear and invites slip city.
Knife and Slicer Placement
Rock-solid board sorted, now park your blades where they make sense. Keep your chef’s knife on your dominant side, tip pointing away, handle easy to grab without a weird wrist bend. That’s countertop ergonomics in action, saving your shoulders and speed. Set your slicer or mandoline just ahead of the board so the blade trajectory travels straight away from you, not across your body. Simple rule, fewer nicks.
Line up knives by size, handles facing you, blades hugging the board’s edge. Don’t stack them. Give each tool a lane. Place a damp towel under the slicer if it tends to wander, because scooting gear equals sketchy. Keep a honing rod nearby, quick touch-ups keep cuts clean. And yeah, wipe handles when slick. Slippy grip, yikes.
Clear Waste and Bins
Usually the fastest prep stations stay clean because the trash has a plan. You set clear waste lanes so scraps don’t pile up, and you keep moving. Place a small bin at your hip, right where you peel, trim, and slice. That’s your catch-all. Then park your bigger bins just behind you, so you can dump and reset without walking laps.
1) Label three bins: trash, recycling, and compost sorting. No guessing, no pauses.
2) Use bin rotation during long prep: swap the full one, slide in an empty, keep slicing.
3) Line bins with sturdy bags, and keep a spare roll clipped nearby.
Work top to bottom, clean as you go, and you’ll feel faster. Smells better too, honestly. Less mess, fewer oops.

Core Slicing Patterns for Maximum Efficiency

Start with the basics, then stack speed on top. Dial in three core moves: stacked slicing for even planks, radial cuts for round produce, and shuttle slicing for quick ribbons. Keep your grip light, guide with your knuckles, and let the blade do the work. Short strokes, then longer glides. You’ll feel the rhythm.
| Pattern | Best For | Key Tip |
|---|---|---|
| Stacked slicing | Cucumbers, tofu, cheese | Stack evenly, align edges |
| Radial cuts | Onions, apples, citrus | Aim slices toward the core |
| Shuttle slicing | Herbs, greens, peppers | Rock the tip, slide back |
Stacked slicing gives uniform thickness so everything cooks or sits evenly. Radial cuts break layers cleanly, neat wedges, zero fuss. Shuttle slicing speed’s great, but keep fingers tucked, please. A little practice, big payoff, no brag… ok, maybe a little.
Batch-Prep Strategies for Produce, Proteins, and Garnishes

Those slicing patterns you just locked in? Now put them to work with ingredient batching. Start by grouping produce with similar textures, so you can run the slicer without fiddling every minute. Think carrots, cukes, then softer stuff like zucchini. Keep your board clean and your bins labeled, and you’ll fly. For proteins, freeze them 15 minutes for cleaner cuts, stack evenly, and portion by recipe so weeknights get easy. Garnishes come last, since they bruise fast, and yes, you deserve pretty herbs.
1) Do seasonal pairing: slice what’s cheapest and freshest together, then plan meals around that.
2) Set up trays for raw, cooked, and ready-to-eat to avoid mix-ups.
3) Pack in clear containers, date them, and stash the oldest in front.
Boosting Flavor Absorption With Smart Cuts
While marinades and rubs do plenty, the real magic happens before they touch the food: it’s in how you cut. You’re giving flavors a map, little pathways to sneak in fast. Try the micro perforations technique by lightly tapping your slicer or tip to create tiny holes across the surface. Not deep, just a gentle freckle pattern. Sauces dive right in.
Use angled scoring for steaks, tofu, eggplant, and even mushrooms. Keep cuts shallow, about quarter inch, in a crisscross so seasoning spreads evenly. You’ll get more flavor per bite without shredding the piece. For chicken breasts, score only the top and avoid sawing; quick, neat lines win. Toss with your marinade, wait a bit, and smile. Flavor’s clocking in early.
Texture, Thickness, and Controlling Cook Times
Flavor’s got a head start now, so let’s talk how the cut itself controls texture, thickness, and how fast dinner hits the plate. You’re steering mouthfeel contrast with every slice. Thin shaves cook in minutes and feel delicate, while thicker cuts stay juicy and chew a bit, which can be great. Do a quick density mapping in your head: carrots are tough, zucchini’s soft, chicken breast sits in the middle, so match thickness to hardness and heat.
1) Go thin for quick sears and stir-fries; keep pieces consistent so nothing burns while friends lag behind.
2) Medium slices for balanced tenderness, like fajita veggies, golden and bendy.
3) Thick cuts for roasts and stews, where time rewards you with softness.
Angles matter too, so slice across grain for tender bites.
Storage, Labeling, and Reheating Without Losing Quality
By the time you’ve sliced a week’s worth of dinners, the next win is storing it right so it tastes like you just cooked it. Cool food fast, then pack it flat in airtight bags or shallow containers to protect texture. Use portion labeling so you grab what you need, not the whole stash. Note the cut, sauce, date, and servings. Keep simple temperature logs if you batch-cook often, just a quick note of when it hit the fridge or freezer.
Stack by priority: freshest in front, freezer stuff in back. Reheat gently. Add a splash of broth or water, cover, and warm low and slow on the stove or microwave at 50 to 70 percent power. Stir once. Rest a minute. Then eat. High-fives to future you.
Cleaning, Maintenance, and Keeping Blades Razor-Sharp
Start smart and keep it sharp: your slicer only treats you right if you treat it right. Unplug it, pop off the blade, and wash parts with warm soapy water, then dry like you mean it. Moisture’s the enemy. For quick cleans between batches, a spritz of vinegar water works great, and it doesn’t leave weird smells.
- 1) Do regular blade care: wipe, dry, then a tiny food-safe oil on the hub so things don’t seize.
- 2) Practice edge maintenance: hone lightly with a ceramic rod, and sharpen when slices start to crush instead of glide.
- 3) Keep crumbs out: a soft brush clears gears and the carriage.
Store the blade in a sleeve. Label your sharpening dates. Sounds nerdy, but your future self cheers.
Frequently Asked Questions
How Do I Adapt Slicing Techniques for Arthritic or Limited Hand Mobility?
Use non-slip boards, stabilize food with a spike, and choose ergonomic grips and adaptive utensils. Opt for rocker knives, guard rails, and pre-cut produce. Slice slowly, keep blades sharp, use finger guards, and consider food processors or mandolines with safety features.
Are There Kid-Safe Ways to Involve Children in Slicing Prep?
Yes. You can use child safe knives, soft foods, and a stable cutting board with non-slip mats. Teach claw grips, start with bananas or cucumbers, emphasize slow, supervised cutting, and set clear rules. Celebrate progress and safety.
What Budget Tools Mimic Pro Slicers Without High Cost?
You’ll mimic pro slicers with manual mandolins featuring safety guards and interchangeable blades. Pair them with adjustable foodmills for uniform purées and riced veggies. Add a julienne peeler and bench scraper to boost speed without spending much.
How Do I Slice Efficiently in Tiny or Shared Kitchens?
Use vertical cutting: stabilize a bowl, slice over it with a compact mandoline. Mount a magnetic board for knives and peelers. Batch-prep, stackable containers, and collapsible colanders save space. Clean-as-you-go, share time slots, and label everything.
Can I Apply These Techniques During Camping or Off-Grid Cooking?
Yes—you can. Use stable boards, clamp bowls with towels, and pre-sharpen blades. Try nesting containers, foldable cutting mats, and glove protection. These camping hacks make off grid slicing safer, faster, and cleaner with minimal gear.
Conclusion
You’ve got the tools, the patterns, and the game plan, so now it’s just about slicing smart and staying safe. Stack, plank, shave, repeat. Label your portions, keep blades sharp, and you’ll fly through prep without breaking a sweat. Your food cooks evenly, tastes better, and cleanup’s quicker. Nice. Practice a couple sessions and you’ll feel the rhythm kick in, like muscle memory. Then dinner? It practically makes itself. Well, almost. You still gotta eat it.


