You’ve probably turned perfectly good nuts into butter when you weren’t looking, or watched your pie dough transform into a sad, gluey mess in seconds. Yeah, continuous processing does that. But here’s the thing: your food processor’s got a secret weapon that most folks ignore. That pulse button? It’s the difference between chunky perfection and culinary disaster. And once you master it, you’ll wonder how you ever survived without knowing this one simple trick.
Key Takeaways
- Use short, snappy one-second pulses with rest intervals between bursts to prevent ingredients from turning to mush.
- Position your thumb on the pulse button for precise control, applying variable pressure to regulate intensity and texture.
- Monitor texture visually during each pulse cycle and stop immediately when desired consistency is reached to avoid over-processing.
- Cut ingredients into uniform sizes and group similar-texture items together, processing harder vegetables before softer ingredients.
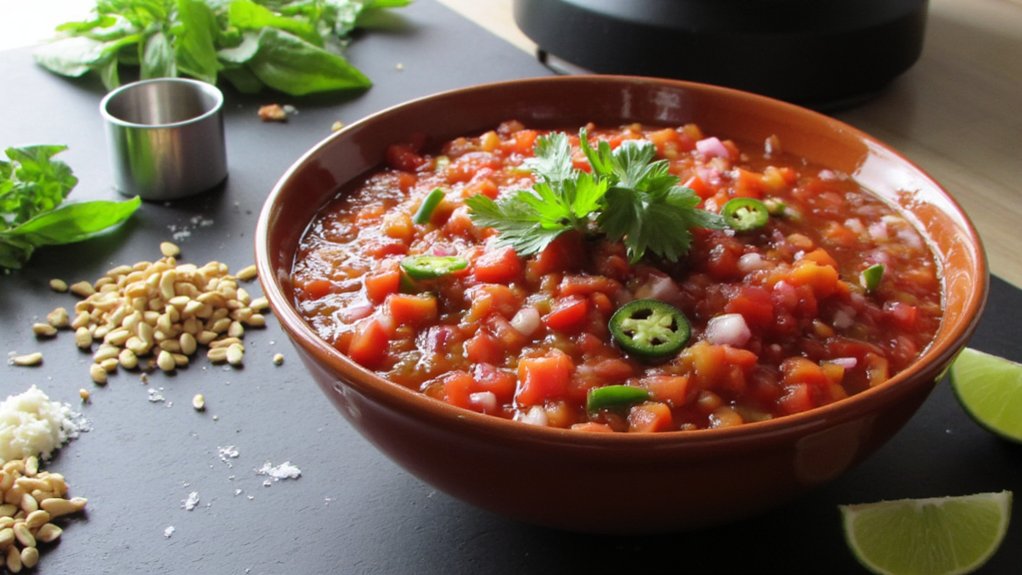
- Match pulsing strategy to recipe goals—rapid taps for nuts and seeds, longer pulses for chunkier results like salsa.


Why Continuous Processing Leads to Disappointing Results
If you’ve ever let your food processor run continuously, you know the sinking feeling when you lift that lid and find mush instead of the perfectly chopped ingredients you were aiming for. That’s the danger of continuous blending. When you let that blade spin without stopping, two things happen simultaneously: your food gets pulverized into oblivion, and heat buildup from friction starts cooking everything from the inside out. Your fresh veggies transform into sad, soggy paste. Your nuts become nut butter when you wanted chunks. The texture you’re dreaming of? Gone. That’s why pulsing matters so much—it gives you control, lets ingredients stay distinct, and keeps temperatures reasonable. Trust me, your taste buds will thank you for learning this simple but game-changing technique. For best results, remember that motor power and performance play a crucial role in how efficiently your food processor handles different textures and ingredients.
Understanding Your Food Processor’s Power and Speed Settings
Most food processors aren’t created equal—and neither are their power settings. Your machine’s motor variations can range dramatically depending on the brand and model you’re working with. Some have beastly motors that’ll pulverize anything in milliseconds, while others operate at a more leisurely pace.
Speed calibration matters way more than you’d think. You’ve gotta know whether your processor runs at 500 watts or 1,200 watts, because that knowledge shapes everything about how you’ll approach pulsing. Check your manual or look up your specific model online—seriously, it’ll save you from turning your ingredients into mush.
Once you understand your machine’s capabilities, you’re equipped to pulse smarter. You’ll know exactly how many quick bursts you need before things get dangerously processed.
When comparing processor motors, remember that motor power and performance influence not just speed, but also how evenly and efficiently your food is chopped or pureed.
The Science Behind the Pulse Function
Now that you’re clued in on what your machine can actually do, let’s talk about the magic happening inside the bowl—because pulsing isn’t just mashing a button like you’re trying to beat a video game boss. There’s actual science at work here. When you pulse, you’re harnessing pulse physiology to create intermitent bursts of power rather than continuous grinding. Your motor gets brief rest periods between pulses, which relates directly to motor thermodynamics—basically, it keeps things cooler and prevents your blade from turning everything into baby food. Those quick on-and-off cycles give your ingredients room to settle and redistribute, letting you see what’s actually happening. It’s controlled chaos. Short bursts mean better texture control. You’re not just processing; you’re orchestrating the perfect consistency. Many modern kitchen appliances, like coffee machines, rely on one-touch brewing or programmable features to deliver similar precision and control for optimal results.


How to Hold and Operate the Pulse Button Correctly
Now here’s where technique really matters—you’ve gotta grip that pulse button like you mean it, positioning your finger right on top so you’ve got full control and can feel exactly when to release. Short, snappy pulses are your best friend; think of it like tapping out morse code rather than holding down some kind of food-obliterating death grip, because one long squeeze’ll turn your perfectly chopped vegetables into baby food faster than you can say “oops.” Keep your eyes on the prize while you’re pulsing, watching how the texture’s changing inside that bowl, and you’ll develop an almost magical sense for when your ingredients are just right—not a second too soon, not a moment too late. Choosing a model with variable speed settings can help you control the texture even more precisely, preventing over-processing and giving you better results.
Finger Placement and Grip
Getting your grip right on that pulse button is where the magic really starts to happen. Your thumb positioning determines everything—literally everything. You’ll want to rest your thumb comfortably on top, not cramped or stretched. Think of it like a gentle handshake, not a death grip.
Pressure control comes next. You’re not trying to pulverize that button into submission. Instead, use light, controlled taps that give your food processor short bursts of power. It’s all about rhythm and restraint, baby.
A well-practiced pulse technique can help you achieve the same kind of consistent particle sizes that burr grinders offer, ensuring your ingredients are processed just right for flavor and texture.
| Grip Type | Thumb Position | Best For |
|---|---|---|
| Light tap | Relaxed on top | Nuts, herbs |
| Medium pulse | Firm contact | Vegetables |
| Quick burst | Fingertip tap | Delicate mixing |
| Steady hold | Curved pressure | Dough |
| Control tap | Balanced stance | Precision work |
Master this technique and you’ll never over-process again.
Short, Controlled Pulses
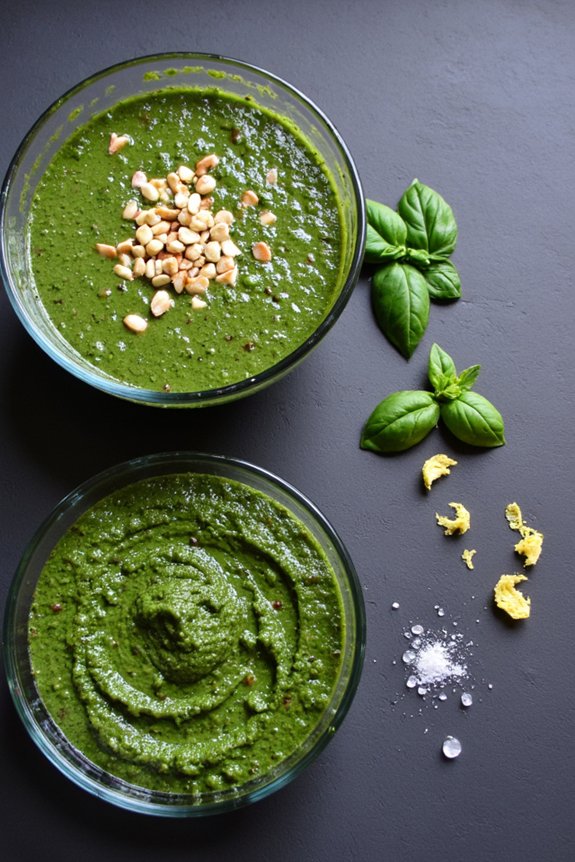
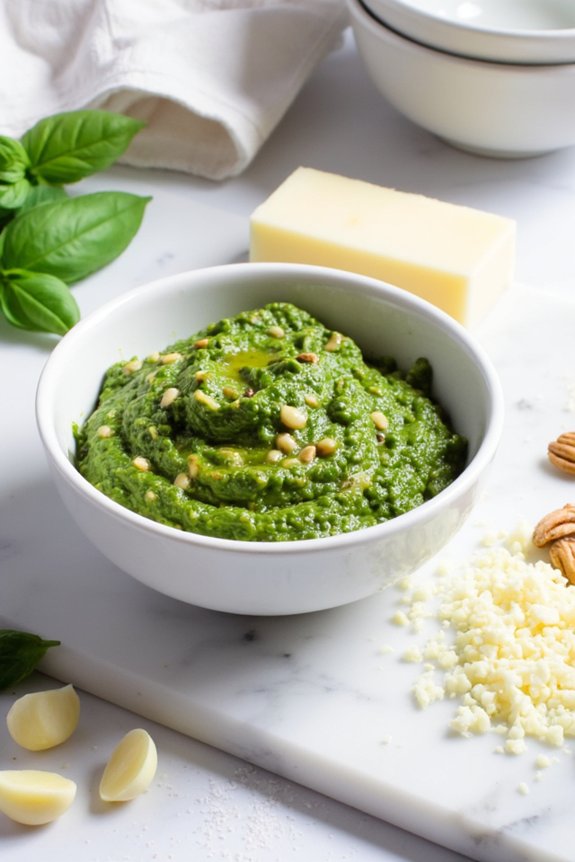
Once you’ve got that grip down, it’s time to learn the actual art of pulsing—because there’s a huge difference between mashing the button like you’re angry at it and using it like you know what you’re doing. The secret? Short bursts at controlled intervals. Don’t go trigger-happy. Instead, press the pulse button for just one or two seconds, then release. Let the blade do its thing between pulses. This rhythm prevents over-processing and gives you way more control over your final texture. You’re basically having a conversation with your food processor, not waging war against it. Think of it like morse code: tap, pause, tap, pause. That restraint? It’s what separates silky pesto from accidentally-made paste. Master this technique, and you’ll never pulverize your ingredeints again.
Monitoring Texture During Processing
The real trick to mastering your food processor is keeping your eyes peeled while you’re pulsing, because what happens between those button presses matters just as much as the presses themselves. You’ve gotta watch for visual cues—the way your ingredients transform from chunky to smooth. Stop and peek inside between pulses. Really look at it. Don’t just guess. Your tactile feedback counts too; lightly shake the bowl and feel how the texture’s evolving. Is it still too rough? Keep going. Getting closer to that creamy consistency you want? Ease off now. This isn’t rocket science, but it demands your full atention. Stay present, stay focused, and you’ll nail that perfect texture everytime without accidentally turning your masterpiece into baby food.
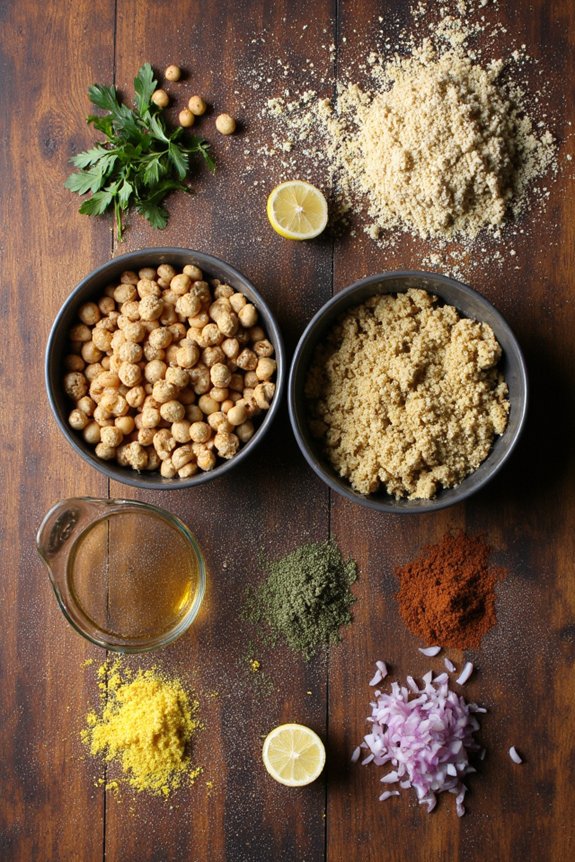
Preparing Ingredients for Optimal Pulse Processing
Prepping your ingredients before you hit that pulse button might sound like extra work, but it’s genuinely the difference between silky-smooth hummus and chunky disappointment. Start with ingredient rinsing—don’t skip this step. Wet beans and veggies process way more evenly than dry ones. Cut everything into similar-sized chunks. Seriously. Uneven pieces mean some parts turn to mush while others stay stubbornly whole, which defeats the entire purpose of pulsing. Storage timing matters too. Room-temperature ingredients blend smoother than cold ones straight from the fridge. Cold stuff’s got less give, making it harder to achieve that perfect consistency you’re after. Drain canned items thoroughly—excess liquid throws off your texture. These simple prep moves? They’re your secret weapon against food processor frustration.


Mastering Texture Control for Different Recipes
Now here’s where things get really fun, because mastering texture control is basically like being a culinary wizard, and it all comes down to how often you pulse and for how long. You’ll discover that different ingredients need different rhythms—some veggies want quick, snappy pulses while nuts and cheeses demand a more patient, deliberate approach—and once you nail this timing thing, you’ll start seeing how you can create totally consistent textures even when you’re mixing ingredients with completely different densities and hardness levels. The trick is learning which recipes call for what kind of processing, whether that’s a chunky salsa or a smooth pesto, because one wrong pulse can turn your masterpiece into an unsalvageable mush, and that’s something you definitely want to avoid.
Pulse Frequency and Timing
Getting the pulse frequency just right is where your food processor transforms from a blunt instrument into a culinary precision tool. You’re not just mashing things anymore—you’re orchestrating texture. Think of pulse intervals like a drummer setting the beat: quick, rapid taps work great for nuts and seeds, while longer pulse patterns give you chunkier results for salsa or coleslaw. The timing’s everything, really. Short bursts, maybe one second each, keep you in control. If you’re aiming for something smoother, try two-second intervals with brief rests between. It’s almost musical when you get it right. Too many pulses? You’ve got baby food. Too few? You’re still chopping with your processor, which defeats the purpose. Practice makes perfect, and soon you’ll pulse like a pro.
Texture Consistency Across Ingredients
Once you’ve mastered that drumming rhythm, you’ll realize that different ingredients are like different band members—they all need their own tempo to sound right. Carrots? They’re the bass—they need more pulses to break down properly. Herbs are your delicate cymbals; one pulse and they’re done. The secret to achieving that perfect mouthfeel balance is understanding each ingredient’s personality. You want particle uniformity without turning everything into mush, right? So here’s the trick: group similar textures together. Pulse your harder veggies first, then add softer stuff toward the end. This way, you’re not over-processing the delicate bits while waiting for the dense ones to catch up. It’s like conducting an orchestra where evry musician knows exactly when to jump in.
Recipe-Specific Processing Methods
Different recipes demand different moves, and that’s where your food processor really shows its personality. You’ve gotta match your pulsing strategy to what you’re actually making.
- Doughs and batters: Use short pulses to combine ingredients without overworking. Keep those ingredient ratios spot-on, or you’ll end up with hockey pucks instead of fluffy biscuits.
- Salsas and sauces: Pulse until you hit that sweet spot between chunky and smooth. It’s like Goldilocks, but delicious.
- Nut butters: Go long and steady. Equipment maintenance matters here since you’re asking your processor to work hard, so don’t skimp on cleaning between batches.
The key? You’re not just pressing a button; you’re conducting a symphony of texture. Listen to that motor hum. Feel the rhythm. Your recipes’ll thank you.
Common Over-Processing Mistakes and How to Avoid Them
You’ve probably experienced that moment when your food processor transforms perfectly good ingredients into something resembling baby food—and it happened in about two seconds flat. The culprit? You didn’t pulse. Instead, you hit the continuous button like you’re trying to launch a rocket.
Here’s the thing: most over-processing happens because you’re impatient. You’re not giving ingredients time to breathe between pulses. Start with short bursts, checking your progress constantly. That’s where knife skills matter—knowing what texture you’re aiming for helps you stop at the right moment.
Temperature control plays a role too. Warm ingredients process faster than cold ones, so keep everything chilled when possible. It’s the difference between chunky salsa and regrettable mush.
Pulse Techniques for Nuts, Seeds, and Nut Butters
Nuts and seeds are where the pulse technique really shows its stuff—they’re forgiving enough to let you learn, but finicky enough to keep you honest. You’ve got to respect their power. Here’s what’ll transform your results:
- Batch grinding: Work in smaller portions instead of dumping everything in at once. You’ll get way more control and consistent texture throughout.
- Short pulses: Hit that button for one, maybe two seconds. Pause. Check your progress. Repeat until you’ve nailed it.
- Flavor infusion: Toast your nuts or seeds first, then pulse them. The warmth releases oils and deepens flavors beautifully.
The secret? Don’t get greedy. Those nutty little guys go from perfect to paste in like two pulses. Stay patient, stay attentive, and you’ll master nut butters that’ll blow store-bought stuff out of the water.
Creating Perfect Pie Dough and Pastry Crusts
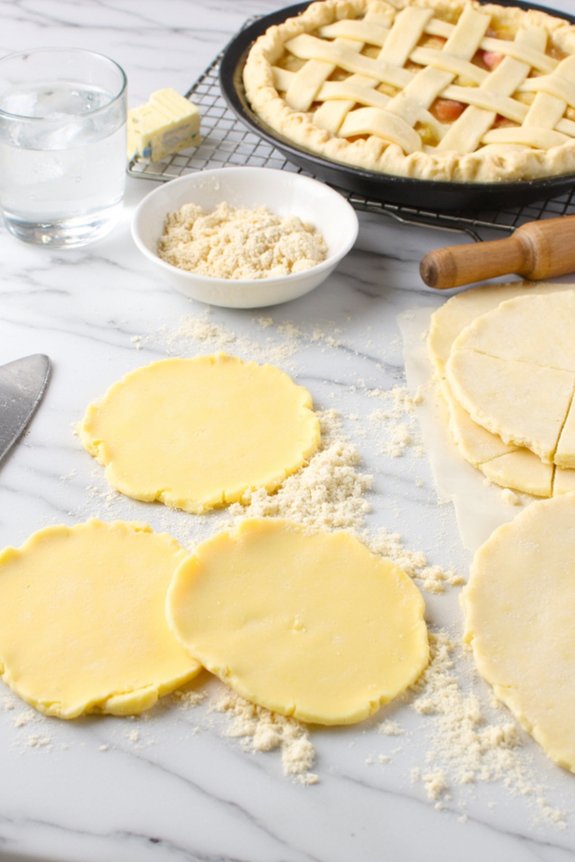
Pie dough is where the food processor becomes your secret weapon, and it’s honestly kind of the opposite of what you just learned with nuts and seeds. You’re not trying to break things down into powder. You want tiny, pea-sized butter bits suspended throughout your flour. That’s what creates those gorgeous flaky layers everyone dreams about.
| Step | What to Do | Why It Matters |
|---|---|---|
| Pulse flour and salt | Keep it quick | Prevents gluten development |
| Add cold butter | Pulse gently 8-10 times | Maintains pea-sized pieces |
| Add liquid slowly | Pulse until just combined | Keeps dough tender |
Here’s the trick: don’t overwork it. Pulse until everything barely comes together, then stop immediately. Freezing dough for at least thirty minutes before rolling helps everything relax and creates superior flaky layers. Your future pie crust will thank you.
Achieving Ideal Consistency for Sauces and Salsas
Transform your salsa from watery disappointment to restaurant-worthy perfection with the right food processor technique.
You’ve got this. Here’s how:
- Master the pulse method — Short bursts create ideal chunk size instead of mushy goop. Think chunky, not paste.
- Control your ingredients’ temperature — Room temperature tomatos and peppers pulse more evenly than cold ones straight from the fridge.
- Know when to stop — One pulse too many ruins everything. Seriously.
The secret? Pulse in intervals. Watch your mixture transform. You’ll notice when it’s just right—that perfect balance between texture and flow. Don’t overthink it. Your salsas and sauces’ll have that homemade, artisanal vibe that makes people ask for your recipe. Temperature control keeps flavors bright while proper chunk size delivers satisfying texture. You’re creating magic here, one pulse at a time.
Frequently Asked Questions
What Food Processor Models Work Best With the Pulse Technique for Home Cooks?
You’ll find that high-end multifunctional models offer superior pulse control, though budget-friendly options work well too. Compact units are ideal if you’re short on space, and they’re all capable of mastering this technique.
How Often Should I Clean My Food Processor Between Pulse Processing Batches?
You should clean your food processor after each batch to maintain proper blade hygiene and prevent flavor transfer. Regular cleaning frequency guarantees peak performance and food safety during your pulse processing sessions.
Can I Use Pulse Technique With a Mini Food Processor or Blender?
You can use the pulse technique with mini choppers, though you’ll have limited capacity. However, blender limitations make pulsing less effective—blenders aren’t designed for intermittent processing like food processors are.
What’s the Ideal Pulse Duration in Milliseconds for Different Ingredient Types?
You’ve got to pulse like you’re tapping morse code—short bursts of 500-800ms for vegetables, 300-500ms for nuts, and 200-300ms for herbs. This texture control keeps you’re ingredients perfectly chopped, not mushed.
Does Pulse Processing Take Longer Than Continuous Processing Overall?
No, you’ll actually finish faster with continuous processing. However, you’re trading speed for superior texture control and processing time management, which prevents over-processing and gives you better results.
Conclusion
You’ve got this pulse thing down now—you’re not gonna mess up another batch of guacamole or pie crust. The secret’s hitting the button right: quick taps, visual checks, patience. You’re basically teaching your food processor to play nice instead of turning everything into sad mush. Master this technique and you’ll have the baking and cooking chops to truly impress yourself, friend.


