
Unplug your grinder and run uncooked rice through it for about thirty seconds to dislodge stuck particles and absorb oils. Dump the rice, wipe everything down with a dry cloth, then reassemble. For burr grinders, you’ll also want to carefully lift out the burrs and give ’em a quick wipe. Do a test grind with a few beans to make sure everything sounds right and tastes fresher. Stick with this weekly habit, and you’re looking at better flavor plus a longer-lasting machine—but there’s definitely more tricks to reveal.
Key Takeaways
- Unplug your grinder, then run uncooked rice for 30 seconds to dislodge oils and stuck particles quickly.
- Dump the rice and wipe interior surfaces with a dry cloth to remove loosened residue completely.
- Use a small brush to scrub hard-to-reach spots and crevices where oil buildup hides most.
- Wipe the exterior with a microfiber cloth for a polished finish without streaks or residue.
- Perform a quick test grind with fresh beans to verify smooth texture and consistent grinding results.

Why Regular Cleaning Matters

Most coffee lovers don’t realize how often they should be cleaning their grinders—and honestly, that’s where things start going downhill. When you skip regular cleanings, old coffee residue builds up inside, and that’s basically asking for stale, bitter-tasting coffee every morning. Gross, right?
Here’s the thing: grinds retention happens naturally in your machine. Leftover particles get stuck in crevices and start oxidizing, which totally wrecks your flavor consistency. You’re effectively brewing yesterday’s coffee mixed with today’s beans. Not ideal.
Regular cleaning prevents this buildup and keeps your grinder running smoothly. You’ll notice a real difference in taste almost immediately, and your machine’ll last way longer too. Plus, it just takes a few minutes. Your future self—and your taste buds—will thank you.
Most experts recommend regular cleaning at least weekly to prevent oil buildup and maintain the quality of your coffee grounds.
What You’ll Need to Get Started

Before you start scrubbing away, you’ll want to gather a few things to make the job easier and safer. You’re gonna need some basic tools like a small brush or old toothbrush, a dry cloth, and maybe a can of compressed air, plus you should know about a couple safety steps to keep yourself and your grinder in one piece. We’ll break down what’s essential, what’s nice to have, and how to stay safe while you’re getting everything spick and span. If you’re working with an electric grinder, be sure to check for removable, dishwasher-safe bowls or parts, as this can make cleaning even quicker and more effective.
Essential Tools Required
To get your grinder sparkling clean, you’ll need a surprisingly short list of items. Honestly, you probably already have most of this stuff lying around your kitchen.
Here’s what you’re working with:
- A small brush or old toothbrush, perfect for scrubbing out stubborn grounds from hard-to-reach spots
- A can of compressed air, which’ll blast away those pesky particles without you having to disassemble everything
- A dosing scale and some manual tamping tools if you want to be thorough about maintaining your equipment
That’s really it. You don’t need fancy cleaning solutions or expensive gadgets. The brush tackles dried residue, compressed air handles the fine dust, and your dosing scale makes certain you’re measuring accurately after cleaning. Keep everything within arm’s reach before you start, and you’ll breeze through this whole process.
If you’re a fan of precision in your coffee routine, you might also appreciate temperature control features like those found in modern electric kettles, which can further enhance your brewing experience.

Optional Cleaning Supplies
While the essentials we covered will definitely get the job done, a few extra supplies can make the whole experience way more enjoyable. You don’t need much, but these additions really help.
| Supply | Purpose | Why It Helps |
|---|---|---|
| Eco friendly wipes | Gentle cleaning | Removes residue safely |
| Travel sized brush | Detail work | Reaches tight spaces |
| Microfiber cloth | Final polish | Leaves no streaks |
Consider grabbing eco friendly wipes because they’re perfect for wiping down the exterior without harsh chemicals. A travel sized brush gets into those annoying crevices where regular cloths can’t reach. And honestly, a microfiber cloth gives your grinder that professional shine at the end.
These extras aren’t mandatory, but they’ll transform your cleaning routine from just functional into something you don’t totally dread doing. If you use coarse grounds for French press brewing, a detail brush is especially handy for clearing out larger particles that can get stuck in your grinder’s burrs.
Safety Precautions First
Now that you’ve got your optional supplies sorted, it’s time to talk about the stuff you really can’t skip—safety. Before you jump into cleaning mode, here’s what matters most:
- Always unplug appliances before touching any internal parts. Seriously, don’t mess with electricity and moving blades at the same time.
- Wear gloves to protect your hands from sharp burrs and any residual grounds that might be hanging around inside.
- Let your grinder cool down if you’ve been using it. Hot metal and bare hands aren’t friends.
Taking these precautions might seem like extra steps, but they’ll keep your fingers intact and your cleaning session incident-free. You’ll feel way better tackling the job when you know you’re doing it safely. If your grinder has any removable parts or attachments, check whether they come with warranty coverage for parts and labor to avoid any accidental damage costs during cleaning.
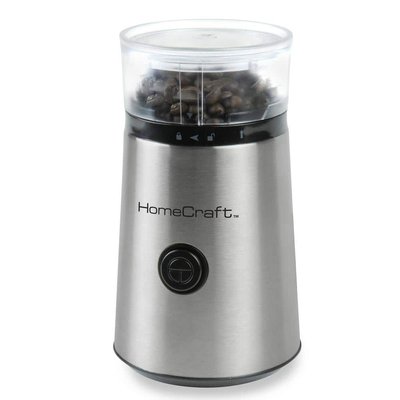
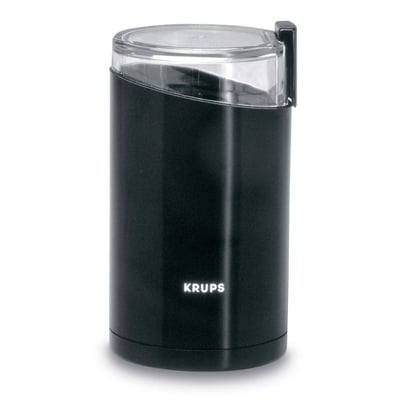
The Dry Run Method for Blade Grinders

Ever wonder why your blade grinder tastes like last week’s espresso? The dry run method is your secret weapon. Here’s how it works: grab some uncooked rice or that stale popcorn kernel hiding in your pantry. Pour it in and run your grinder for about thirty seconds. The rice will knock loose all those stuck coffee particles clinging to the blades and chamber walls. This simple trick maintains your blade balance while improving grind consistency for your next brew. Dump out the rice, wipe the inside with a dry cloth, and you’re done. No water, no mess, no complicated steps. Your grinder’s basically reset and ready to deliver that fresh coffee taste you’ve been missing.
Cleaning Burr Grinders Effectively

Burr grinders need a bit more love than blade grinders, so you’ll want to disassemble yours and actually remove those burrs for a proper cleaning. Once you’ve got ’em out, here’s where the rice method comes in handy—run some uncooked rice through your grinder to absorb all the oily residue and old grounds that’ve been hanging around in there, and your grinder’ll thank you with fresher-tasting coffee.
Disassemble and Remove Burrs
To really get your grinder clean, you’ll need to take it apart and access those burrs where all the grime hides. It might seem intimidating, but here’s the thing—most grinders are designed to come apart pretty easily.
- Unplug your grinder first (safety’s important), then remove the hopper and any remaining beans
- Locate the burr assembly, usually held by a few screws or a locking ring that twists counterclockwise
- Carefully lift out the burrs and set them aside on a clean cloth
Before reassembling, check your burr alignment to make sure proper grinding. While you’re in there, consider if your motor lubrication looks dried out. You don’t need much, just a tiny bit of food-grade oil on moving parts. Once everything’s clean and properly aligned, your grinder’ll run like new again.


Rice Method Deep Clean
Running uncooked rice through your newly disassembled grinder is basically the secret weapon for getting those burrs sparkling clean. Pour a handful of raw rice into the hopper and let it rip for about thirty seconds. The grain abrasion works wonders, grinding away stubborn coffee residue that’s clinging to your burrs like it owns the place.
Here’s the cool part: rice polishing naturally absorbs oils and particles without damaging anything. Once you’re done, dump out the rice, and you’ll notice it’s turned slightly brown, which means it’s doing its job. Wipe down the burrs with a dry cloth afterward. Your grinder will feel refreshed and ready to tackle that next batch of beans with renewed enthusiasm.
Removing Stuck-On Oils and Residue

After grinding coffee day after day, your grinder builds up oils and residue that can go pretty stubborn. That oily buildup affects your coffee’s taste and can leave a nasty container odor that lingers. Here’s how to tackle it:
- Use a damp cloth with a bit of dish soap to wipe down the burrs carefully, avoiding any electrical parts.
- Scrub the hopper and container with warm soapy water, getting into all those crevices where oil hides.
- For stubborn spots, let parts soak for five minutes before scrubbing again.
Dry everything thoroughly before reassembling. You’ll notice your coffee tastes fresher immediately. Plus, that stale smell? Gone. Your grinder’ll thank you for the attention, and honestly, so will your taste buds.
Reassembling and Testing Your Grinder
Now that your grinder’s all clean and dry, it’s time to put it back together and make sure everything works like it should. Start by reversing your disassembly steps, carefully reattaching the burrs or blades first. Make sure they’re lined up proper, then screw everything back in snug but not crazy tight.
| Step | Action |
|---|---|
| 1 | Reattach burrs with alignment check |
| 2 | Secure all fasteners firmly |
| 3 | Plug in and test grind briefly |
| 4 | Listen for unusual sounds |
| 5 | Check consistency of grounds |
Next, do your test grind with a small amount of beans. Listen for any weird grinding sounds that weren’t there before. The texture should feel smooth and consistent. If everything sounds normal and the grounds look good, you’re golden. Your grinder’s basically brand new now.
Maintenance Tips to Extend Grinder Life
You’ll want to clean your grinder regularly to keep it running smooth and your coffee tasting fresh. Preventive maintenance is honestly the best investment you can make in your machine’s longevity. Here’s what’ll help you extend your grinder’s life and keep that warranty preservation intact:
- Clean out the hopper weekly to prevent oil buildup and staleness
- Run rice or specialized grinder cleaner tablets monthly for deep cleaning
- Check burrs every few months for wear and proper alignment
Don’t let coffee residue accumulate inside—it’ll gunk things up faster than you’d think. By staying on top of these simple tasks, you’re basically giving your grinder the TLC it deserves. Your morning brew will thank you, and your machine’ll keep grinding like a champ for years.
Frequently Asked Questions
Can I Use Water to Clean My Coffee Grinder Without Damaging It?
You shouldn’t use water directly on your grinder; water damage and rinsing risks can harm internal components and the motor. Instead, you’ll want to use dry methods like compressed air or a brush to safely remove coffee residue.
How Often Should I Clean My Grinder to Maintain Optimal Performance?
You should do daily maintenance after each use by wiping burrs clean. For peak performance, you’ll want a seasonal deep clean every few months to remove stubborn buildup and guarantee consistent grinding quality.
What’s the Difference Between Cleaning Blade and Burr Grinders?
You’ll find blade grinders need simpler blade maintenance since they lack moving parts, while burr grinders require careful burr calibration to preserve grinding consistency. Burrs demand more detailed cleaning attention than blades do.
Is It Safe to Use Cleaning Tablets or Specialized Grinder Cleaning Products?
You’ll find grinder safe detergents work well, but you should avoid tablets due to tablet residue concerns. They can leave harmful buildup inside your grinder’s mechanisms, potentially affecting your coffee’s taste.
Can I Clean My Grinder While It’s Still Plugged in Safely?
No, you shouldn’t clean your grinder while it’s plugged in. You’re risking electrical hazards and potential injury. Always unplug it first. If you’re unsure about safe cleaning, consider professional servicing.
Conclusion
You’ve got this! Your grinder’ll be running like new in no time, and you’re already ahead of most coffee folks who never think about cleaning theirs. Stick with these quick methods regularly, and you’ll taste the difference in every cup. Plus, your grinder’ll last way longer when you actually take care of it. So go brew something delicious!


