Perfect grill marks come down to three essentials: preheat your grill to 375–400°F for a solid 10–15 minutes, pat your food dry and oil it lightly before it hits the grates, then let it sit undisturbed for 3–4 minutes per side. Rotate 45 degrees twice to create that restaurant-style crosshatch pattern everyone drools over. Skip the constant flipping—patience is your secret weapon here. Clean your grates regularly so they perform consistently every single time. Stick around though, because there’s plenty more ground to cover on nailing this technique.
Key Takeaways
- Pat food dry, bring to room temperature, and coat lightly with high-heat oil before grilling.
- Preheat your grill to 375–400°F for 10–15 minutes until fully stabilized for optimal searing.
- Let food sit undisturbed for 3–4 minutes, then rotate 45 degrees twice for crosshatch patterns.
- Use the lid strategically to lock in heat and deepen grill marks without constant flipping.
- Clean grates after each use and calibrate monthly to maintain consistent heat and performance.


Choosing the Right Indoor Electric Grill
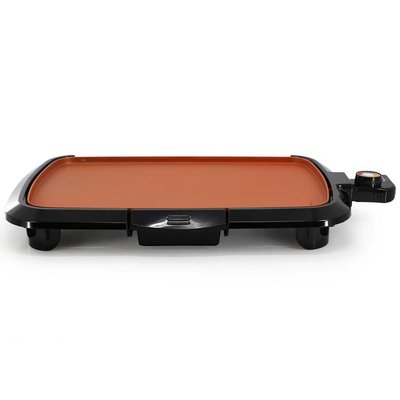
When you’re hunting for the perfect indoor electric grill, you’ll quickly realize that not all grills are created equal—and that’s actually good news for you. Look for models with nonstick coatings that’ll make cleanup a breeze and help your food slide around without sticking. You’ll also want to prioritize smoke reduction features, since nobody wants their kitchen smelling like a barbecue joint for three days straight. Check the surface size first. Too small, and you’re cooking in batches all night. Too big, and it’ll eat up your counter space like nobody’s business. Temperature control matters big time too. You need consistent heat to nail those grill marks. Finally, read some reviews from actual users who’ve dealt with the thing long-term. Their insights are pure gold. For added convenience and safety, seek out grills with removable, dishwasher-safe parts and cool-touch handles to make both cleaning and handling much easier.
Preheating Your Grill for Optimal Results
You’ll want to crank your grill to the right temperature before anything touches that cooking surface, and yeah, it actually makes a difference. Most indoor electric grills hit their sweet spot somewhere between 350 and 400 degrees, though you’re gonna want to check your manual because every grill’s got its own personality. Give it a solid 5 to 10 minutes of preheating time, and you’ll be rewarded with those gorgeous, crispy grill marks that’ll make your food look like it came straight from a fancy restaurant instead of your kitchen counter. Preheating is a critical step, just like with induction cooktops where reaching the correct temperature ensures optimal cooking results.
Temperature Settings Matter
Getting those gorgeous grill marks starts before you ever slap meat onto the cooking surface, and that’s where your temperature settings become your secret weapon. You’ve gotta understand that not all heat is created equal on your electric grill.
- Dial calibration – Check if your grill’s temperature dial actually matches reality, since some run hotter or cooler than advertised
- Create heat zones – Use different areas of your grill for varying temperatures, giving you flexibility
- Medium-high is your sweet spot – Around 375-400°F gets you those beautiful marks without charring
- Let it stabilize – Wait a full 10-15 minutes after preheating so temps stay consistent
Getting the temperature right means your food makes proper contact with the grates. That contact is what burns those perfect lines into whatever you’re cooking. For the best results, always preheat your grill to at least 1500 watts for larger meals, since higher wattage leads to faster and more even heating across the cooking surface.

Wait Time Importance
Most home cooks skip this step and wonder why their grill marks look like they were drawn by a toddler with a crayon. Here’s the thing: patience and wait time are absolutely essential for achieving those restaurant-quality marks you’re after. You’ve gotta let your electric grill preheat fully, and I mean fully. Don’t rush it. Give it a solid 10 to 15 minutes to reach ideal temperature, depending on your model. The timing importance can’t be overstated because a properly heated grill creates that perfect sear instantly when food hits the surface. That’s where your beautiful marks come from. Without adequate preheating, your food just sorta sits there steaming instead of searing, and bye-bye grill marks. So show some restraint and let it warm up completely. For the best grilling results, make sure your grill can consistently reach at least 250°F for reliable performance, as this helps ensure both great searing and those sought-after grill marks.
Preparing Your Food for Perfect Marks
Before those grill marks can make your food look like it came straight from a fancy restaurant, you’ve gotta prep your ingredients the right way. Think of prep work as laying the groundwork for grill mark success.
Here’s what you need to do:
- Pat your food completely dry with paper towels to remove excess moisture
- Cut proteins and veggies to uniform thickness so they cook evenly
- Consider dry brining your meat a few hours ahead for better browning
- Bring everything to room temperature before grilling
Thickness uniformity matters because thin spots cook faster and won’t mark as nicely. Moisture is basically your enemy here, since wet surfaces won’t develop those crispy, beautiful marks you’re after. Take five extra minutes prepping, and your results’ll be noticeably better. For best results, try to use a griddle or grill surface that offers even heat distribution for consistent, restaurant-quality marks on all your food.
Mastering Temperature Control
Now that you’ve got your ingredients prepped and ready to go, temperature control becomes your best friend in the quest for those Instagram-worthy grill marks. Most electric grills have a dial or digital display, but here’s the thing: they’re not always perfectly accurate. Do some temperature calibration by testing your grill with a thermometer before you start cooking. You’re aiming for around 400-450°F for those beautiful sear marks.
Keep ambient humidity in mind too. On really humid days, you might need slightly higher temps since moisture can interfere with that perfect char. Let your grill preheat fully, usually 5-10 minutes. Patience pays off here. Once it’s hot, you’ll know you’re ready to lay down some seriously impressive marks that’ll make your food look professional and taste even better.
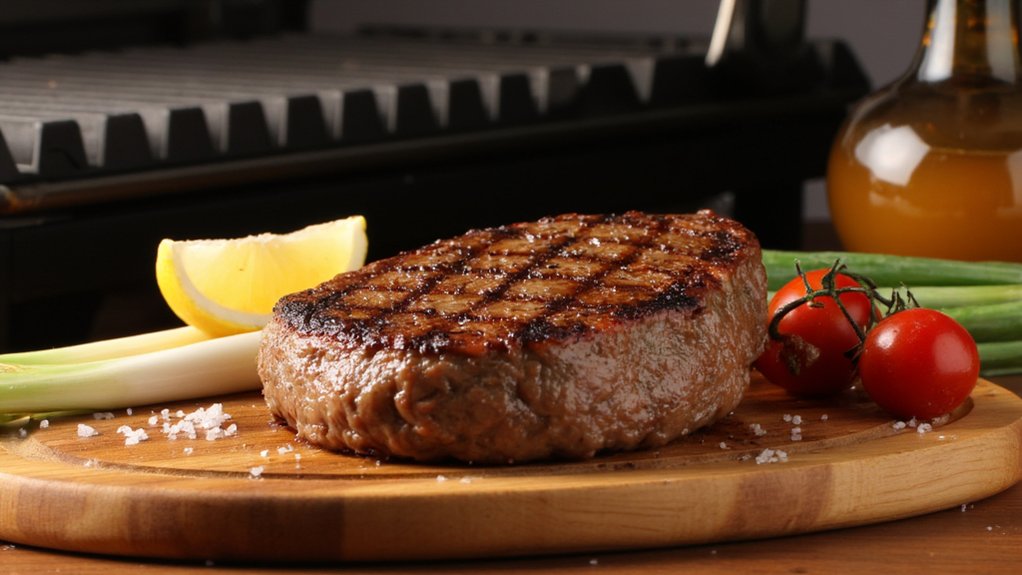
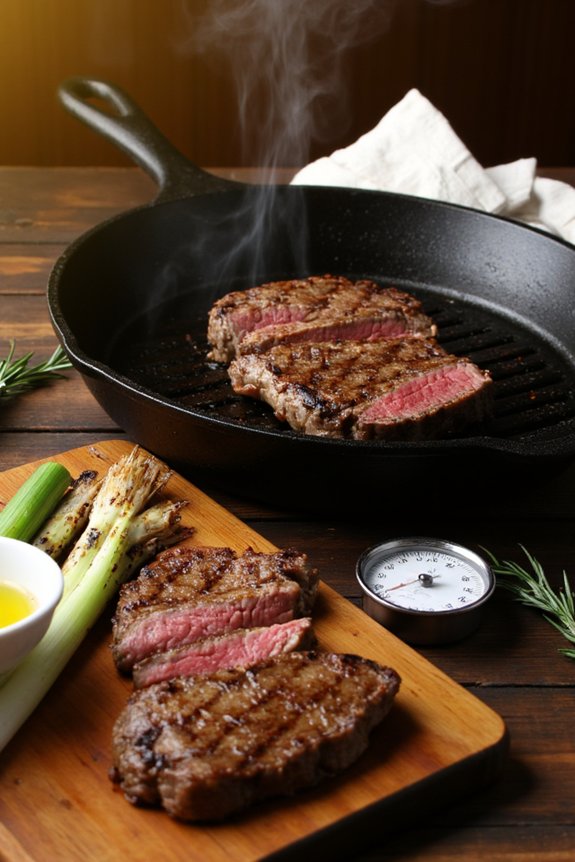
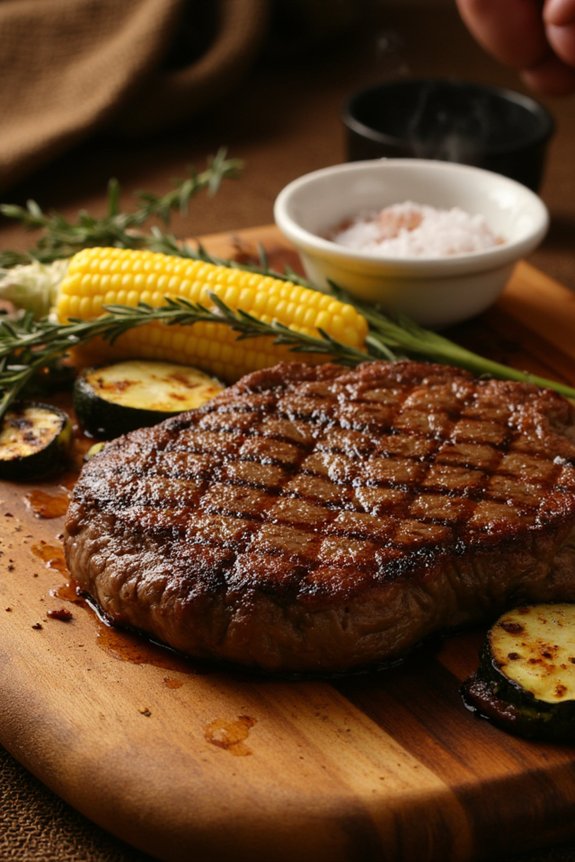
Understanding Grill Mark Timing and Technique
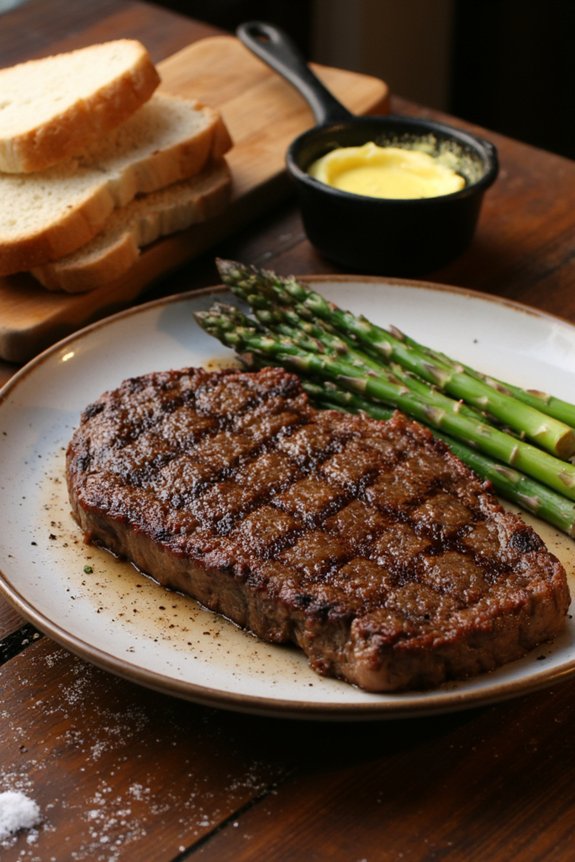
Getting those picture-perfect grill marks isn’t just about heat—it’s about nailing your timing and knowing exactly when to flip. You’ll want to let your food sit on the grates long enough to develop that beautiful sear, usually around three to four minutes depending on thickness, then rotate it at a 90-degree angle for those classic crosshatch lines that’ll make your friends think you’re a grill master. The trick is resisting the urge to constantly poke and move things around, because honestly, the less you mess with it, the better your marks’ll look.
Temperature and Timing Control
Since you’re working with an indoor electric grill, getting those perfect grill marks really comes down to two things: nailing your temperature and timing.
Here’s your game plan for temperature control and timing strategy:
- Preheat to medium-high heat – Usually around 375-400°F works best for most foods without burning them
- Give it 5-10 minutes – Let your grill reach full temperature before placing anything on it
- Don’t move food constantly – Leave items alone for 3-4 minutes per side so marks actually develop
- Use the lid strategically – Close it occasionally to lock in heat and deepen those marks
The trick is patience. You can’t rush perfection. Let the heating element do its job, and resist the urge to constantly flip and fuss with your food.


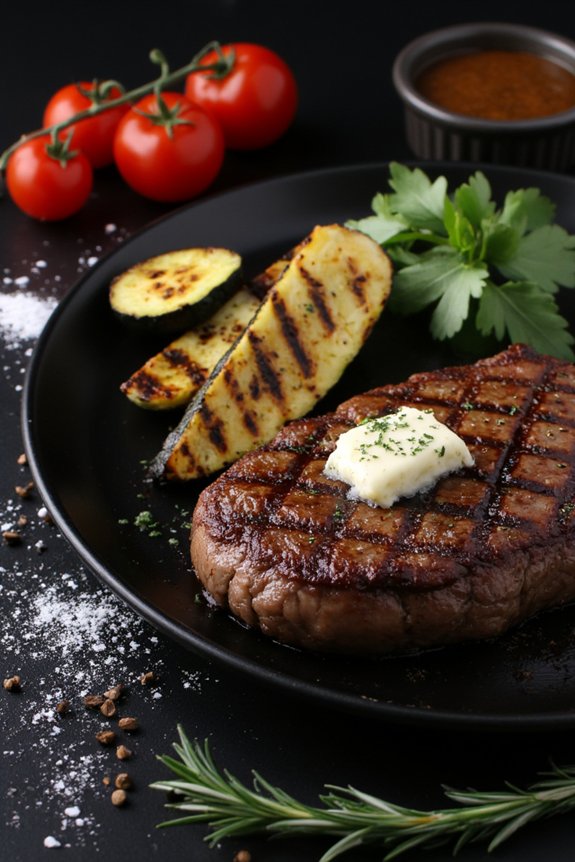
Angle and Rotation Method
Once you’ve got your timing down pat, the real magic happens when you master the angle and rotation technique. Here’s the thing: you’ll want to position your food at a 45 degree rotation across the grill grates. This creates those beautiful diagonal lines everyone admires. After about two to three minutes, rotate your food another 45 degrees to form a cross hatch pattern that’ll make your burgers and chicken look restaurant-quality. Don’t just flip and forget though. Watch how the marks develop, and adjust your rotation timing based on how quickly your grill heats. Different foods need different approaches, so stay flexible. Practice makes perfect, and honestly, you’ll nail it faster than you’d think.
The Importance of Oil and Surface Preparation
Envision this: you’ve got your electric grill all heated up, you’re ready to slap some meat on there, and then… nothing. No marks. Just disappointment. The secret? Proper prep work, my friend.
Here’s what you need to know about pan coating and surface conditioning:
- Oil your grill grates generously with high-heat oil like vegetable or canola
- Use a brush or cloth to spread it evenly across the entire surface
- Wipe down your food with a light coating of oil before placing it on the grill
- Let the grill reach full temperature, giving the oil time to bond with the grates
Dry food sticks. Oily food? That slides right into those grill lines and creates those Instagram-worthy marks you’re after. Don’t skip this step.
Common Mistakes That Ruin Your Grill Marks
You’ve nailed the prep work, but here’s where most people sabotage themselves: they make mistakes during the actual grilling that completely wipe out those beautiful marks you’re working so hard to achieve. The biggest culprit? Excessive flipping. You gotta resist the urge to constantly check on your food, trust me. Flipping too often breaks up those gorgeous sear patterns you’re creating. Another common trap is uneven searing caused by crowding the grill surface. Pack your food too close together and you’ll get steamed spots instead of crispy marks. Also, moving your items around too much prevents proper contact with those heating elements. Patience really is key here. Let your food sit undisturbed, and you’ll get the marks you deserve.
Maintenance Tips for Consistent Performance
Regular cleaning is your secret weapon for keeping those grill marks sharp and consistent every single time you cook. You’ll want to stay on top of maintenance so your grill performs like a champ, and here’s how to do it right.
- Clean the grates after each use with a grill brush while they’re still warm
- Empty and wipe down your drip pan maintenance routine weekly to prevent buildup
- Check grill calibration monthly to make certain even heat distribution across the cooking surface
- Inspect heating elements quarterly for any signs of wear or damage
Think of maintenance like brushing your teeth, except way more delicious. When you keep everything clean and properly calibrated, you’re setting yourself up for those picture-perfect marks that’ll make your guests jealous. It’s honestly not rocket science, just simple consistency.
Frequently Asked Questions
Can You Get Grill Marks on Frozen Food, or Must It Be Thawed First?
You’ll get better grill marks if you thaw your food first. Frozen steaks and thawed chicken both mark more effectively when they’re completely thawed before grilling, ensuring even heat contact and proper searing.
Do Different Food Types Require Different Grill Mark Techniques for Optimal Results?
Yes, you’ll need different techniques. For meat, guarantee proper resting before grilling. With vegetables, prep them uniformly thin. Adjust your grill’s heat and contact time accordingly for peak marking on each food type.
How Long Do Grill Marks Typically Last After Cooking Before They Fade?
Your grill marks typically fade within 5-10 minutes as the food’s surface oxidation diminishes and heat dissipates. You’ll notice their appearance duration decreases faster on moisture-rich foods, so photograph them immediately for best visual results.
Is It Possible to Achieve Crosshatch Grill Marks on an Indoor Electric Grill?
Yes, you can achieve perfect crosshatch marks on your indoor electric grill. You’ll rotate your food 45 degrees between diagonal searing sessions. This technique requires proper heat management and timing to create those distinctive intersecting lines effectively.
What’s the Best Way to Reheat Food While Maintaining Its Original Grill Marks?
You’ll want to use a gentle steam reheat method or low temp oven approach. Avoid your grill entirely when reheating to preserve those crosshatch marks you’ve worked hard to achieve on your food.
Conclusion
You’re gonna nail those grill marks now. Honestly, it’s all about prep, heat, and timing—nothing fancy. Oil your grill, get it hot, and don’t be afraid to let your food sit for a solid minute or two before flipping. You’ll mess up sometimes, and that’s fine. Just keep your grill clean between uses and you’ll be impressing folks with your indoor grilling skills in no time.


