You’ve got your grinder, you’ve got your beans, you’ve got your dreams of the perfect espresso—but where does everything actually go? Most folks just scatter their gear around the kitchen like confetti, wondering why they’re spilling grounds everywhere and can’t find their scale when they need it. Here’s the thing: organizing around your grinder isn’t just about looking cool, it’s about making your morning routine smoother than, well, espresso itself. So what’s the secret layout that’ll transform your chaotic coffee corner into a finely-tuned machine?
Key Takeaways
- Position your grinder at elbow height with bean storage, scale, and brewing equipment within arm’s reach for seamless workflow efficiency.
- Establish three zones: primary (beans, scoops, dosing), secondary (maintenance supplies, brushes), and tertiary (grounds, extraction equipment) around the grinder.
- Arrange devices counterclockwise from storage to brewing to cup, keeping filters and scales nearby to minimize unnecessary movement and steps.
- Store beans in airtight, light-blocking containers on a single shelf and implement FIFO rotation to maintain freshness and organization consistency.
- Brush burrs daily, empty grounds bin before buildup, and run cleaning tablets weekly to preserve flavor quality and station performance.


Assessing Your Grinder’s Size and Type

Before you start carving out your coffee station, you’ve gotta figure out what you’re actually working with—because trying to build the perfect setup around a grinder you haven’t properly evaluated is like baking a cake without checking your oven size. First, measure your grinder’s footprint. Does it take up a tiny corner of your counter or sprawl across half your workspace? That matters. Next, identify your burr type. You’ve got blade grinders, which are compact but messy. Then there’s burr grinders—they’re bigger, yeah, but way more consistent. Knowing whether you’re dealing with conical or flat burrs helps you understand how much space you’ll need for beans, storage, and cleanup. This intel shapes everything that comes next. Also, keep in mind that burr grinders offer adjustable settings and quieter operation compared to blade models, which can influence both your coffee quality and the overall vibe of your coffee station.
Positioning Your Grinder for Optimal Workflow
Now comes the fun part—actually figuring out where your grinder belongs in your setup. You’ll want to think about the height that feels natural for your hands, how close your beans should sit to avoid unnecessary shuffling, and whether your espresso machine can easily access the ground coffee without you doing an awkward dance across your counter every morning. Get these three elements right, and you’ve basically cracked the code to a coffee station that actually works for you instead of against you. When choosing your grinder’s spot, consider safety features and controls to ensure that the grinder is both convenient and secure for daily use.
Grinder Placement Height Matters
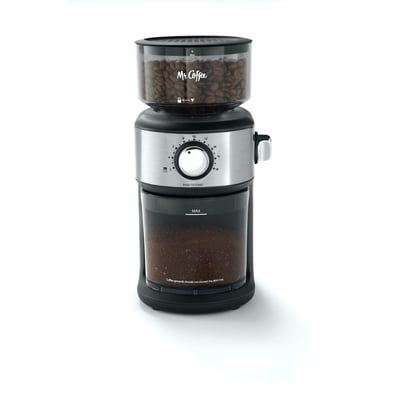
Your grinder’s height can make or break your coffee station’s whole vibe. Getting that ideal elevation right means you’re not hunching over like you’re searching for loose change on the floor. Here’s what you need to nail it:
- Position your grinder at elbow height or slightly lower for perfect arm ergonomics
- Keep your shoulders relaxed when reaching the hopper and adjusting settings
- Make sure your wrists stay neutral while operating the grinder’s buttons and controls
When everything’s dialed in correctly, you’ll feel the difference immediately. Your mornings become smoother, faster, and way less uncomfortable. Nobody wants sore shoulders before their first cup, right? Take time adjusting your setup until it feels natural and intuitive. Your future self will thank you for this small investment in comfort and efficiency. For even better results, consider how removable water tanks and trays on your coffee machine can help reduce clutter and make your workflow more efficient.

Bean Storage Proximity Strategy
Most coffee enthusiasts don’t realize that where you stash your beans matters just as much as where you put your grinder. Your bean storage should be positioned right next to your grinder for maximum efficiency. Think about it: you’re already standing there, ready to grind, so why make extra steps?
| Storage Factor | Best Practice | Why It Works |
|---|---|---|
| Distance | Within arm’s reach | Minimizes workflow interruptions |
| Container Type | Airtight containers | Preserves freshness and flavor |
| Light Protection | Light blocking canisters | Prevents bean degradation |
| Organization | Single shelf location | Keeps everything accessible |
| Rotation | FIFO system | Ensures you’re using older beans first |
Keep your airtight containers and light blocking canisters clustered together. This setup eliminates unnecessary movement, streamlines your morning routine, and honestly, makes you feel like a barista operating your own little coffee command center. For even greater efficiency and freshness, consider the double-wall insulation found in some top portable electric kettles, as it helps maintain temperature and protects your beans from environmental changes.
Espresso Machine Access Flow
Once you’ve got your beans lined up like little caffeinated soldiers, it’s time to think about where your grinder actually lives in relation to your espresso machine—because let’s face it, if you’ve gotta trek across your kitchen like you’re on some kind of bean-to-cup expedition, you’ll lose momentum faster than a shot pulls without proper tamping.
Here’s what works:
- Position your grinder directly beside your machine for minimal hand movement
- Keep visual sightlines clear so you can monitor both devices simultaneously
- Arrange them in a counterclockwise workflow from storage to brewing to cup
This setup means you’re not fumbling around like you’re playing kitchen Tetris. Your hands flow naturally from one tool to the next. Seriously, proximity matters way more than you’d think. You’ll actually enjoy making espresso instead of dreading the awkward shuffle. Plus, choosing a grinder and machine combination that matches your kitchen space and workflow can make daily maintenance and cleaning significantly easier.
Creating Zones Around Your Grinder
Think of your coffee station like a kitchen—you wouldn’t throw your spatulas in with your spices, right? Creating zones around your grinder is all about smart organization. Set up your primary zone directly around the grinder itself, keeping beans, scoops, and dosing cups within arm’s reach. This ergonomic layout saves you time and reduces frustration during those bleary morning moments.
Your secondary zone should house grinder maintenance supplies—brushes, cleaning tools, and replacement burrs. Keep these slightly seperate so you’re not accidentally grabbing a brush when you need a scoop. Then establish a third zone for your finished grounds and extraction equipment nearby.
This zone-based approach transforms your coffee ritual. You’ll move with purpose, not chaos. Each station serves its function. Your workflow becomes smoother, faster, and honestly? Way more satisfying.
Organizing Beans and Storage Solutions

Your beans are the stars of the show, so they deserve better than living in crumpled bags shoved behind yesterday’s cereal. Let’s fix that.
Here’s your storage game plan:
- Invest in airtight canisters that keep oxygen and moisture out, preserving those delicate flavors you paid good money for
- Label everything with roast dates so bean rotation happens naturally and you’re not accidentally brewing month-old grounds
- Store canisters in a cool, dark spot away from your grinder’s heat and direct sunlight
Pro tip? Keep your current bag open while others rest sealed. This prevents staling and keeps your station looking intentional, not chaotic. Your morning brew will thank you when you’re working with fresh, properly stored beans instead of whatever’s been sitting around collecting dust and disappointment.
Arranging Brewing Equipment Within Reach
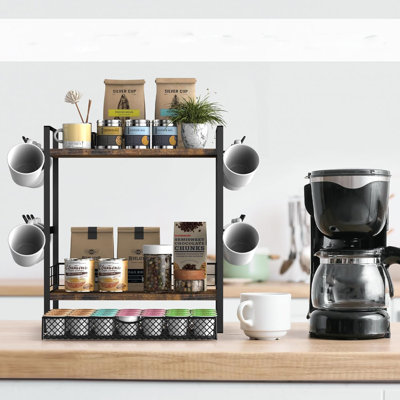
Place your brewing equipment where you can grab it without performing acrobatic feats before your caffeine kicks in. Seriously, your French press, pour-over dripper, and filters shouldn’t live in some distant cabinet. Keep them within arm’s reach of your grinder. Organize them on a dedicated shelf or small table right next to your brewing station. Group similar items together—filters with filters, mugs with mugs. Use countertop lighting to illuminate your setup so you’re not fumbling around like a zombie. Don’t forget cable management for your electric kettle or grinder cords; tangled wires are chaos waiting to happen. When everything’s accessible and visible, you’ll actually use your fancy brewing equipment instead of just admiring it from afar.

Setting Up a Measuring and Weighing Station
Now that you’ve got your brewing gear within arm’s reach, it’s time to nail down the precision side of coffee making. Here’s where the magic happens:
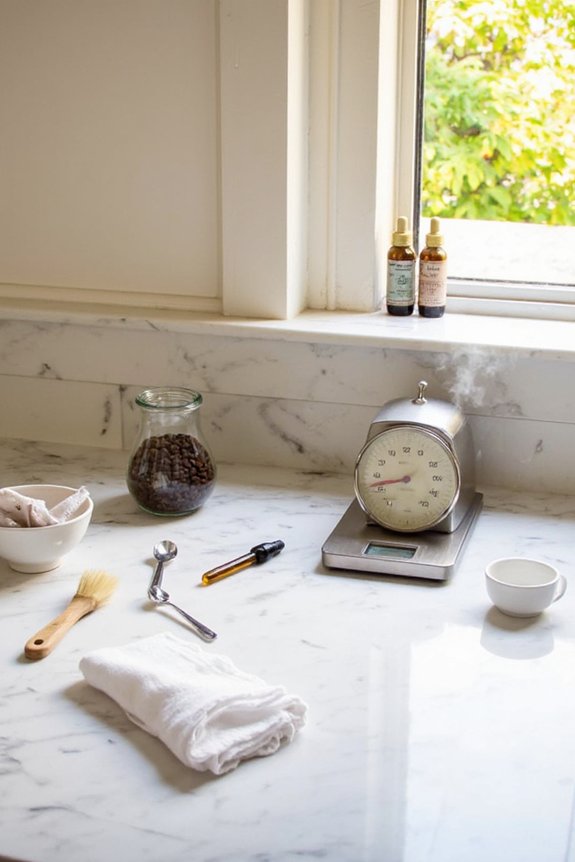
- Invest in a reliable digital scale—it’s your secret weapon for portion control and consistency
- Position your scale right next to your grinder for seamless workflow and tare optimization
- Keep measuring scoops handy, though honestly, weight beats volume every time
You’ll want your scale easily accessible, not buried in some cabinet. Tare optimization means zeroing out between measurements, which saves you from doing mental math at 6 a.m. Trust me, your morning brain’ll thank you. A small notebook nearby works wonders for jotting down winning ratios. Before you know it, you’re dialing in shots like a pro, not just winging it.
Designating Space for Cups and Accessories
Once you’ve dialed in your measurements and got that scale situation locked down, it’s time to think about where all your cups and accessories are gonna live. You’ll want easy access to your favorite mugs without cluttering your workspace. Stack your stacked saucers neatly in a designated zone, keeping them within arm’s reach. Consider a small shelf or cabinet section for your travel mugs so they’re ready when you’re rushing out the door. Store stirrers, sweeteners, and cream in a compact caddy nearby. Keep lids organized too, because nothing’s worse than hunting for a matching cap. Group everything logically and you’ve created a zone that flows naturally from grinding to pouring. Your morning ritual just got way smoother.
Maintaining Your Coffee Station Layout

Once you’ve got your coffee station all set up, the real work begins—keeping it running smooth and looking sharp. You’ll want to establish a cleaning schedule that keeps your grinder and surrounding surfaces free from coffee dust and grime, because stale grounds are basically the enemy of great coffee and a happy kitchen. By mapping out an efficient workflow, where everything you need is within arm’s reach and used items have a designated home, you’ll transform those morning coffee runs from chaotic scrambles into zen-like rituals that actually feel good.
Cleaning Schedules Matter
Your coffee station’ll stay sharp only if you’re willing to give it some regular TLC, and honestly, that’s where most people drop the ball. A solid cleaning schedule keeps your grinder humming and your coffee tasting fresh, not stale.
Here’s what you need to tackle:
- Daily maintenance – Brush out grounds from your grinder’s burrs every morning, wipe down surfaces, and empty the grounds bin before it becomes a science experiment.
- Weekly deep cleaning – Run a grinder-cleaning tablet through the machine to eliminate oily residue that builds up over time and ruins flavor.
- Monthly overhaul – Disassemble removable parts, soak ’em if needed, and inspect for wear.
Stick with this routine, and your station’ll perform like a champ.
Workflow Efficiency Tips
When your coffee station’s layout actually makes sense, you’ll cut your morning prep time in half—no joke. Start with workflow mapping. Think about your movements: beans to grinder, grounds to brewer, cup to counter. Eliminate unnecessary steps. Group similar tasks together using task batching. Keep your filters right next to your grinder. Store your scales nearby. Your mugs? Just one quick reach away.
The magic happens when everything flows naturally. You’re not running around like you’ve already had three espressos before breakfast. Instead, you’re moving with purpose. One hand grabs beans. The other’s opening your grinder. It’s almost meditative, really.
Small adjustments create big results. Rearrange once. Perfect your rhythm. Then you’ll actually enjoy those morning moments before chaos takes over.
Frequently Asked Questions
How Often Should I Deep Clean My Grinder to Maintain Optimal Performance?
You should deep clean your grinder monthly for maintenance and perform a seasonal overhaul every few months. This keeps your grinder functioning at its best and prevents coffee oil buildup that’ll affect your brew’s quality and taste.
What’s the Best Way to Dispose of Old or Stale Coffee Beans?
You’ve got several discard methods for stale beans. Composting options work great—they’ll break down naturally in your compost bin. Alternatively, you can toss them in regular trash or donate them to local gardens needing organic matter.
Can I Use the Same Grinder for Both Espresso and Drip Coffee?
Yes, you can share grinder duties between brewing methods. You’ll need to adjust your burr settings for each style—espresso requires finer grinding than drip. However, grind retention between adjustments means you’re losing some coffee potential.
How Much Counter Space Do I Realistically Need for a Functional Station?
You’ll realistically need 24-36 inches of countertop footprint minimum. Organize workflow zones strategically: grinder, brewing equipment, and storage. This arrangement lets you move efficiently without cramping your space or compromising functionality.
What’s the Ideal Temperature and Humidity for Storing Whole Coffee Beans?
You’ll want to store your beans in an ideal climate between 50-70°F with 50-60% humidity. This preserves bean freshness by slowing oxidation and preventing moisture absorption that’d compromise flavor and quality.
Conclusion
You’ve just built yourself a coffee station that hums like a well-oiled machine. Your grinder sits pretty at elbow height, beans organized like little soldiers in their airtight bunkers, and everything you need is literally within arm’s reach. No more hunting for that scale or scrambling for filters—you’re dialed in. Daily brushouts keep things fresh, weekly cleanings keep ’em humming, and suddenly, making espresso feels less like chaos and more like a smooth, delicious ritual.