If you’ve ever dragged out your turkey fryer on the big day and found rusty parts, sticky hoses, or a mystery smell, you know storage kinda matters. The good news is, with a bit of cleanup and smart packing, you can keep your pot, burner, hoses, and gadgets ready to go instead of starting from scratch every year. Let’s walk through how to store everything so next time you’re not stuck scrubbing and guessing.
Key Takeaways
- Thoroughly clean and dry the pot, burner, and stand, then lightly oil metal surfaces to prevent rust before long-term storage.
- Store propane tanks outdoors, upright, with valves closed and capped, away from doors, dryers, flames, or other ignition sources.
- Coil and bag the hose and regulator together, inspect for cracks or leaks, and never store the setup if any leak is detected.
- Organize accessories in labeled bins or caddies, grouping by use (baskets, thermometers, injectors) and placing most-used items toward the front.
- Choose a dry, elevated indoor or protected outdoor spot for the fryer, packing components in reverse-setup order for faster, easier next-season use.
Assessing Your Turkey Fryer After Each Use

Right after you finish frying that beautiful bird, it’s tempting to just turn everything off and head straight for leftovers, but this is actually the perfect time to give your turkey fryer a quick once-over. Start with simple temperature checks, making sure the oil and metal parts are cooling down safely and nothing’s overheating or acting weird.
Look over the burner, hose, and regulator for cracks, loose fittings, or scorch marks. If you spot anything odd, do some quick damage documentation with your phone, snapping pics and jotting a few notes so you don’t forget later.
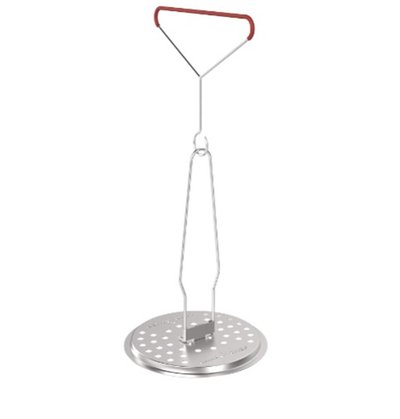
Give the lid, basket, and hook a fast visual check too. Missing screws, bent metal, or wobbly pieces now can mean big headaches next holiday. As part of your post-cooking routine, always inspect for safety features like heat-resistant handles or CSA certification labels, since these are vital for safe operation and long-term reliability.
Deep-Cleaning the Pot, Burner, and Stand

Once the turkey’s long gone and everyone’s in a food coma, it’s time to roll up your sleeves and really clean that fryer so it’s not a greasy science experiment by next year. Start with the pot. Use hot water and a little degreaser, then go at it with some good old soap scouring, working on the sticky brown ring near the top.
For really stubborn stuff, boil water in the pot for a few minutes to loosen it, kind of like steam sanitizing on a budget. Wipe everything dry.
On the burner and stand, knock off crumbs and soot with a brush, then wipe with a damp, soapy rag. Dry them completely so they don’t rust while they’re sitting all year.
For easier cleanup next season, look for fryers with dishwasher-safe parts or nonstick interiors, as these features speed up the cleaning process and help prevent gunk buildup over time.
Handling and Disposing of Used Cooking Oil Safely

Dealing with a giant pot of used oil after frying a turkey isn’t exactly the glamorous part of the feast, but it’s super important if you don’t want clogged pipes, nasty smells, or a surprise visit from the local wildlife. Let the oil cool completely, then strain out crumbs with a fine mesh strainer or cheesecloth.
If the oil still looks and smells decent, you can store it in a clean, labeled jug and reuse it once or twice. Otherwise, look for local oil recycling programs or drop-off spots, since they often turn it into biodiesel.
Skip pouring it down the sink. For small amounts, seal it in a container and trash it, and don’t try grease composting unless your local guidelines say it’s ok. If you use kitchen appliances like countertop ice makers, be sure to keep their water reservoirs and baskets clean to prevent residue buildup and ensure safe food handling.

Inspecting Hoses, Regulators, and Connections

So you’ve wrangled the used oil and got that mess under control, now it’s time to make sure the fryer itself isn’t secretly planning chaos for next time. Start with a slow visual inspection of every hose from end to end, looking for cracks, soft spots, burns, or places critters might’ve chewed. Check that fittings are snug, not gorilla tight, just firm.
Hook up the tank and do simple pressure testing with a spray bottle of soapy water on:
- Hose connections that already make you a little nervous
- The regulator and its fittings
- The valve where the burner meets the hose
- Any joint that just feels “off” to you
If you see bubbles, you’ve got a leak, and that setup doesn’t get stored until it’s fixed. For best results year-round, choose storage locations that are both dry and energy-efficient to prolong the life of your hoses and regulators.
Protecting Metal Surfaces From Rust and Corrosion

Even if your fryer only comes out a couple times a year, rust is lurking like that one cousin who always “forgets” to help clean up. So you’ve got to shut it down before it starts. First, make sure every metal surface is completely dry, including the burner frame, pot, lid, and basket. Any leftover moisture will invite rust fast.
Wipe metal parts with a light coat of cooking oil or a dedicated rust-preventive spray, avoiding any plastic or rubber pieces. For parts that see a lot of splatter, silicone coatings can add an extra shield that’s easy to clean later. Store everything in a dry spot, then toss in a few humidity absorbers so damp air doesn’t undo all your work. For cast iron pots or accessories, maintaining proper seasoning is key to preventing long-term corrosion and ensuring your cookware lasts for generations.
Storing Propane Tanks the Safe, Correct Way
When it comes to propane tanks, you’ve got to treat them less like “random garage junk” and more like a seriously important guest that can cause trouble if it’s shoved in the wrong corner. Store tanks outside, upright, on a stable surface, away from doors, dryers, or anything that sparks. Never in the garage or shed.
Close the valve tightly, then snap on valve caps, since they’re your last little safety backup. Practice simple tank rotation so the oldest, safest tank gets used first and you’re not guessing later.
- You’d like your house to not explode
- You enjoy breathing fresh, non-burnt air
- You prefer clean cookouts over sketchy ones
- You want your future self to say “nice job”
Organizing Accessories Like Baskets, Thermometers, and Tools
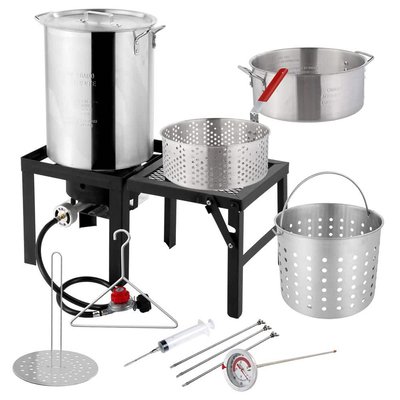
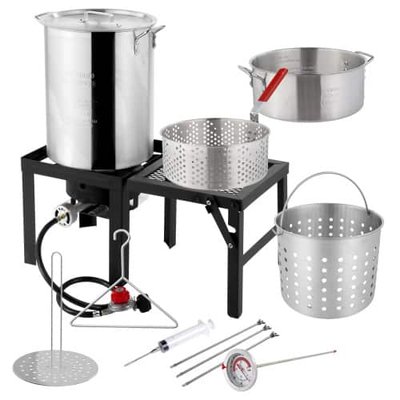
Let’s kick things off by getting all those baskets, thermometers, injectors, and random fryer doodads out of “mystery pile” status and into something that actually makes sense. You want every little gadget to have a clear home, so you’re not digging through greasy chaos on turkey day.
Start by grouping stuff by how you use it, not just by size. Grab some labeled bins, Tool caddies, and a few sturdy basket hooks for hanging larger pieces.
| Item Type | Where It Lives |
|---|---|
| Fry baskets | Basket hooks on a wall or shelf edge |
| Thermometers | Small bin or divided drawer insert |
| Injectors | Lidded container, labeled “injectors” |
| Hooks & hangers | Zip bag clipped inside a bin |
| Misc tools | Tool caddies with simple sticky labels |
Keep it simple, keep it obvious, and future you will be very grateful.
Choosing the Best Storage Location Indoors or Outdoors
Picking a home for your turkey fryer isn’t just about where you’ve got space, it’s about where it’ll stay clean, dry, and out of trouble until the next bird-day rolls around. Indoors, a cool Basement corner works if it’s dry and you’ve got it up off the floor. Outdoors, a sturdy Garage shelf or weatherproof deck box can be fine, as long as you protect everything from moisture and curious hands.
Think about how you want to feel when you pull it out next season:
- Relieved that nothing’s rusty
- Proud you actually remembered where it is
- Calm knowing kids and pets never messed with it
- Excited because it’s ready for fryer glory again
Packing and Labeling Your Fryer for Quick Setup Next Time
Now that you’ve picked a storage spot, it’s time to pack everything so you can set up your fryer next time without scratching your head or muttering creative new words. You’ll want to think about smart labeling for each piece and an efficient packing order, so the parts you need first aren’t buried at the bottom of the bin under twelve other things. Do this right once, and future-you will be seriously grateful, probably wondering when you suddenly got so organized.
Smart Component Labeling
Even though it feels like you just wrestled a dragon made of hot oil, this is actually the perfect moment to get smart about labeling every part of your turkey fryer setup. Grab some color coded tags and start matching pieces that always work together. Burner with stand. Pot with lid. Thermometer with its clip.
Use simple, material specific labels too, like “stainless only” or “for cast iron,” so parts don’t get mixed up later. Future you will be very thankful.
- That sweet rush when everything snaps together next year
- No more mystery hoses or “where on earth does this go?”
- Less stress, less arguing, more laughing in the driveway
- You feel oddly pro, like you’re running a tiny outdoor kitchen
Efficient Packing Sequence
Start by thinking of your fryer like a little puzzle you want to solve in reverse, so it’ll basically build itself next year. For efficient packing, use component prioritization. Anything you’ll grab first when setting up goes in last, on top. Burner frame, pot, lid, then baskets and small tools.
Group parts by seasonal sequencing too. If you only fry on holidays, pack those once-a-year accessories deeper in the tote, then keep everyday tools or thermometers closer to the front.
Nest what you can, like measuring cups inside the pot, cords or hoses coiled in labeled bags. Keep the regulator and hose together, so you’re not hunting like it’s a scavenger hunt. Finish by placing your labeled hardware pouch right on top.
Seasonal Checkups and Maintenance Before Your Next Fry
Before you fire things up next season, you’ll want to give the burner and hose a quick once-over so you’re not surprised by a wobble, clog, or sneaky leak. You should also test the regulator and any built-in safety systems, since those quiet little parts are what keep your turkey from turning into a backyard fireworks show. It only takes a few minutes, but these checks make the whole setup feel smoother, safer, and a lot less stressful.
Inspect Burner and Hose
Once your turkey fryer’s cleaned up and put away, it’s a smart move to give the burner and hose a quick “health check” so they’re ready for the next big fry, not just hoping for the best on fry day. Start by checking the burner for rust, clogged holes, or bent parts. If the flame pattern looked weak or lopsided last time, that’s your cue to clean those ports.
Look over the hose from end to end. Bend it gently and watch for cracks, bubbles, or soft spots around the fittings and gas valve. Anything sketchy, replace it. Future you will say thanks.
- Picture perfect, golden turkey
- Zero scary flare-ups
- Chill, confident cooking vibes
- One less thing to stress about
Test Regulator and Safety Systems
You’ve checked the burner and hose, so now it’s time to make sure the “brains” of your fryer, the regulator and safety systems, are actually doing their job. Start with simple pressure testing. Hook up the propane tank, open the valve slowly, then brush soapy water on all regulator fittings and connections. If you see bubbles, you’ve got a leak and that regulator doesn’t belong anywhere near hot oil.
Next, confirm the regulator controls flow correctly. Light the burner and watch the flame as you slightly adjust the valve. It should respond smoothly, not flicker like it’s confused.
If your setup has electric igniters or shutoff switches, do quick electrical diagnostics, checking switches, wires, and batteries. No sparks, no fry.
Frequently Asked Questions
Can I Store My Turkey Fryer Outside During Winter if Covered With a Tarp?
You technically can, but it’s not ideal. If you must, follow weatherproofing tips: raise it, tightly tarp it, seal burner openings, and remove hoses. For rodent prevention, use steel wool, traps, and avoid storing food nearby.
How Long Can an Unused Turkey Fryer Safely Sit in Storage?
You can safely store it 1–2 years if it’s cleaned, dried, and covered. After that, seasonal maintenance’s vital to prevent long term corrosion: inspect hoses, burners, and fittings yearly, then re-season the pot.
Do I Need to Disassemble the Burner From the Stand for Storage?
You don’t have to disassemble the burner, but it’s safer and easier to inspect. Use cleaning tips: wipe grease, clear ports, dry thoroughly. For assembly techniques, label parts, bag hardware, and photograph setup for quick reassembly.
Is It Safe to Store My Fryer in an Attached Garage Year-Round?
Yes, you can store it in an attached garage, but you shouldn’t ever use it there. Address ventilation concerns, carbon monoxide risks during operation, and protect the fryer from temperature fluctuations, moisture, pests, and accidental fuel leaks.
Can I Store My Fryer Near Lawn Equipment, Paint, or Other Household Chemicals?
You shouldn’t store your fryer near lawn equipment, paint, or chemicals; that flammable proximity increases fire risk. Maintain clear separation, consider chemical compatibility, keep propane cylinders outside, and guarantee good ventilation and stable, upright positioning away from ignition sources.
Conclusion
So that’s it, you’ve basically turned your turkey fryer into a low‑maintenance, high-reward gadget instead of a greasy mystery box in the shed. When you clean it, protect the metal, store the tanks right, and keep all the tools labeled, you’re setting yourself up for stress-free frying later. Future you will be pretty grateful, honestly. And your guests will just think you’re some kind of backyard genius.