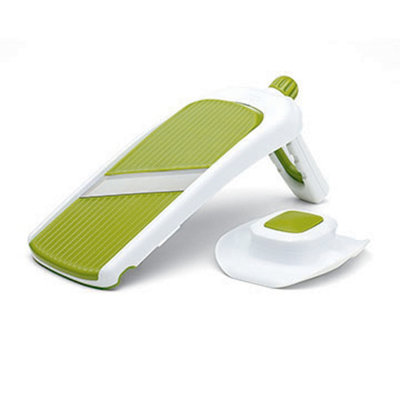
Your mandoline slicer’s razor-sharp blades are basically tiny ninjas living in your kitchen drawer, and they need a proper home. You’ve probably thought about tossing it somewhere convenient, but here’s the thing: one wrong move and you’re facing a nasty cut or a ruined blade. The good news? With the right storage setup, you can keep your mandoline safe, accessible, and ready to slice whenever you need it—and we’re talking about a system that’ll take maybe ten minutes to set up.
Key Takeaways
- Measure drawer dimensions to ensure the mandoline slicer lays flat with comfortable handle clearance and accessibility.
- Add protective foam or felt padding to the drawer bottom to cushion the blade area.
- Keep blade guards and covers on the mandoline and store replacement blades in a separate labeled container.
- Store the mandoline in a frequently used, accessible drawer near prep areas for convenient grab-and-go access.
- Place the mandoline in a cool, dry drawer away from moisture and use silica packets in humid environments.


Understanding Your Mandoline Slicer’s Blade Configuration
Before you can safely store your mandoline slicer, you’ve gotta understand what you’re actually working with. Most mandolines come with multiple blades, and each one’s got a different job. You’ll typically find straight blades for basic slicing, then waffle and julienne options hanging around for fancier cuts.
Here’s the thing: blade alignment matters big time when storing. If your blades aren’t positioned correctly, they’ll shift around in your drawer and potentially damage themselves or, worse, your fingers. Check those cutting angles too. Some blades sit at aggressive angles designed for paper-thin slices, while others are more forgiving. Understanding these differences helps you know exactly what protection each blade needs during storage. For maximum safety and organization, look for slicers that include dedicated blade storage to keep all sharp components secure and easy to access.
Choosing the Right Drawer for Storage
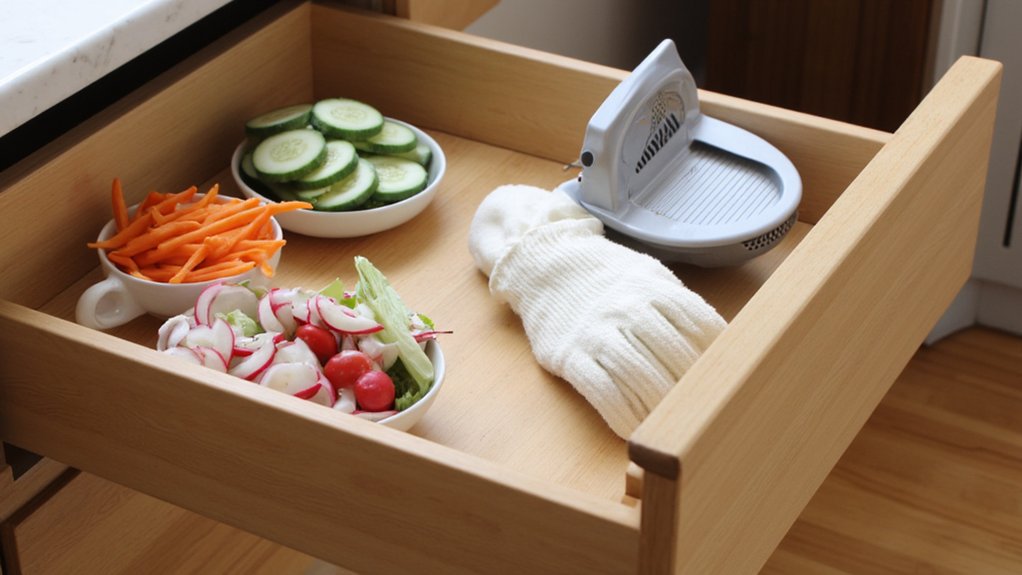
Now that you know what blades you’re dealing with, it’s time to find them a proper home. You’ll want to pick a drawer that works with your mandoline’s dimensions, not against them.
Consider these factors when selecting your storage spot:
- Drawer depth – Make sure there’s enough room so your slicer lays flat without forcing it
- Handle clearance – You need space for the handle to fit comfortably without getting stuck
- Accessibility – Choose a drawer you use regularly, so you’re not digging through rarely-opened spaces
- Proximity to prep areas – Keep it near where you actually cook to make grabbing it easy
A shallow to medium-depth drawer works best for most mandolines. Avoid cramped spaces where you’d have to wrestle your slicer in and out. Your future fingers will thank you. For added safety and easier maintenance, store your mandoline in a drawer that allows for removable, dishwasher-safe parts to be conveniently accessed and cleaned.
Protective Blade Guards and Covers
Once your mandoline’s secured in its drawer, the real protection comes from what you put between those razor-sharp blades and everything else. A silicone sheath is your best friend here, honestly. It slides right over the blade guard and keeps everything cushioned without taking up much space. You won’t believe how much peace of mind it brings. If you’re looking for something heavier-duty, a magnetic cover works wonders too. It’ll grip securely and prevent any accidental blade exposure during drawer rummaging. Both options are affordable and super easy to slip on and off. The key’s finding what fits your specific mandoline model, so double-check before buying. Just like choosing removable blade guards for electric deli slicers, using the right protective cover for your mandoline ensures safer storage and extends the life of your kitchen tools.


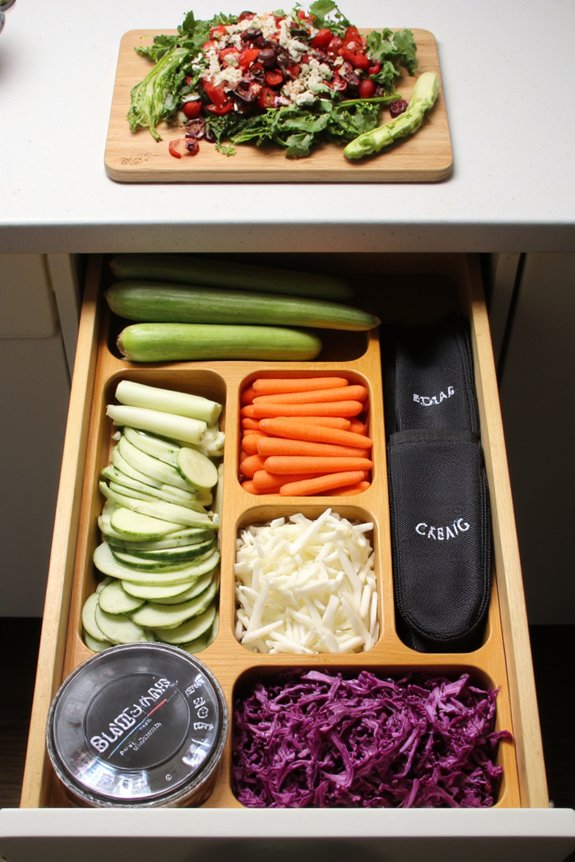
Creating a Designated Storage Compartment
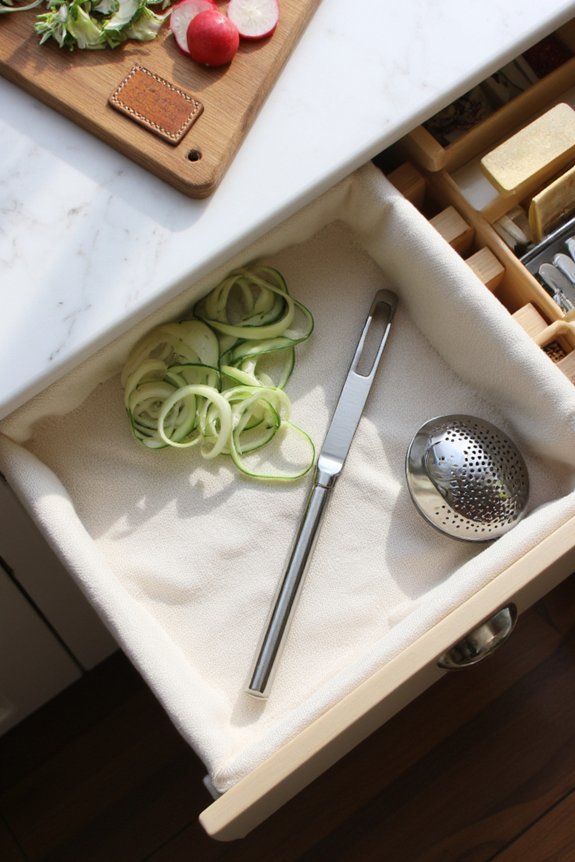
You’ll want to start by taking a good look at your drawer space and figuring out what you’re actually working with, because cramming your mandoline into a junk drawer between the spatulas and takeout menus isn’t exactly a winning strategy. Once you’ve found your spot, add some protective padding like foam or felt to cushion that razor-sharp blade and keep it from getting dinged up or, you know, accidentally introducing itself to your other kitchen tools in ways nobody wants. Finally, slap a clear label on your storage area and organize everything so you know exactly where that mandoline is when you need it, making grab-and-go time way easier than hunting through three drawers like you’re on some kind of kitchen treasure hunt. If you want your mandoline to stay sharp and functional for years, treat it with the same maintenance and longevity care as you would other high-quality kitchen tools like cast iron skillets.
Drawer Space Assessment
Before you can safely tuck away your mandoline slicer, you’ve got to figure out what you’re actually working with in your kitchen drawers. Start by measuring your available space, checking both the width and drawer depth to guarantee your slicer fits comfortably without forcing it. You’ll want some wiggle room so it doesn’t get jammed in there like a sardine.
Here’s what you should assess:
- Horizontal clearance for the blade and handle to sit flat
- Vertical space considering the slicer’s overall height
- Drawer depth from front to back without blocking other items
- Accessibility so you’re not digging through clutter to grab it
Once you’ve measured everything, you’ll know exactly what compartment setup works best for your kitchen’s layout and your mandoline’s dimensions. For long-term organization, consider the platform materials & durability of any drawer inserts or dividers you use to help protect both your mandoline slicer and the drawer itself.
Protective Padding Installation
Now that you know your mandoline’s got a proper home in your drawer, it’s time to protect both the blade and everything else sharing that space. Foam inserts are your best friend here. They’ll cushion that razor-sharp blade while keeping it from sliding around like it owns the place.
| Protection Type | Best For |
|---|---|
| Foam inserts | Blade cushioning |
| Anti-slip liners | Drawer stability |
| Felt pads | Surface protection |
| Cardboard sleeves | Extra coverage |
Layer your foam inserts around the mandoline’s blade section. Then add anti-slip liners underneath to prevent any sneaky movement when you’re digging through your drawer. This combo keeps your slicer secure and your fingers safe. You’ll sleep better knowing everything’s locked down tight and ready for action.
Labeling and Organization
Creating a dedicated spot for your mandoline in your kitchen storage might seem like overkill, but it’s honestly one of the smartest moves you can make. You’ll want to organize everything thoughtfully so you can find it fast and keep it protected.
Here’s what’ll help you nail this:
- Use color coding on your storage containers to distinguish between your mandoline and other kitchen tools
- Add inventory tags so you remember what blades you’ve got stored away
- Keep a small notebook nearby listing your slicing attachments and maintenance schedule
- Group all mandoline-related items together in one drawer section
This system keeps everything accessible while preventing your mandoline from getting lost among other gadgets. You’ll appreciate the organization when you’re prepping meals and need quick access to your trusty slicer.
Organizing Additional Accessories and Parts
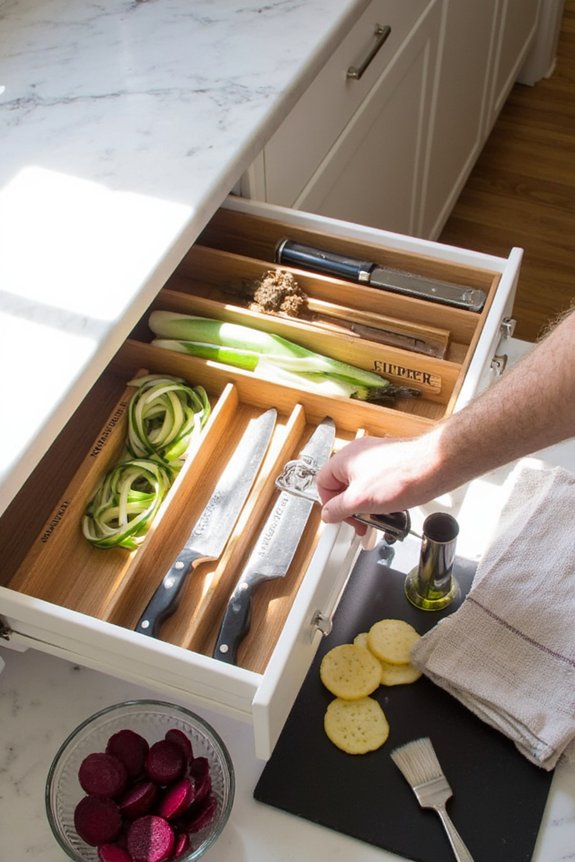
You’ve got more than just the blade to think about when it comes to keeping everything organized and safe. Your blade guards and covers deserve their own little spot—maybe a small pouch or container right next to your mandoline—so they’re always there when you need to protect that sharp edge and your fingers. Don’t forget about stashing those replacement blades in a secure spot too, whether that’s a dedicated compartment or a labeled drawer, because nothing’s worse than fumbling around trying to find a fresh blade when your current one’s getting dull.

Blade Guards and Covers
Because your mandoline comes with all those protective extras, organizing them properly is half the battle when it comes to safe storage. You’ll want to keep everything in one spot so nothing gets lost or damaged.
Here’s what you should focus on:
- Store guards in a dedicated pouch or small container to prevent them from shifting around
- Keep covers separated by material type to maintain material durability and prevent cross-contamination
- Label each accessory so you know exactly what goes where without hunting around
- Use soft padding between items for enhanced safety haptics when everything’s tucked away
The key is creating a system that works for you. When your blade guards and covers are organized and easily accessible, you’re way more likely to actually use them. That means safer slicing every single time you pull out your mandoline, which is really the whole point.
Storing Replacement Blades
Sharp blades are kind of like socks in the dryer—they disappear if you’re not careful about where you stash them. Keep replacement blades in a dedicated container, separate from your main drawer. A small plastic case or magnetic strip works great for organizing them safely. Label each blade by type so you’ll know exactly what you’re grabbing. Store them in a cool, dry spot away from moisture, which can cause rust and dull the edges faster. Before tossing old blades, check your warranty registration to see if they’re covered for replacement. For blade disposal, wrap dull ones in newspaper or cardboard first, then place them in a clearly marked container. This keeps you safe and prevents accidental cuts when reaching into drawers or trash cans.
Safety Considerations for Household Members
When there’s a mandoline slicer in your home, everyone living there needs to know the basics about handling it safely. Your family members and guests should understand the risks, especially when it comes to child access and preventing accidents.
Here’s what matters most:
- Keep the mandoline stored in a high cabinet or locked drawer where kids can’t reach it
- Teach older children how to use it properly, emphasizing the importance of the hand guard
- Store blades separately in a clearly marked container so no one accidentally grabs them
- Make sure everyone knows where you keep it, so they’re not searching drawers unsupervised
A little household education goes a long way. When everyone understands the dangers, you’ve created a safer kitchen environment for the whole family.
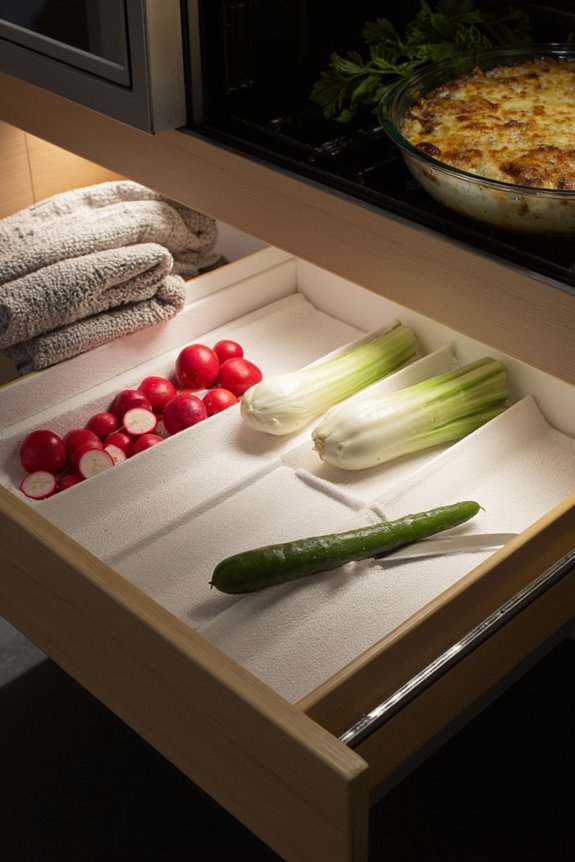
Maintaining Your Mandoline Between Uses
Proper care between uses keeps your mandoline in top shape and ready for your next slicing session. You’ll want to do a daily inspection, checking for food debris or rust spots that might’ve snuck on there. A quick wipe-down with a dry cloth works wonders, honestly.
| Maintenance Task | Frequency |
|---|---|
| Daily inspection | After each use |
| Deep cleaning | Weekly |
| Humidity control check | Monthly |
Here’s the thing: humidity control matters big time. Store your mandoline in a cool, dry spot away from damp areas. If you live somewhere really humid, you might toss in a silica packet nearby, and that’ll keep moisture from settling on the blade. Your mandoline’ll thank you for it.
Frequently Asked Questions
How Often Should I Sharpen My Mandoline Slicer Blades for Optimal Performance?
You’ll need to sharpen your mandoline slicer blades every 3-6 months with regular use. Proper blade maintenance guarantees peak performance. Monitor for dullness—you’ll notice increased resistance when slicing. Professional sharpening services are recommended for best results.
What Temperature and Humidity Levels Are Ideal for Mandoline Storage?
You’ll want cool storage between 50-70°F with stable humidity around 40-50%. These conditions prevent rust and blade corrosion. Avoid damp basements and hot areas near appliances that’ll damage your mandoline’s metal components.
Can I Store My Mandoline Slicer in a Damp Kitchen Environment?
You shouldn’t store your mandoline in a damp kitchen environment. Use moisture resistant containers and guarantee ventilation friendly placement to protect it from rust and blade deterioration.
How Do I Remove Rust or Discoloration From My Mandoline Blades?
You can remove rust or discoloration by soaking your blades in vinegar for several hours, then gently scrubbing with steel wool. Rinse thoroughly and dry immediately to prevent future rust formation.
Is It Safe to Store My Mandoline With Other Metal Kitchen Tools?
It’s not safe to store your mandoline with other metal tools without blade protection. You’ll want utensil separation to prevent your sharp blades from dulling, chipping, or damaging neighboring items. Use a blade guard or sheath.
Conclusion
You’ve got this. Storing your mandoline safely really just means treating it like the sharp tool it is, giving it a dedicated spot with proper protection. Keep those blades covered, organized, and away from curious hands. Your future self’ll thank you when you’re not hunting for guards or nursing a finger wound. A little effort now means stress-free slicing later.