If you’re like most home bakers, your stand mixer attachments are probably scattered across three different drawers, hiding behind spatulas and measuring cups. You’ve got that one beater you actually use, another mysterious attachment you’re not sure about, and maybe a whisk that’s seen better days. Here’s the thing: organizing them isn’t just about finding stuff faster—it’s about protecting your investment and actually knowing what you own. Ready to transform that chaos into something actually functional?
Key Takeaways
- Inventory all attachments, identify duplicates, and photograph each piece to prevent buying duplicates and losing items.
- Select a storage container with a tight-fitting lid, padded interior, and appropriate size for your kitchen space.
- Use drawer dividers and individual pouches to protect attachments from scratches, dents, and tangling while maintaining visibility.
- Implement color-coded waterproof labels and arrange attachments alphabetically for quick identification and streamlined retrieval.
- Store frequently used attachments at eye level and occasionally used pieces in less convenient spots for efficiency.
Assess Your Current Attachment Collection
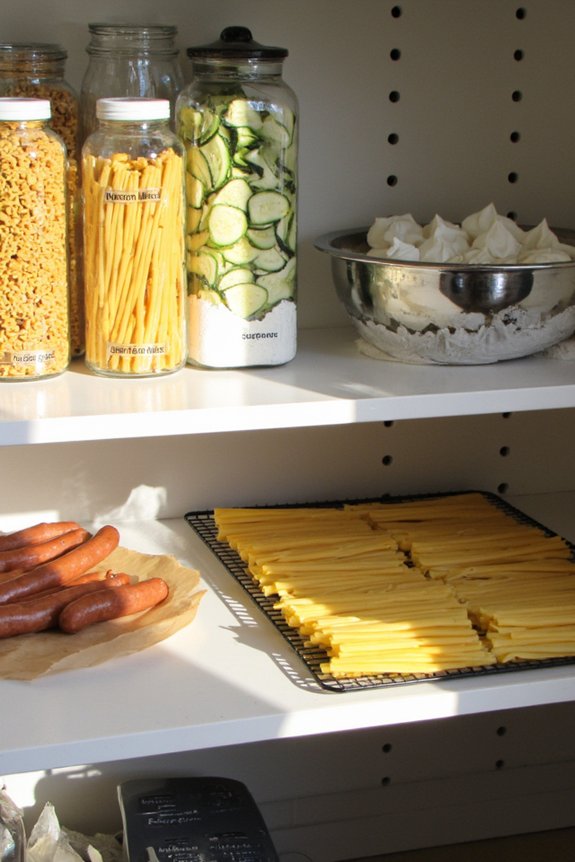
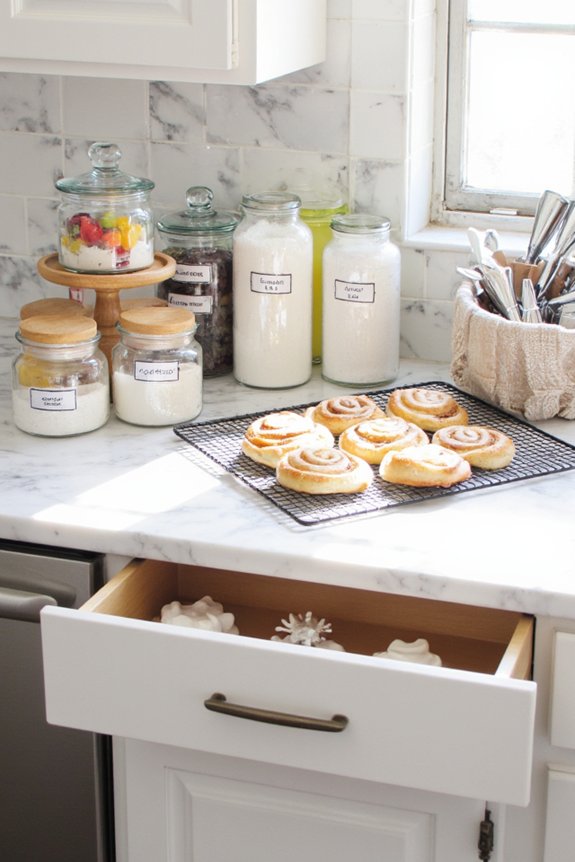
Before you can organize those stand mixer attachments, you’ve gotta know what you’re actually working with. Pull everything out of that drawer or cabinet and lay it all out on your counter like you’re preparing for an attachment fashion show. Count what you’ve got. Do you have three paddle attachments when you really only need one? That’s where evaluating duplicates comes in handy. You might discover you’re hoarding unnecessary extras taking up precious space. Next, check if anything’s missing from your collection. Maybe that dough hook disappeared into the kitchen void, or you’re missing the whip attachment you always wanted. Take inventory of what’s actually there versus what should be there. This honest assessment sets you up perfectly for creating an organization system that actually works for your needs. When reviewing your collection, make sure you have all core attachments—like the dough hook, whisk, and flat beater—since these are essential for most stand mixer tasks.
Choose the Right Storage Container
Now that you’ve figured out what you’re actually working with, it’s time to find a home for all those whisk attachments and dough hooks—and not just any container’ll do. You’ll want to think about the sheer volume of stuff you’re storing and whether you’ve got the space for a sprawling setup or need something compact, plus you gotta make sure whatever you pick can handle the weight and won’t let your precious (okay, maybe not *precious*, but definitely useful) attachments get banged up or collect dust like forgotten kitchen relics. If you plan to store attachments in the same spot as other tools, consider the platform material durability to ensure your storage solution can withstand frequent use and doesn’t scratch or damage your mixer accessories.
Size and Capacity Assessment
Once you’ve gathered all your stand mixer attachments in one place, it’s time to figure out what container’ll actually hold everything without looking like you’ve stuffed a clown car with kitchen gadgets. Start by evaluating your bowl compatibility needs—those dough hooks, flat mixers, and whisks take up surprising real estate. Measure your attachments honestly. Width, height, depth. Don’t just eyeball it like you’re playing kitchen Tetris.
Next, consider space planning in your kitchen. Where’s this container gonna live? Your cabinet’s only so big. Think about whether you need a drawer organizer, a dedicated bin, or maybe a wall-mounted solution. You want something that fits your stuff comfortably, with just a little breathing room. Too cramped, and you’ll avoid using it. Too big, and it becomes clunky. Get it right. For inspiration, look at how compact design in modern appliances helps maximize storage without sacrificing functionality.

Material Durability and Protection
Your container’s only as good as the material it’s made from, especially when you’re storing metal attachments that could rust faster than you can say “kitchen disaster.” You’ve got options, and picking the right one’ll make a real difference in how long your stuff stays in good shape.
Plastic containers with rust resistant coatings work great for keeping moisture at bay. But here’s the thing—you’ll want to look for ones with silicone padding on the interior. That cushioning protects your dough hooks and whisks from getting dinged up during storage and transport.
Stainless steel options? Solid choice. They’re durrable and won’t corrode themselves. Whatever you choose, make sure it’s got a tight-fitting lid that seals properly. Your attachments’ll thank you.
For even more peace of mind, consider how proper seasoning and maintenance on cookware like cast iron can drastically extend its lifespan—so it’s worth applying some of those same careful storage principles to your stand mixer attachments, too.
Use Drawer Dividers and Compartments
Drawer dividers and compartments are honestly your secret weapon for keeping those stand mixer attachments from turning into a jumbled mess. You’ll want to invest in quality organizers that actually work. Here’s what’ll make your life easier:
- Compartment inserts designed specifically for kitchen drawers keep each attachment in its own spot, preventing dings and scratches
- Padded pockets cradle delicate pieces like coated beaters, protecting them from damage while maximizing space
- Modular trays let you customize your setup as your collection grows, adapting to whatever you’ve got
The beauty of using drawer dividers? Everything stays visible and accessible. No more digging through a tangled pile wondering where your dough hook disappeared to. Your attachments stay protected, organized, and ready whenever inspiration strikes your baking adventures. For even more kitchen efficiency, consider how removable components in other appliances—like electric deli slicers—make cleanup and storage easier, which is a principle you can apply to organizing your stand mixer accessories too.
Create a Labeling System
Now that you’ve got your attachments tucked neatly into compartments, it’s time to make sure you can actually *find* them without playing kitchen detective. You’ll want to set up a labeling system that includes color-coded labels for quick visual recognition, waterproof label materials that’ll survive the occasional splash, and maybe an alphabetical organization system so your whisk comes before your paddle. Trust us, your future self will be seriously grateful when you’re not squinting at mystery attachments at 6 a.m. on baking day.
Color-Coded Labels
Setting up a color-coded labeling system might sound like overkill for mixer attachments, but trust us—it’s a game-changer. Your color coded inventory transforms chaos into order faster than you can say “whisk.” Here’s how to nail hue based sorting:
- Assign each attachment type its own color: whisk gets blue, dough hook takes red, paddle claims yellow
- Print small, waterproof labels and stick ’em on handles or storage containers
- Create a quick reference chart you’ll actually use instead of squinting at unlabeled plastic bins
This system cuts searching time in half. You’ll grab exactly what you need without that frustrating guessing game. Plus, guests’ll be impressed by your organizational prowess. Who knew mixer attachments could be this satisfying to manage?
Waterproof Label Materials
You’ve got the color scheme down, but here’s where your system either survives the kitchen or falls apart in a soggy mess—picking the right label materials.
Your mixer attachments spend time near water, flour dust, and occasional splashes. That’s why waterproof vinyl and polyester tags are your best friends here. These materials laugh in the face of moisture while staying put through countless washing cycles.
| Material | Best For | Durability |
|---|---|---|
| Waterproof Vinyl | Direct contact areas | 2-3 years |
| Polyester Tags | General labeling | 3-4 years |
| Laminated Paper | Budget option | 6-12 months |
Vinyl sticks like it means business, resisting peeling even when your kitchen gets steamy. Polyester tags? They’re practically indestructible. Sure, they cost a bit more upfront, but you won’t be relabeling everything next spring. That’s the real win here—durability that actually lasts.

Alphabetical Organization System
Once you’ve got your durable labels in hand, it’s time to actually organize your attachments in a way that won’t drive you crazy at 6 AM when you’re craving pancakes. Here’s your filing conventions gameplan:
- Label each attachment with its name, starting with the first letter
- Arrange them A-Z in your storage container or drawer
- Update your system whenever you aquire new pieces
This alphabetical maintenance method sounds boring, but it’s genuinely a lifesaver. You’ll find your whisk in seconds instead of excavating through a tangled mess of metal. Plus, your future self will thank you when you’re half-asleep and desperately searching for the dough hook. Organization doesn’t have to be complicated. Sometimes simple beats fancy every single time.
Store Attachments by Frequency of Use
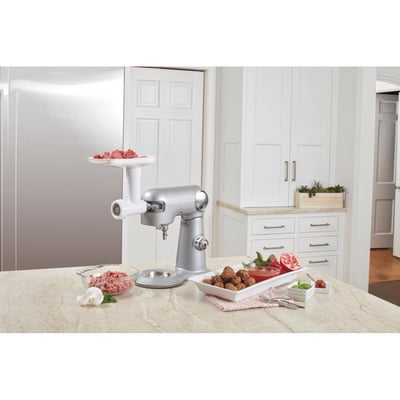
Most of us don’t reach for the dough hook every time we use our stand mixer, and that’s exactly why organizing by frequency makes total sense. Keep your daily rotation attachments—typically the whisk and paddle—in your most accessible spot. They’re the MVP’s of your kitchen arsenal. For usage tracking, consider jotting down which attachments you actually grab each month. You might be shocked at what you rarely touch. Store frequently used pieces at eye level or in easy-reach drawers. Relegat those occasional-use attachments, like the coated beater or meat grinder, to less convenient spots. This smart strategy saves you time and prevents drawer chaos. Your hands’ll thank you when you’re not digging through a jumbled mess searching for that one attachment you need right now.
Protect Your Attachments From Damage
Because your stand mixer attachments are pretty much the workhorses of your kitchen, they deserve some real protection. These babies aren’t cheap, so you’ll want to keep them in tip-top shape for years to come.
Here’s what you need to do:
- Store attachments in a temperature controlled storage area away from humidity and extreme heat
- Wipe them down after each use to prevent corrosion and buildup
- Keep them in individual pouches or cases to avoid scratches and dents
Don’t just toss them in a drawer where they’ll bang around like crazy. Moisture is basically their enemy, so make sure your storage spot stays dry. Think of it this way: a little preventitive care now means you’re not replacing them later. Your wallet will thank you, trust me.
Keep an Inventory List
With all those attachments scattered around your kitchen, you’re probably wondering where that flat beater went or if you’re missing the whisk altogether. Here’s the thing: creating an inventory spreadsheet is your secret weapon against attachment chaos. Seriously. Grab a notebook or open your computer and start listing everything you own. Write down each attachment’s name, when you got it, and where it’s currently living. Digital cataloguing might sound fancy, but it’s just organized note-taking. You could even snap photos of each piece—super helpful when you’re shopping for replacements and need to remember what ya got. This simple inventory keeps you from buying duplicates and guarantees nothing mysteriously disappears into your kitchen’s black hole. Your future self will thank you.
Maintain Your Organization System
You’ll want to regularly check in on your system—think of it like a seasonal closet cleanout, except way more fun because, hey, stand mixer attachments. Routine audits keep everything running smoothly. Here’s what you should do:
- Monthly spot-checks to confirm attachments are clean and stored correctly
- Seasonal rotations when you switch between baking and cooking modes
- Quick inventory reviews to catch any missing or damaged pieces
Don’t let your organizational masterpiece collect dust. Set a phone reminder if you’re forgetful, because let’s face it, life gets hectic. A little maintenance prevents chaos from creeping back in. Your future self will thank you when you need that dough hook and know exactly where it is. Keeping your system alive? Totally worth the effort.
Display Your Collection Attractively
Once you’ve got your system locked down and those monthly check-ins are happening like clockwork, it’s time to show off what you’ve got. Your attachments deserve a moment in the spotlight. Consider wall mounted shelves in your kitchen where guests can actually see your impressive collection. They’re functional and totally Instagram-worthy. A rotating display works beautifully too, letting you feature different attachments while keeping everything accessible. You could even organize by color or attachment type for maximum visual impact. The goal here isn’t just storage, it’s celebration. Your stand mixer attachments represent culinary potential and kitchen pride. When you display them attractively, you’re not just organizing, you’re creating a focal point that screams “I bake seriously.” Make it count.
Frequently Asked Questions
What Should I Do With Attachments That Are Broken or No Longer Compatible?
You’ve got a couple of solid options with broken or incompatible attachments. First, explore repair options through the manufacturer or local repair shops. If they’re beyond fixing, check out recycling programs in your area that accept small appliances and metal parts.
How Often Should I Clean My Stand Mixer Attachments Before Storing Them?
You should clean your attachments after every use, immediately dry them, and perform a monthly deep clean using silicone safe sanitizer to make sure they’re properly maintained before storage.
Can I Store Attachments in Different Locations or Must They Stay Together?
You can absolutely store attachments in different locations based on your accessibility zones. Separate storage works well—keep frequently used attachments nearby and store less-used ones elsewhere for better kitchen organization and convenience.
Which Attachments Come Standard With Most Stand Mixer Models?
You’ll typically get a flat mixing paddle, dough hook, and wire whip with most stand mixers. These come with power coating and ergonomic handles for comfortable use. They’re your essential trio for everyday mixing tasks.
How Do I Prevent Rust or Corrosion on Metal Attachments During Storage?
Don’t let your attachments rust away. You’ll want to apply oil lightly, use silica gel packets, store dry in airtight containers, and avoid stacking metal pieces together to prevent corrosion buildup.
Conclusion
You’ve basically turned your mixer into a well-oiled machine—literally. Like a chef organizing their knives, keeping attachments sorted means you’ll actually *use* them instead of digging through chaos. Your future self will be thrilled when you grab the whisk without excavating three other pieces. Stay consistent with those spot-checks, and you’ll never wonder where anything went. That’s the sweet spot right there.