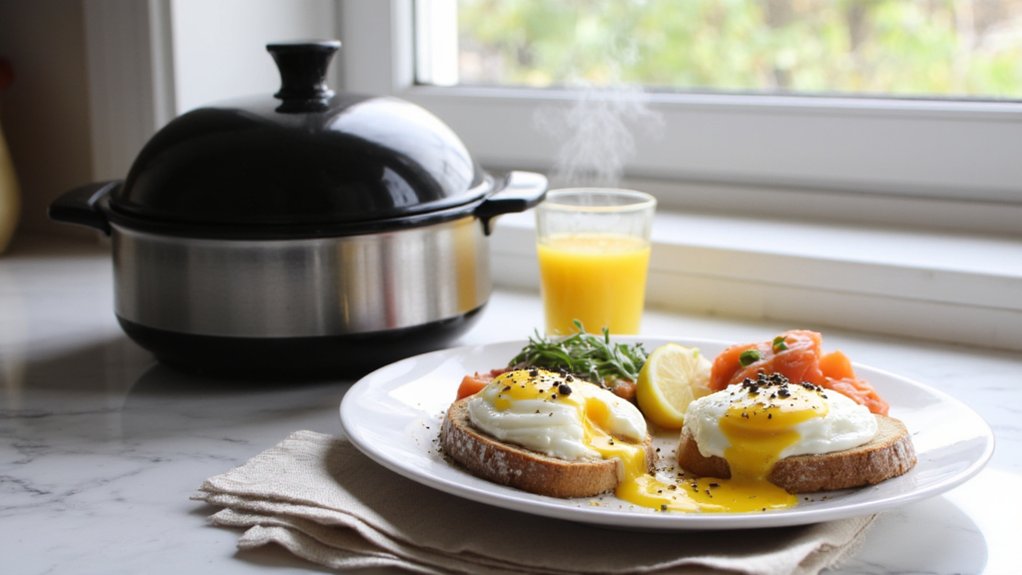
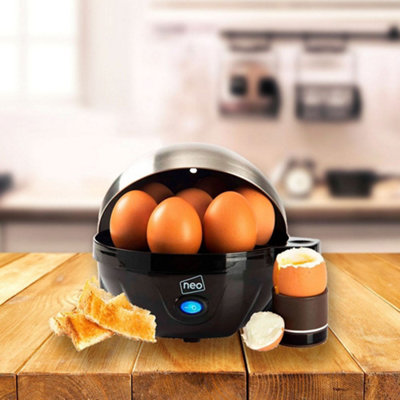
You’ve probably got an egg cooker sitting in your kitchen, maybe still shiny and promising. But here’s the thing nobody mentions: those fancy nonstick trays? They’re basically disposable. The silicone flakes, the coatings wear thin, and suddenly you’re wondering if that gray speck in your poached egg is supposed to be there. Water level’s off by half an inch? Your whole breakfast goes sideways. There’s actually a method to this madness, and once you know what’s really going on behind the scenes, you’ll never cook eggs the same way again.
Key Takeaways
- Silicone coatings flake during cleaning and may leach chemicals into food with heat exposure over time.
- Nonstick surfaces frequently fail to release eggs as advertised despite premium marketing claims and promises.
- Water level critically affects texture; cooker markings are suggestions, not precise measurements for your preference.
- Precise temperature control (160–180°F) and timing adjustments of seconds dramatically alter final yolk consistency results.
- Fresh eggs hold together better during poaching; older supermarket eggs have watery whites that spread easily.

The Silicone Coating Deteriorates Faster Than Expected
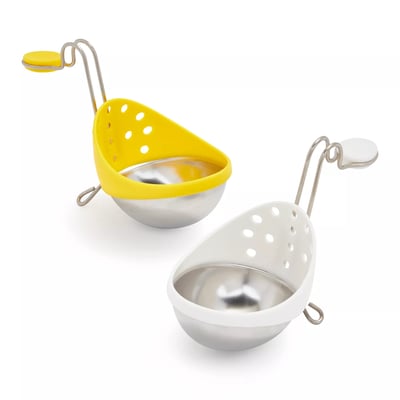
When you’re excited about your new egg cooker and those nifty poaching trays, you’ve probably imagined years of perfect poached eggs ahead of you. Here’s the truth nobody mentions: that silicone coating? It’s not gonna last as long as you think. Within months, you’ll notice heat discoloration creeping across the surface, making them look kinda gnarly. The real kicker is silicone degradation happens faster than manufacturers care to advertise. You’ll spot coating flaking during routine cleaning, tiny bits coming loose in your breakfast. Even worse, chemical leaching can occur when the damaged coating breaks down from repeated heat exposure. Suddenly those convenient trays become questionable. Your dream of endless perfect poached eggs gets derailed by a coating that simply can’t handle the job. It’s frustrating when quality fails this quickly. Some egg cooker brands, like Cuisinart’s brushed stainless steel finish, use metal for their poaching trays, which tends to be more durable than silicone-coated options.
Nonstick Claims Don’t Match Reality
Beyond that deteriorating silicone, there’s another problem that’ll really get under your skin: the nonstick surface barely works as advertised. You’re expecting your eggs to slip right out, but instead they’re sticking like they’ve got glue on them. The coating longevity claims? Let’s just say they’re optimistic at best. Manufacturers promise years of reliable release performance, yet after just a few uses, you’re practically wrestling your poached eggs out of those trays. It’s frustrating. You paid good money for a product that supposedly features premium nonstick technology, and now you’re using butter, oil, and every trick in the book just to get breakfast unstuck. The gap between marketing hype and actual kitchen reality is honestly kind of laughable. If you want kitchen gear that actually delivers, pay close attention to platform materials & durability since not all nonstick trays are created equal.
Water Level Makes or Breaks Your Results
nailing down exactly how much water your poacher actually needs. You’ll want to find that sweet spot for your specific tray, avoid the common measurement blunders that’ll leave you with rubbery eggs or runny disasters, and understand how different tray sizes demand different water amounts because, let’s face it, a tiny two-egg model isn’t gonna play by the same rules as a six-egg beast. If you’re using electric griddles for poaching, remember that precise temperature control can make a huge difference in achieving the perfect consistency every time.

Finding Your Optimal Level
Getting the water level just right in your egg cooker poacher is like tuning a guitar—it’s all about finding that sweet spot where everything harmonizes perfectly. You’ll want to start by checking your cooker’s markings, but here’s the thing: those lines are just suggestions. Your ideal level depends on factors like cooking altitude and how you prefer your egg texture—whether you’re after runny yolks or fully set whites. If you’re at higher elevations, you might need slightly more water since it evaporates faster. Start conservative. Add a little, poach an egg, observe what happens. Too little water? You’ll get rubbery disasters. Too much? Watery sadness. It’s genuinely fun once you nail it. If you’re looking for similar compact kitchen appliances that require careful attention to water levels and sizing, countertop ice makers like the Antarctic Star or Frigidaire are worth researching.
Common Water Measurement Mistakes
While you’d think measuring water is the easiest part of poaching eggs, it’s actually where most people stumble—and hard. Inaccurate measuring throws everything off. You’ll either end up with rubbery eggs or watery disasters. The culprit? Most folks eyeball it. Don’t do that.
| Mistake | Result | Fix |
|---|---|---|
| Too little water | Eggs cook unevenly, stick to tray | Fill to the line |
| Too much water | Eggs become rubbery, tasteless | Measure precisely |
| Ignoring evaporation loss | Water level drops mid-cook | Check before starting |
Here’s the thing: evaporation loss happens faster than you’d expect, especially with longer cooking times. That’s why you gotta measure right from the start. Use the marked lines on your cooker. Trust the measurements, not your gut. Your taste buds will thank you. For the best results, be sure to use accessible water reservoirs so you can refill easily and maintain the perfect water level throughout cooking.
Adjusting for Tray Size
Now that you’ve nailed the measurement basics, here’s where it gets tricky: your tray size actually matters way more than you’d think. Different trays require different water levels, and that’s where tray calibration becomes your secret weapon. A smaller tray? You’ll need less water than you’d guess. Go too deep, and you’re basically boiling your eggs instead of poaching them. Size scaling isn’t complicated, but it’s surprisingly easy to mess up. Here’s the thing: start by filling your specific tray halfway, then adjust from there. Every cooker’s different, so don’t assume last week’s setting’ll work today. Your tray size determines how water distributes around those eggs. Get the calibration right, and you’ll nail perfect poached eggs every single time. That’s the real magic.
Uneven Cooking Is More Common Than You Think

If you’ve ever pulled poached eggs from your cooker only to find some perfectly set while others are still runny—yeah, that’s uneven cooking, and you’re definitely not alone. Honestly, it’s one of the most frustrating parts of using these trays. You think you’ve nailed your technique, but then boom—disappointment.
Several factors contribute to this problem. Shell thickness varies between eggs, which means they heat at diferent rates. Tray placement matters too. Eggs sitting closer to the heat source cook faster than those positioned further away. The water distribution in your cooker might not be perfectly even either. Some spots get hotter, creating those annoying hot spots that rush certain eggs while leaving others lagging behind.
Understanding these quirks helps you troubleshoot better.
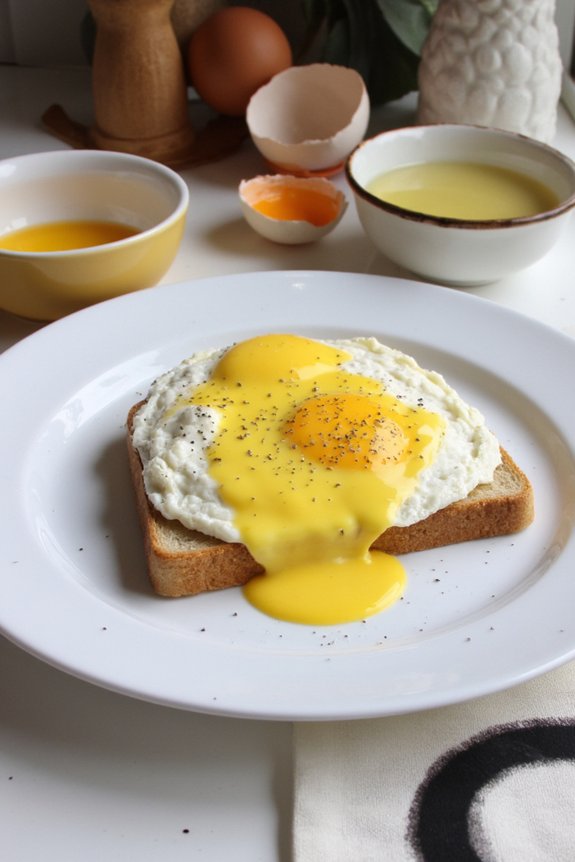
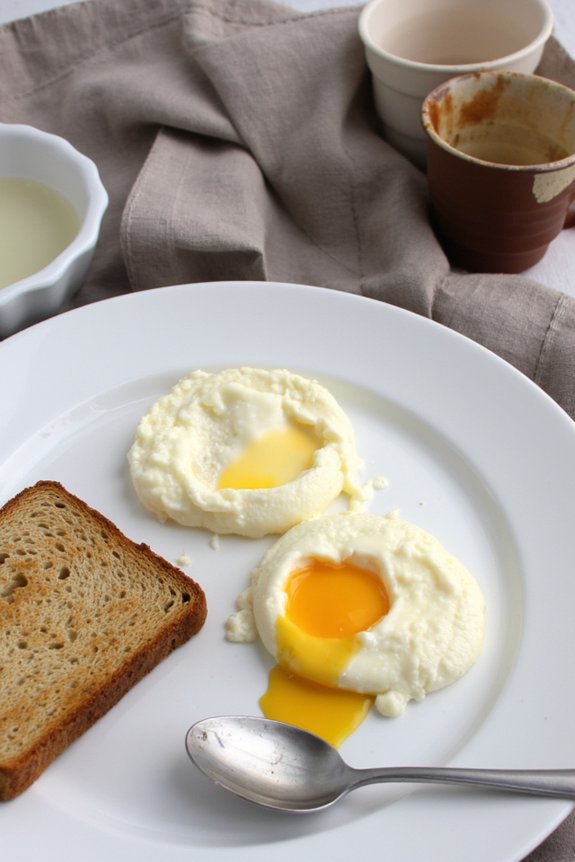
Achieving the Perfect Yolk Consistency Is Trickier Than It Seems
Getting that yolk just right? You’ve gotta nail the water temperature, because even a few degrees off’ll throw your whole poached egg into chaos. Timing’s your secret weapon here—whether you want a runny center that oozes like liquid gold or a firmer yolk that won’t betray you on the plate, a few extra seconds can make all the difference between breakfast triumph and yolk disappointment.

Water Temperature Control Matters
Water temperature’s the secret sauce that separates a gorgeously runny yolk from a rubbery disappointment. You’ll want a precise thermostat on your cooker—we’re talking 160 to 180 degrees Fahrenheit for that perfect poach. Too hot? Your whites’ll scramble faster than you can say “oops.” Too cold and you’re basically making egg soup.
Gentle preheating is your best friend here. Give your cooker a solid five minutes before you crack those eggs in. It sounds fussy, but trust me, it’s worth it.
| Temperature | Result | Time |
|---|---|---|
| 160°F | Creamy yolk | 4-5 min |
| 170°F | Runny center | 3-4 min |
| 180°F | Firmer yolk | 2-3 min |
| 190°F+ | Overdone mess | 1-2 min |
Your egg cooker’s got one job. Let it do it right.
Timing Adjustments for Preference
Since you’ve nailed the temperature sweet spot, here’s where things get delightfully complicated—timing is basically the difference between brunch hero and breakfast flop. Your yolk preference is everything. Like soft and runny? You’re looking at three to four minutes, maybe less depending on your cooker’s mood. Want something firmer? Bump it to five or six minutes, and you’ll get that jammy, golden center that’ll make you feel like a culinary genius. Most adjustable timers on quality poaching trays take the guesswork out, but honestly, you’ll probably fiddle with them anyway. Start conservative. You can always cook longer, but you can’t uncook an egg. Those first few attempts are your playground—experiment, taste, adjust. Pretty soon you’ll dial in your perfect poach without even thinking.
Maintenance Requirements Nobody Mentions
Most folks who buy egg cooker poaching trays think the hard part’s over once they’ve mastered the cooking technique, but here’s the thing—nobody really talks about what happens after you’ve made your perfect poached eggs. Your trays need love too. Coating maintenance is absolutely essential because that nonstick surface? It’ll deteriorate faster than you’d think if you’re not careful. Avoid metal utensils like they’re your enemy—they’ll scratch that precious coating right off. For descaling frequency, you’re looking at every two to three weeks depending on your water hardness. Mineral buildup sneaks up on you real quick. Use white vinegar and let it soak. It’s boring, sure, but skip this step and you’ll regret it when your cooker starts acting weird.
Egg Quality Matters More Than You’d Realize
You’ve got your cooker gleaming, your trays descaled and ready to go, but here’s where a lot of people drop the ball—they grab whatever eggs are sitting in their fridge and wonder why their results look, well, mediocre. Egg freshness is genuinely game-changing. Older eggs have watery whites that spread everywhere, making poaching a nightmare. Fresher eggs? They hold together beautifully. The yolk firmness you’re chasing depends on this too. A farm-fresh egg’ll give you that perfectly set center you’re craving, while a week-old egg might disappoint. Check those expiration dates, seriously. Consider buying from farmers markets or local producers—they’re usually fresher than supermarket options. Your poaching trays can only do so much. The eggs themselves deserve your atention, and your breakfast’ll thank you for it.
Storage and Longevity Issues
Once you’ve invested in quality eggs and gotten your technique down, keeping your trays in tip-top shape is where the real work begins. Here’s the thing: these little guys don’t last forever. Shelf degradation sneaks up on ya. Store them in a cool, dry spot, because humidity damage’ll wreck your setup faster than you can say “scrambled.” The lids are especially vulnerable to warping when exposed to moisture or extreme temps. And don’t even get me started on gasket breakdown—those rubber seals deteriorate over time, making your trays leak like a sieve. Regular cleaning helps, but honestly? Most folks don’t realize their trays are slowly falling apart until it’s too late. Handle ’em with care, store ’em properly, and maybe they’ll actually stick around.
Tricks to Actually Make Them Work Properly
While it’s tempting to just dump your eggs in and hope for the best, there’s actually some legit technique involved here. First, crack your eggs gently into the poaching trays—don’t just toss ’em in like you’re angry at them. A little gentle stirring of the water before adding eggs helps distribute heat evenly and prevents those tragic sticking situations. You’ll want to make certain proper steam protection by covering your cooker with the lid, but don’t seal it completely tight. Leave a tiny gap for steam to escape, otherwise you’re basically creating an egg pressure cooker, and nobody wants that disaster. The sweet spot? Medium heat. Not blazing hot. Patience wins here. Give it time, and you’ll nail consistently perfect poached eggs that actually slide out smoothly.
Frequently Asked Questions
Can Egg Cooker Poaching Trays Work With Different Egg Sizes or Types?
You’ll find that most poaching trays aren’t designed for size compatibility with jumbo or extra-large eggs. Standard trays fit medium eggs best. You can adjust water levels to control yolk firmness, but oversized eggs won’t fit properly.
Are Silicone Poaching Trays Safer Than Plastic or Metal Alternatives?
You’re like a chef choosing between tools—silicone’s your safest bet. It’s got superior material safety and heat resistance compared to plastic’s warping or metal’s heat conduction issues, making it ideal for consistent poaching.
How Do Temperature Fluctuations Affect Poaching Results in Electric Cookers?
You’ll find that temperature fluctuations cause uneven cooking and water agitation problems. Your eggs won’t poach consistently when heat varies, resulting in runny whites or overcooked yolks. Temperature stability’s essential for perfect poaching results.
Can Poaching Trays Be Used in Microwave or Stovetop Cookers?
You can’t use most electric cooker poaching trays in microwaves due to metal components, but you’ll find stovetop adaptations available. Some trays feature microwave compatibility options, though they’re less common than traditional designs.
What’s the Average Lifespan Before Replacement Becomes Necessary?
You’ll typically get three to five years from your poaching trays before lifespan indicators suggest replacement. Watch for warping or discoloration. Replacement cost runs between $8-15, making periodic updates affordable and worthwhile.
Conclusion
You’ve now got the inside scoop. Egg cookers aren’t the magic bullet they’re marketed to be, but here’s the thing—they’re absolutely worth it once you crack the code. Start conservative with timing, keep your water measured, and remember: you can’t unboil an egg. It’s like they say, you’ve gotta learn to walk before you run. Your perfect poached egg’s waiting on the other side of a few practice rounds.


