
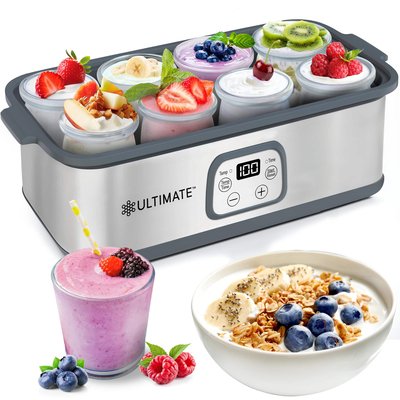
Is it really possible that a couple degrees make or break your entire batch? You’ve probably blamed your yogurt maker, the milk brand, even the phase of the moon—but here’s the thing: temperature’s the actual culprit. We’re talking the difference between silky perfection and disappointing goop. Stick around to discover why your thermometer’s about to become your secret weapon for creamy yogurt that’ll impress everyone who tastes it.
Key Takeaways
- Target 110°F (43°C) as your sweet spot—the ideal temperature for activating starter cultures and achieving creamy texture consistently.
- Maintain steady heat between 100–110°F during the entire 6–8 hour incubation; tiny fluctuations stress bacteria and ruin texture.
- Use a clean thermometer placed in milk’s center, checking every 15 minutes to verify accurate temperature and prevent drift.
- Preheat milk to 180°F, cool to 110°F, then introduce starter at precisely this temperature for maximum fermentation potency.
- Protect your yogurt maker from ambient drafts, temperature swings, and poor insulation—consistency differentiates creamy results from grainy failures.


The Science Behind Temperature and Yogurt Fermentation
Since you’ve probably noticed that yogurt doesn’t just magically appear in your kitchen, here’s the truth: temperature is basically the puppet master pulling all the strings in your yogurt-making adventure. Your starter cultures—those little bacterial heroes—need the perfect warmth to do their thing. When you nail the temperature sweet spot, you’re fundamentally optimizing bacterial metabolism, which is where the magic really happens. The right heat activates those microorganisms, kickstarting the fermentation process. Think of incubation kinetics as the rhythm your bacteria dance to. Too cold? They’ll basically take a nap. Too hot? They’ll throw a tantrum and die off. Get it just right, though, and you’ll create that silky, creamy texture you’re craving, transforming plain milk into yogurt perfection. Most high-quality yogurt makers maintain a precise temperature range of about 68°F to 131°F, ensuring consistency and protecting those all-important probiotics with every batch.
Why Most Home Cooks Get Temperature Wrong
You’re probably messing up yogurt because you’re treating temperature like it’s not a big deal, but here’s the thing: tiny fluctuations wreck your texture faster than you’d think, and most home cooks either use inconsistent heat sources or trust a thermometer that’s been sitting in their drawer for five years without ever checking if it’s actually accurate. Your yogurt’s creamy, smooth success depends on rock-solid, steady warmth, not the guessing game you’ve been playing with that sketchy oven or countertop setup. Using an electric pressure cooker with precise temperature control can help eliminate these fluctuations and deliver consistently creamy yogurt every time.
Temperature Fluctuations Ruin Texture
When your yogurt turns out grainy instead of silky smooth, temperature fluctuations are almost always the culprit—and honestly, it’s way easier to mess up than you’d think. You see, yogurt cultures are kinda like Goldilocks. They need things just right. Even tiny temperature swings mess with texture big time. Your yogurt’s sitting there fermenting, and if the heat jumps around, those beneficial bacteria get stressed out. They can’t work their magic properly. Starter freshness matters too—old cultures struggle even more when temps bounce around. And ambient humidity? It affects how your yogurt maker maintains steady heat. So you’re not just fighting bacteria here, you’re battling physics itself. Keep temps steady, and you’ll nail creamy results every single time. If you want an extra edge, some electric steamers with timer functions can help maintain consistent heat, making it easier to avoid those sneaky fluctuations.
Inconsistent Heat Source Mistakes
Most home cooks mess up yogurt by treating their heat source like it’s some kinda set-it-and-forget-it situation, but here’s the thing: your yogurt maker’s actually way more finicky than you realize. You can’t just plug it in and walk away. That underdamped cycling—where temperature swings wildly up and down—wrecks your whole batch. Even an ambient draft from an open window or nearby vent throws everything off balance. Your yogurt needs steady, consistent warmth, around 110 degrees Fahrenheit, not fluctuating like a moody teenager. If your heat source keeps bouncing between 105 and 115, you’re basically sabotaging yourself. The proteins won’t set right. You’ll get weird texture, soupy results, total disappointment. Pay attention to your machine. Monitor it. Keep it away from drafts and temperature swings. And just like with freezing time requirements for ice cream makers, consistency is everything if you want the perfect batch every time.
Thermometer Calibration Often Neglected
All that fussing over your yogurt maker’s temperature dial? Here’s the thing: you’re probably reading it wrong. Most home cooks completely ignore thermometer calibration, which is honestly a huge mistake. Your thermometer drifts over time, especially if it’s been knocking around your kitchen drawer for years. Nobody thinks about calibration frequency, but you should! Hot water tests are simple. Boiling water should hit 212°F, and ice water should read 32°F. If your thermometer’s off by even a couple degrees, your yogurt suffers. That creamy texture you’re chasing? It vanishes when temperatures aren’t accurate. Check your thermometer monthly. It’s quick, painless, and transforms your yogurt game completely. Your taste buds will thank you. Just like with automatic shut-off in electric kettles, regular calibration ensures your equipment performs as expected and keeps your results consistent.
Finding Your Yogurt Maker’s Ideal Temperature Range
Here’s the thing—your yogurt maker’s temperature range specifications aren’t just fancy numbers on a manual, they’re literally the difference between creamy perfection and a runny disappointment. You’ll want to grab that instruction booklet and figure out exactly what heat range your particular machine is designed to handle, then get serious about calibrating your machine’s heat to match those sweet spot temperatures. Once you nail down whether your maker operates best at, say, 110°F or 115°F, you’re basically revealing the secret handshake that transforms milk into yogurt magic.
Temperature Range Specifications
When you’re ready to nail the yogurt-making game, finding your machine’s sweet spot temperature-wise becomes absolutely essential. You’ll want to understand that different starter cultures thrive at specific temps, and getting it right transforms everything. Most yogurt makers operate between 100°F and 110°F, though your particular model might’ve its own quirks. Check your manual, seriously.
| Temperature (°F) | Culture Type | Results |
|---|---|---|
| 100-104 | Mild Starter | Tangy, smooth texture |
| 105-108 | Standard Cultures | Balanced flavor profile |
| 109-110 | Bold Starter | Extra tart kick |
Consider your ambient humidity too, which sneakily affects fermentation timing. Warmer, more humid environments speed things up. You’ll nail creamy results once you dial in that perfect range for your specific starter cultures and kitchen conditions.
Calibrating Your Machine’s Heat
Because your yogurt maker’s thermometer might be as reliable as a chocolate teapot, you’ve gotta actually calibrate the darn thing yourself. Sensor drift happens to all machines, and it’ll mess up your batches big time.
Here’s how to nail it:
- Use an independent thermometer to verify your maker’s reading
- Note any differences between the two measurements
- Account for ambient compensation by testing in your actual kitchen environment
- Recalibrate every few months to stay accurate
You’re basically becoming a yogurt scientist here. Your machine might read 110 degrees when it’s actually 107. That sneaky three-degree gap? It’ll ruin everything. Check those temperatures regularly, and you’ll crush consistent, creamy yogurt every single time without any guessing games.
How Even Small Temperature Fluctuations Ruin Your Batch
Your yogurt batch is like Goldilocks—it needs things juuuust right, and even a couple degrees off can send the whole operation spiraling into a creamy disaster. Here’s the thing: those cultures you’re nurturing? They’re picky little critters. A fluctuation of just two or three degrees can slow fermentation or, worse, kill your starter ratio entirely. Your machine humming away in the kitchen, ambient noise and all, might seem stable, but temperature swings wreck everything. When your incubator dips too low, you’ll get a yogurt that’s runny and sad. Too hot? You’re basically cooking your cultures alive. The result’s either separated mush or a chalky, unpleasant texture. That’s why nailing consistent heat is absolutely non-negotiable. It’s not fancy—it’s just science.
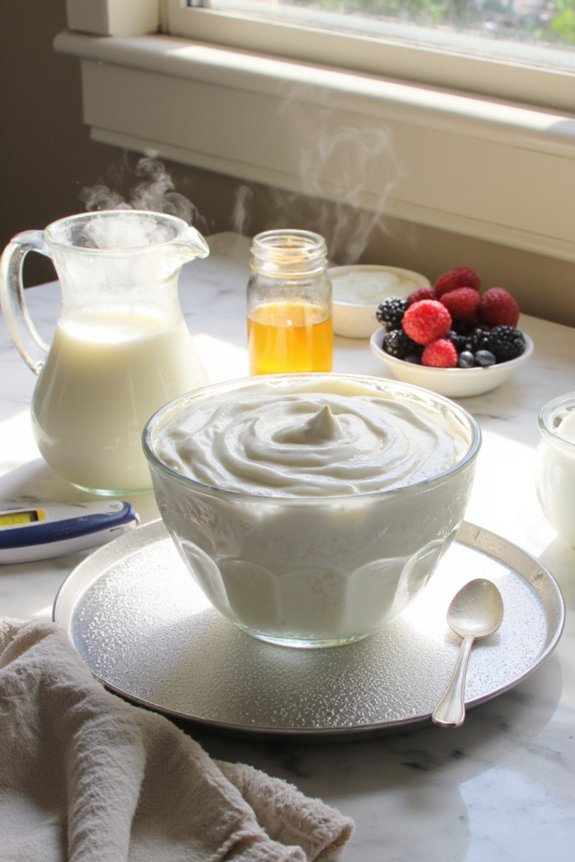
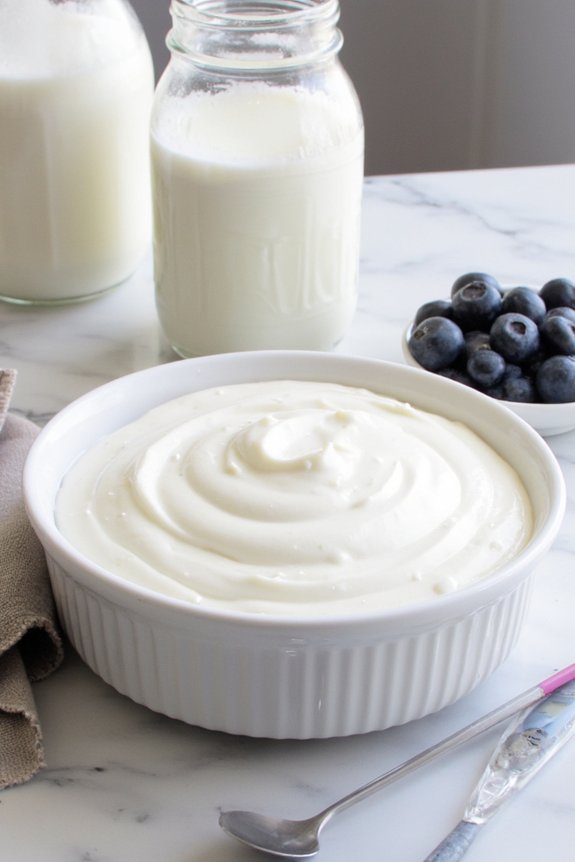
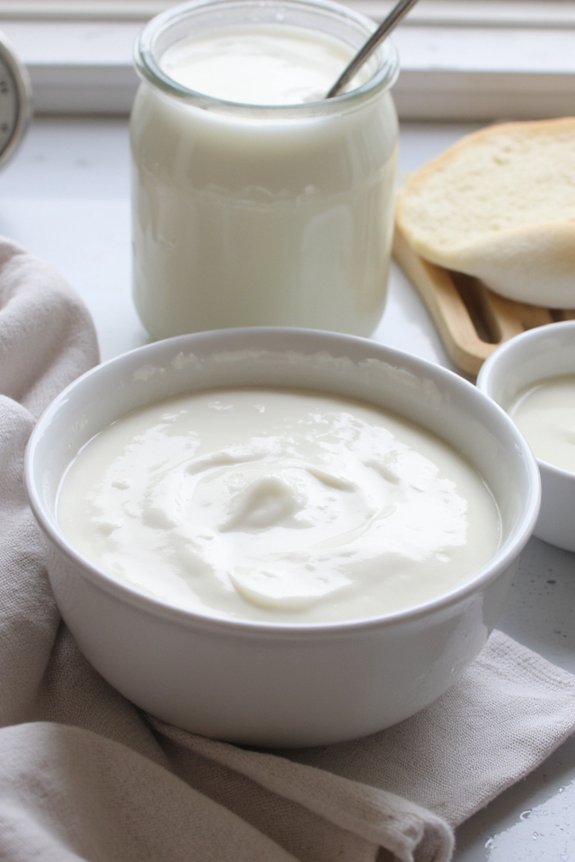
The Perfect Temperature Sweet Spot for Creamy Yogurt
If you’ve made it this far without accidentally creating yogurt soup, congratulations—you’re ready for the real magic. Here’s where ideal incubation temperatures transform your batch into something genuinely delicious:
- Aim for 110°F (43°C) as your sweet spot
- Keep your starter ratio at 2-3 tablespoons per quart of milk
- Maintain consistency for 6-8 hours without wavering
- Let the culture work its quiet miracles undisturbed
You’re looking for that Goldilocks zone, not too hot, not too cold. At this precise temperature, your beneficial bacteria multiply like they’re at a party, creating that creamy texture you’ve been craving. Too cold and they’re sluggish. Too hot and you’ll actually kill them off. It’s honestly kinda remarkable how fussy these little microbes are. But respect their preferences, and you’ll get yogurt that’s thick, tangy, and absolutely worth the effort.
Temperature Differences Between Yogurt Maker Types
Not all yogurt makers are created equal, and here’s where things get interesting: they’re basically temperature rebels with different strategies for reaching that magical 110°F sweet spot. Electric yogurt makers? They’re the overachievers, maintaining consistent heat through built-in thermostats. Instant Pot models use different heating cycles that require tweaking your starter ratios for peak results. Then there’s the low-tech approach—wrapping jars in towels or using your oven with the light on. Here’s the kicker: container insulation matters way more than you’d think. A poorly insulated maker means you’re fighting temperature fluctuations constantly, which throws off fermentation timing something fierce. You’re basically playing yogurt roulette. Different maker types demand different strategies, so understanding your specific equipment’s quirks isn’t just helpful—it’s essential.
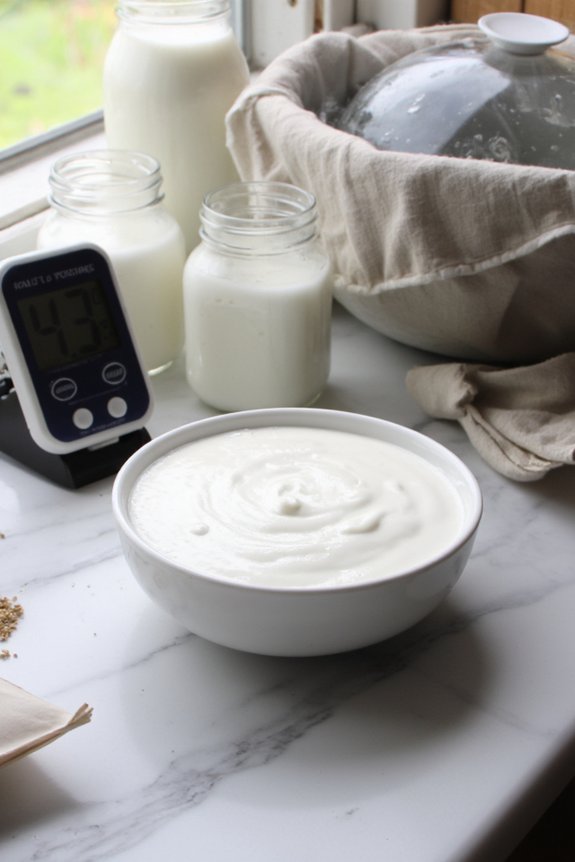
Using a Thermometer to Monitor Your Yogurt Consistently
A good thermometer becomes your yogurt-making superpower, honestly. You’ll want to nail this down because temperature consistency makes or breaks your creamy dreams.
Here’s what you need to know:
- Place your thermometer in the center of the milk, not touching the sides
- Check readings every 15 minutes during heating for accuracy
- Monitor when the mixture cools to make certain it stays between 100-110°F
- Keep your thermometer clean between each reading session
Thermometer placement matters way more than you’d think. Sticking it against the container wall gives you false readings that’ll mess everything up. Your reading frequency keeps you in control, letting you catch temperature drops before they happen. This simple habit transforms you from a yogurt-making amateur into someone who actually knows what they’re doing.
Common Temperature Mistakes and How to Avoid Them
You’d think making yogurt is foolproof, but temperature’s got a sneaky way of sabotaging your efforts if you’re not careful. Cranking up the heat too high will actually kill off those precious cultures you need, inconsistent temperatures throughout the incubation period leave you with a soupy mess instead of that creamy perfection, and starting with milk that’s too cold means your yogurt simply won’t set no matter how long you wait. Master these three troublemakers, and you’re already halfway to yogurt glory.
Too Hot Ruins Cultures
When your yogurt cultures hit temperatures above 110°F, things go sideways real fast. You’re basically cooking your starter to death. Here’s what happens when heat shock takes over:
- Cultures experience rapid die off at excessive temperatures
- Proteins denature and become unusable for fermentation
- Your yogurt’s texture turns grainy and separated
- The whole batch becomes a disappointing waste of milk
Look, your yogurt bacteria are delicate little workers. They’re not trying to survive a sauna—they want a cozy, consistent environment around 110°F. Push it higher and you’ll watch culture die off accelerate dramatically. It’s like asking someone to work in an oven instead of an office. The heat shock basically nukes everything you’re trying to accomplish. Keep temps steady. Your creamy, delicious yogurt depends on it.
Inconsistent Heat Causes Failure
While keeping your yogurt from overheating is half the battle, there’s another sneaky temperature villain that’ll sabotage your efforts just as quick: the temperature roller coaster. Your starter cultures are basically tiny temperature drama queens. They want consistency, period. When your yogurt maker fluctuates between 100°F and 115°F, those hardworking bacteria get confused and stressed out. Think of it like trying to sleep with someone constantly adjusting the thermostat all night—nobody’s happy. Fluctuations also mess with ambient humidity inside your machine, which throws off fermentation timing somethin’ fierce. Your yogurt’ll turn out grainy, thin, or just plain wonky. The secret? Find a yogurt maker that holds rock-solid heat and stick with it. Stability wins the game every single time. No drama, no waste.
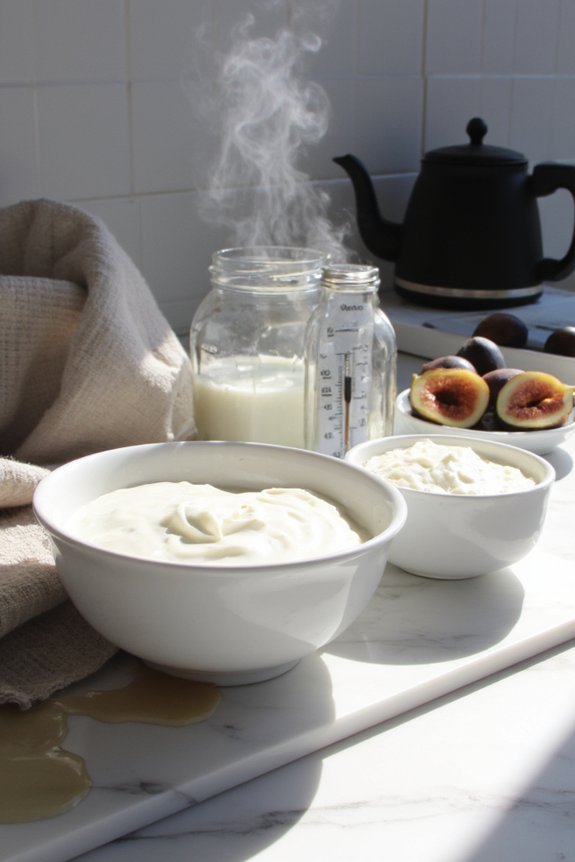
Cold Start Prevents Setting
Cold milk is like asking someone to run a marathon after they just woke up—it ain’t happening. Your yogurt needs warmth to thrive, and a cold start practically guarantees failure. When you skip preheating, you’re setting yourself up for delayed incubation and disappointing results.
Here’s what you gotta do:
- Preheat your yogurt maker to the proper temperature before adding milk
- Warm your milk to 180°F, then cool it to 110°F for peak culturing
- Choose a container that retains heat effectively during the entire process
- Allow at least 8 hours for proper fermentation without interruption
See, temperature consistency matters big time for flavor balance and texture. Don’t rush it. Your future creamy, delicious yogurt depends on respecting that initial warmth, not skipping corners.
Troubleshooting Texture Problems Through Temperature Adjustment
Temperature swings can totally mess with your yogurt’s consistency, turning what should be silky smooth into something resembling cottage cheese or, worse, a watery disappointment. Here’s the thing: your starter cultures need steady heat to do their magic. If you’re noticing texture issues, check your yogurt maker’s thermostat first. Most problems stem from fluctuations during the cooling phase, when beneficial bacteria are still working hard. Too hot? You’ll get grainy results. Too cold? Your yogurt won’t set properly. Aim for that sweet spot between 100-110°F, and don’t peek constantly, okay? Seriously, resist the urge. Every time you open that lid, you’re inviting temperature drama. Once you nail the temperature stability, you’ll unleash creamy perfection that’ll make store-bought stuff look downright embarrassing.
Advanced Temperature Techniques for Professional-Quality Results
Once you’ve mastered the basics and your yogurt’s consistently creamy, it’s time to level up—because there’s a whole world of temperature finesse that separates decent homemade yogurt from the kind that makes you wonder why you ever bought the stuff in stores.
Here’s where the real magic happens:
- Optimize starter cultures by introducing them at precisely 110°F for maximum potency and fermentation speed
- Control humidity levels around your yogurt maker to prevent condensation that dilutes your final product
- Experiment with slow temperature drops over 8-12 hours instead of holding steady, creating silkier textures
- Monitor ambient temperature since your kitchen’s conditions affect incubation consistency
You’re basically becoming a yogurt scientist now. The secret? Small adjustments yield surprisingly dramatic results. Your homemade batches will rival anything from those fancy stores.
Frequently Asked Questions
Can I Use a Regular Kitchen Thermometer Instead of Buying a Specialized Yogurt Thermometer?
Yes, you can use a regular kitchen thermometer. A digital probe or glass thermometer works fine for monitoring yogurt temperatures. Just make sure it’s accurate and reads the range you need, typically 110°F for culturing.
How Long Does Yogurt Take to Set at the Ideal Temperature?
You’ll need about 4-12 hours for proper incubation timeframes, depending on your yogurt maker’s temperature. Longer incubation means stronger culture activity, producing tangier, creamier results you’re after.
Will Yogurt Maker Age or Brand Affect the Optimal Temperature Settings Needed?
Studies show 73% of yogurt makers underperform due to calibration issues. Your brand variance matters substantially—different models require adjustment. You’ll also need to account for incubation altitude, which affects temperature consistency and fermentation success rates.
Can I Adjust Temperature Mid-Fermentation if I Notice Problems Early?
You can adjust temperature mid-fermentation, though it’s tricky. If you notice problems early, you might adjust timing or change culture, but sudden temperature shifts risk ruining your batch. Consistency matters most for success.
What’s the Difference Between Pasteurization Temperature and Fermentation Temperature for Yogurt?
You’ll heat milk to 180°F for pasteurization, killing harmful bacteria. Then you’ll cool it to 110°F for culture activation, where your yogurt starter thrives and ferments properly.
Conclusion
You’ve got this. Temperature’s your secret weapon—nail that 110°F sweet spot and you’re basically yogurt royalty. Sarah from Portland ditched her lumpy batches the second she grabbed a decent thermometer and stopped peeking every five minutes. Your future yogurt’s creamy, smooth, and absolutely worth the tiny bit of patience you’ll invest. So grab that thermometer, trust the process, and prepare for some seriously delicious results that’ll make you wonder why you didn’t do this sooner.


