You’re standing there watching your perfectly sealed bag bob around like a tiny inflatable duck, and yeah, that’s not supposed to happen. Your sous vide setup’s supposed to be precise, reliable, maybe even a little boring in the best way possible. But floating bags? They’re the kitchen equivalent of a plot twist nobody asked for. There’s actually a simple reason why this keeps happening, and better yet, several surprisingly easy fixes that’ll get your food cooking evenly every single time.
Key Takeaways
- Trapped air inside sealed bags creates buoyancy; use water displacement technique to remove air before final sealing.
- Lean proteins like fish and chicken breasts are naturally buoyant; fattier cuts sink more easily.
- Magnetic clips or weights positioned along bag sides provide balanced submersion without damaging food or seals.
- Inspect sealed edges and corners for air leaks; double-bagging reduces flotation for persistent problems.
- Powerful water circulation from immersion circulator helps keep bags submerged and maintains even temperature distribution.


Understanding Buoyancy in Sous Vide Cooking
When you’re first getting into sous vide, you’ll quickly discover that floating bags are basically the nemesis of perfectly cooked food. Here’s the thing: your bag’s buoyancy comes down to basic physics. As water heats up, it undergoes pressure variation, which affects density and how your sealed pouch behaves in the bath. Think of it like this—a vacuum-sealed bag filled with air pockets becomes your little culinary balloon. The heat transfer happening inside your water bath causes the air inside the bag to expand, making it more buoyant than the surrounding liquid. It’s not exactly rocket science, but it’s definitely annoying when your ribeye’s doing laps around the circulator. Understanding these principles helps you troubleshoot way faster and get back to cooking delicious meals. Using a sous vide device with powerful water circulation can help keep your bag submerged and maintain even cooking temperatures throughout the bath.
Air Pockets: The Primary Culprit Behind Floating Bags
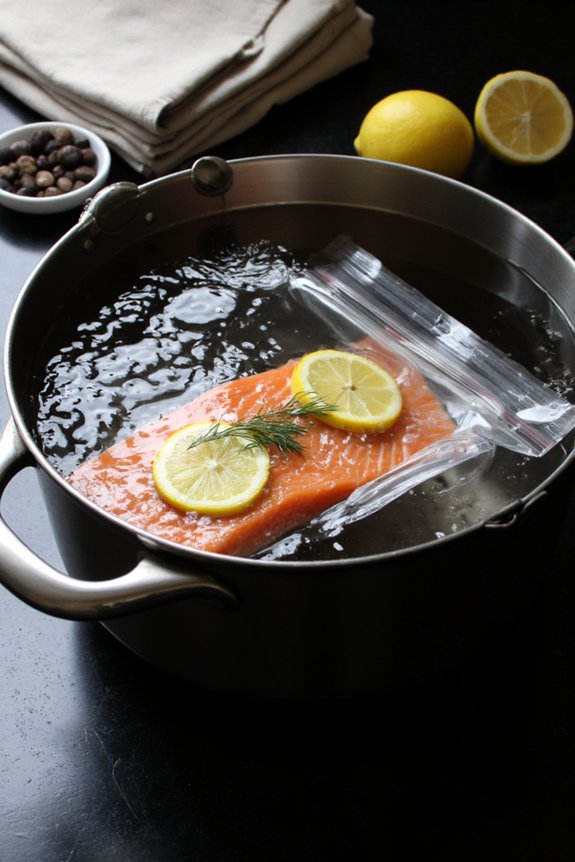
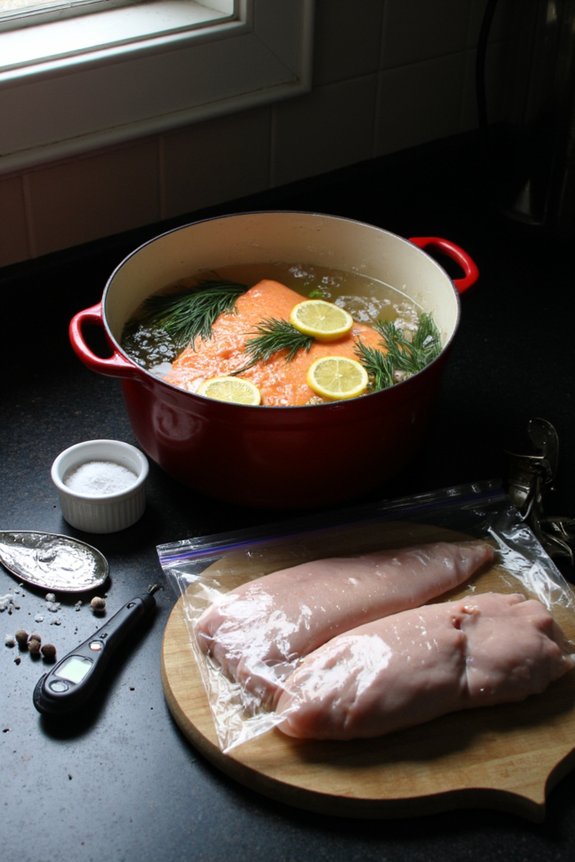
Since you’re sealing up your food in a bag, you’re basically trapping air inside—and that’s your real problem right there. Those sneaky air bubbles are like little floatation devices having a party in your water bath. Even the tiniest air pocket will fight against gravity and send your bag bobbing to the surface like it’s on vacation.
Here’s the thing: vacuum integrity is everything. When you’re not removing all that trapped air before sealing, you’re basically creating a built-in life preserver. That air bubble expands slightly from the heat, making matters worse and ensuring your bag won’t stay put where it belongs.
The solution? Seal your bags properly using the water displacement method or a decent vacuum sealer. Get ruthless about removing every last bit of air. Your sous vide success depends on it. If you’re also boiling water for sous vide cooking, using a rapid boiling electric kettle can save time and ensure consistent water temperature control.
Mastering the Water Displacement Sealing Technique
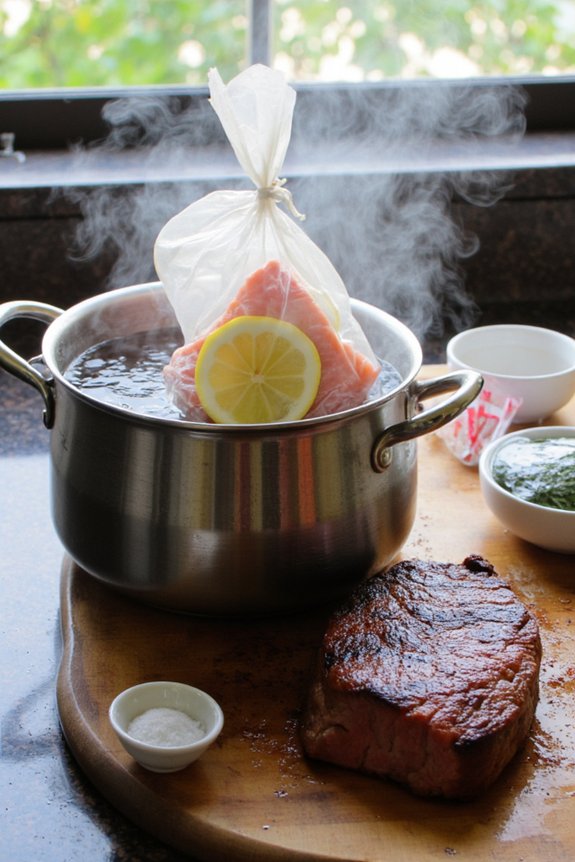
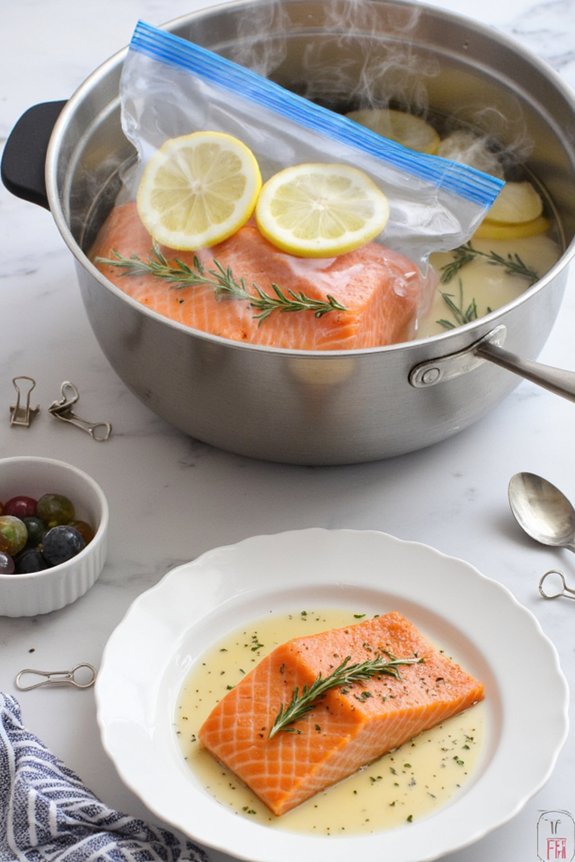
You don’t need fancy equipment to win the air-removal game—the water displacement method is your secret weapon, and it’s almost embarrassingly simple. Here’s how it works: seal your bag almost all the way, leaving just a tiny opening. Then slowly submerge it into your hot water bath, letting the water pressure push air out through that gap. It’s like magic, except it’s just physics. The plastic folding naturally as you lower the bag creates incredible pressure, forcing stubborn air pockets right out. Close that final seal once everything’s underwater, and boom—you’ve got a sinker, not a floater. Practice this technique a few times and you’ll wonder why you ever struggled with floating bags. It’s genuinely that effective. For even better sous vide results, consider using clear, odor-free ice in your bath to help maintain water purity and temperature consistency.

Using Clips and Clamps to Keep Bags Submerged
If your sous vide bags keep doing that annoying bob-and-weave thing like they’re training for the Olympics, it’s time to recruit some clips and clamps to keep ’em in place. You’ve got options here—from simple binder clips and clothespins to fancy sous vide-specific clamps designed to grip your bags without puncturing them, and honestly, the right tool’ll make all the difference between a perfectly cooked steak and a half-done disappointment. We’re gonna walk you through picking the right clip for your setup and mastering the clamping techniques that’ll keep your food exactly where it needs to be. When choosing your clips or clamps, consider safety features and design to ensure you avoid burns or accidental slips during sous vide cooking.
Clip Selection and Types
Floating bags aren’t just annoying—they’re basically your sous vide saboteurs, refusing to stay put while your perfectly seasoned salmon sits half-submerged like it’s sunbathing. You’ve got options, though, and choosing the right clip can totally transform your cooking game.
Here’s what you should know about clip selection:
- Stainless steel clips offer superior durability and won’t rust in your water bath
- Silicone-lined designs protect seal materials from getting pinched or damaged during clamping
- Magnetic clip designs attach to metal containers for hands-free bag management
- Heavy-duty clamp variations provide maximum grip strength for larger, buoyant bags
Different clip designs work better depending on your container type and bag thickness. Test a few options before committing to one. You’ll find your sweet spot quick enough, and soon you’re cooking like a pro. If you want a truly versatile kitchen setup, consider how handle design and comfort impact the usability of your other cooking tools, like cast iron skillets, as well.
Proper Clamping Techniques
Once you’ve got the right clip in your arsenal, it’s all about technique—because even the fanciest clamp won’t save you if you’re clamping like you’re defusing a bomb. The secret? Gentle but firm. You want enough clamp tension to keep that bag pinned down, but not so much that you’re squeezing the life out of it. Too tight, and you’ll compromise seal integrity, letting water seep into your carefully vacuum-sealed meal. That’s a recipe for disaster.
Position your clip about an inch below the water line. This sweet spot prevents floating while maintaining even pressure. Don’t clamp the very edge—spread the grip across the bag’s side for better control and stability. Think of it like a secure hug, not a headlock. Your food’ll thank you for the balanced approach.
Magnetic Solutions for Securing Your Vacuum Bags
If clips and clamps aren’t your thing, magnetic solutions offer a sleek alternative that’ll keep those pesky bags submerged without the fuss. You’ve got magnetic clips that attach right to your pot’s rim and magnetic weights that sink to the bottom, plus the trick of figuring out exactly where to position ’em for maximum holding power without creating dead zones in your water. It’s honestly like finding the sweet spot in a video game, except way more delicious.
Magnetic Clips Explained
Magnetic clips represent one of the cleverest solutions you’ll find for keeping your vacuum-sealed bags anchored to the side of your water bath, and they’re honestly a game-changer if you’ve been wrestling with flotation issues. These nifty little devices use powerful magnets to grip your bags without puncturing them, which beats those sketchy clothespins every time.
Here’s what makes them so effective:
- They work with field mapping technology to create even pressure distribution across your bag
- Unlike magnetic stirrers, they don’t interfere with your water circulation
- They’re adjustable, so you can position bags exactly where you want ’em
- They’re reusable and won’t damage your vacuum seal
You’ll wonder how you ever lived without them. Seriously.


Installing Magnetic Weights
Installing weights on your sous vide setup isn’t rocket science, but it’s definitely one of those “why didn’t I do this sooner?” moments that’ll transform your cooking game. You’ll grab magnetic stirrers and position them strategically along your bag’s sides. The ferrite encasements keep everything secure without damaging your food or water bath. Here’s what you need to know:
| Weight Type | Strength | Best For | Cost | Durability |
|---|---|---|---|---|
| Standard Magnetic | Medium | Most bags | $8-12 | 2-3 years |
| Heavy-Duty Ferrite | High | Thicker cuts | $15-20 | 5+ years |
| Combo Pack | Variable | Flexibility | $20-25 | Mixed |
| Budget Option | Low | Light items | $5-7 | 1-2 years |
| Premium Grade | Maximum | Professional | $30+ | Lifetime |
Your bags’ll stay perfectly submerged. No more floating frustration!
Best Magnet Placement
Now that you’ve got your weights ready, here’s where the real magic happens—and we’re talking about placement strategy, not just slapping magnets anywhere and hoping for the best. You’ll want to think strategically about where those magnetic weights go. Here’s your game plan:
- Position magnets along the bag’s sides, not just the bottom, for balanced support
- Space them evenly to prevent lopsided floating and uneven cooking
- Use refrigerator magnets as backup options if you’re in a pinch
- Avoid placing magnetic stirrers too close to your heating element
The sweet spot? About two-thirds down the bag’s depth. This positioning keeps your vacuum-sealed food submerged without fighting the water’s natural circulation. It’s all about finding that equilibrium where gravity and magnetism become your sous vide’s best friends. Trust us, nail this, and you’ll never chase a floating bag again.
Weighted Plates and Racks: Heavy-Duty Alternatives
When your sous vide bags keep staging an escape attempt like they’re auditioning for an aquatic heist movie, weighted plates and racks swoop in as the heavy-duty heroes you didn’t know you needed. These bad boys anchor your food down with serious gravitational force.
| Material | Best For | Durability |
|---|---|---|
| Cast Iron | Even weight distribution | Extremely long-lasting |
| Stainless Steel | Corrosion resistance | Superior durability |
| Silicone Racks | Non-scratch protection | Very good |
You’ve got options here. Cast iron weights deliver old-school reliability and won’t budge under pressure. Stainless steel racks offer sleek functionality while resisting water damage. They’re investments that’ll outlive your current immersion circulator. Sure, they cost more upfront, but you’re basically buying sous vide peace of mind.
Food-Specific Issues: Why Certain Proteins Float
Here’s the thing about certain proteins—they’re basically the rebellious teenagers of the sous vide world, determined to break free from your carefully controlled water bath. Some foods just won’t cooperate, and understanding why helps you troubleshoot like a pro.
- Lean fish floats because it lacks fat density to keep it submerged
- Chicken breasts have lower protein buoyancy issues than fattier cuts
- Gelatin formation in collagen-rich meats actually helps them sink as they cook
- Delicate proteins like scallops need extra caution since they’re naturally bouyant
The real culprit? Low fat content creates protein buoyancy problems. When you’re working with lean cuts, they’ll want to bob around like tiny icebergs. That’s where vacuum sealing becomes your secret weapon—removing air eliminates most floating headaches and keeps everything submerged where it belongs.
Adjusting Your Vacuum Sealing Settings for Better Results
Master your vacuum sealer’s settings, and you’ll unseal the secret to keeping those stubborn proteins exactly where you want them. Your seal pressure is the MVP here—crank it up just enough to create an airtight seal without crushing your delicate fish or chicken. Too little pressure? Your bag becomes a helium balloon. Too much? You’re squishing out flavor like a pessimistic sponge. Experiment with your cycle duration too. Shorter cycles work great for thin cuts, while thicker portions need that extra time to seal properly. Think of it like Goldilocks—not too short, not too long, but juuust right. Play around with these settings, and you’ll finally achieve sous vide sealing perfection.
Troubleshooting Tips for Persistent Floating Problems
If your sous vide bag’s still doing its best impression of a beach ball despite nailing those vacuum settings, don’t panic—you’ve got options. Sometimes even perfect sealing isn’t enough to keep your food submerged. Here’s what you can do:
- Double-check for air leaks by inspecting the sealed edges closely, especially corners where sneaky air pockets hide.
- Use a second bag as a backup for float prevention, basically creating a double-layer system that’s practically unsinkable.
- Try weights—seriously, just place a heat-safe dish or ramekin on top of your bag to hold it down.
- Adjust your cooking temperature slightly, as some foods release gas during heating and need extra pressure management.
You’ll nail this.
Frequently Asked Questions
Is Sous Vide Cooking Safe if the Bag Floats Partially Above Water?
No, you shouldn’t allow your bag to float partially above water. You’re risking food safety issues because air pockets prevent even heat distribution, leaving you with undercooked areas vulnerable to harmful bacteria growth.
Can I Use Regular Plastic Bags Instead of Vacuum-Sealed Bags for Sous Vide?
You can use regular plastic bags, but you’ll need zip top alternatives or reusable silicone bags designed for sous vide. Standard plastic bags aren’t reliable—they may leak or allow water infiltration during cooking.
How Long Can Food Safely Cook if the Bag Keeps Floating?
Like a boat drifting untethered, your floating bag risks uneven cooking. You’ll want to limit safe duration to shorter intervals, respecting temperature limits carefully since you’re not maintaining consistent heat exposure throughout your food.
Will Floating Bags Affect the Cooking Temperature or Final Food Quality?
Yes, your floating bags will compromise heat distribution, resulting in uneven cooking. You’ll notice texture changes and inconsistent doneness throughout your food, ultimately degrading your final dish’s quality.
What Happens if Water Enters the Bag During the Sealing Process?
If water enters your bag during sealing, you’ll compromise seal integrity and risk water contamination of your food. Your meal won’t cook properly, and you’ll need to restart with a fresh bag to guarantee food safety.
Conclusion
You’ve got this! Your floating bag problem? It’s totally fixable. Whether you’re vacuuming out air like you’re defusing a bomb or weighing everything down with clips and magnetic weights, you’ve got solid options. And here’s the kicker—once you nail that perfect seal and keep those bags submerged, your sous vide game’ll level up faster than you’d expect. Perfectly cooked proteins await!