You’re tempering chocolate, everything’s going great, and then—your machine decides to throw a tantrum. Temperatures spike, then drop, leaving you with dull, streaky batches instead of that gorgeous glossy finish you’re after. It’s frustrating. But here’s the thing: it’s usually fixable. Whether it’s a temperamental sensor, worn heating element, or something simpler lurking inside, we’ve got the answers to get your machine back on track.
Key Takeaways
- Worn heating elements and failing thermostats cause temperature fluctuations and inconsistent chocolate tempering results.
- Calibration drift detected through spot-checks with accurate thermometers requires recalibration every three to six months.
- Poor insulation and heat leaks force heating elements to overwork, increasing temperature swings significantly.
- Inspect temperature probe placement to ensure it sits properly in chocolate, not touching machine walls.
- Schedule monthly deep cleaning of heating elements and seals to prevent mineral buildup and heat loss.
Understanding the Importance of Precise Temperature Control
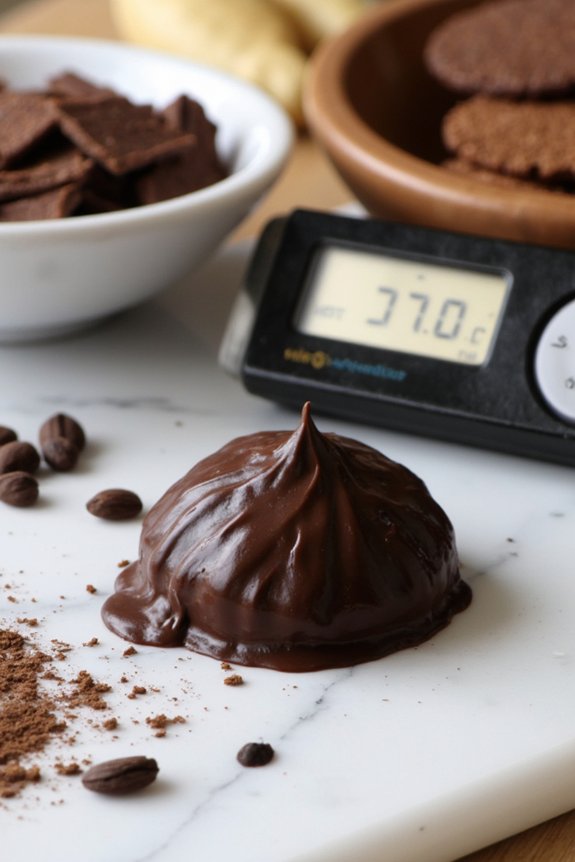
When you’re working with chocolate, temperature’s basically your best friend or your worst enemy—there’s really no in-between. Precise temperature control isn’t just some fancy requirement, it’s absolutely essential for getting that perfect shine and snap you’re after.
Here’s the thing: chocolate’s temperamental. Even small fluctuations can mess with your batch variation, leaving you with inconsistent results that’ll frustrate anyone. Ambient humidity plays a role too, affecting how your chocolate sets and hardens. When you’re tempering properly, you’re fundamentally aligning those cocoa butter crystals in just the right way, creating that glossy finish and satisfying crack.
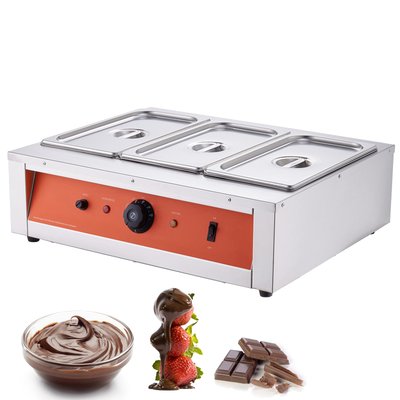
Without nailing your temperatures, you’ll end up with dull, grainy chocolate that nobody wants. So yeah, staying locked in on temperature control? That’s not negotiable if you want quality chocolate. Many modern tempering machines use independent temperature controls to help maintain the precise settings needed for different types of chocolate, preventing unwanted cross-contamination or overheating.
Common Causes of Temperature Fluctuations
Since you’ve got your temperatures dialed in perfectly, the last thing you want is some sneaky culprit throwing everything off balance. Here’s the thing: process variability can sneak up on you when your machine’s heating elements wear down or thermostats get a little too sensitive. Ambient influences matter way more than folks realize. If your kitchen’s temperature swings wildly, your machine’s gonna struggle keeping up. Maybe there’s a drafty window nearby or the AC’s blasting directly at your equipment, constantly battling against your settings. Sometimes it’s just worn-out parts that can’t hold steady anymore. The heating coil might be acting up, or perhaps your calibration’s drifted over time. Even humidity levels play a role in how stable your chocolate tempering actually stays. Temperature-sensitive tasks like chocolate work benefit from precise temperature control to ensure consistency and prevent unwanted fluctuations.
Diagnosing Thermostat Problems
When your tempering machine starts acting like it can’t make up its mind about temperature, it’s usually time to check if your thermostat’s calibration has drifted off course—basically, it’s telling your machine the wrong numbers. Watch for red flags like inconsistent readings, the machine overshooting or undershooting your target temp, or the heating element cycling way too much, which often means your sensor’s got some issues and isn’t reporting temperatures accurately anymore. If you’re noticing these problems, you’ve probably got either a sensor that’s gone wonky or a thermostat that needs recalibrating, and catching this early beats dealing with a batch of seized chocolate later. Just like with automatic pressure control in electric pressure cookers, having reliable temperature regulation is essential to prevent both overheating and underheating in chocolate tempering machines.
Calibration Drift Detection
Over time, your chocolate tempering machine’s thermostat can drift from its calibration, and honestly, it’s one of those sneaky problems that’ll mess with your results before you even realize something’s wrong. You’ll want to establish a sensor recalibration schedule so you catch these issues early. Most pros recommend checking calibration every three to six months, depending on how heavily you use your machine. Pay attention to your drift threshold setting, which basically tells you how far off things can go before they become a real problem. If your machine’s reading 88 degrees but it’s actually 92, that’s problematic. Simple test? Use an accurate thermometer to spot-check your machine’s temperature at different settings and compare the readings against what your thermostat displays. Like with automatic shut‑off and boil‑dry protection in modern electric kettles, regularly verifying accuracy prevents unnoticed faults from affecting your chocolate tempering results.
Sensor Malfunction Signs
If your machine starts acting like it’s got a mind of its own, your sensor’s probably trying to tell you something. Watch for erratic readings that jump around like they’re possessed. You might notice cold drift where temperatures gradually drop below what you’ve set, even though nothing’s physically changed. One minute it’s reading 88 degrees, the next it’s claiming 82. That’s your thermostat waving a red flag. Another telltale sign is when the display freezes on one number or refuses to update. Sometimes sensors get stubborn and just stop responding to actual temperature changes. If you’re seeing wild fluctuations or consistent false readings, your sensor’s likely failing and needs replacement soon. Just like with warranty length and coverage on kitchen appliances, sensor reliability is crucial for avoiding downtime and costly repairs.
Inspecting and Replacing Heating Elements
Heating elements tend to wear out over time, so you’ll want to track down the culprit behind your machine’s temperature swings, and replacing them is actually one of the more straightforward fixes you can tackle yourself. Start by unplugging everything and letting it cool completely. You’re looking for signs of element corrosion, discoloration, or visible damage around the heating coil replacement area.
| Issue | What to Look For |
|---|---|
| Corrosion | White or green crusty buildup |
| Cracks | Visible breaks in the element |
| Discoloration | Dark spots or burn marks |
| Resistance | Element doesn’t heat properly |
Most machines have easily accessible elements held down by a couple bolts. Snap photos before disconnecting anything so you remember how it goes back together. Your new element should match the wattage exactly, otherwise you’re just asking for more temperature headaches down the road.
Evaluating Your Machine’s Insulation

Now that you’ve got a shiny new heating element in place, don’t celebrate just yet because a worn-out heating element is only half the battle. Your machine’s insulation is equally essential for maintaining stable temperatures. Check the walls and seals around your tempering machine for any cracks, gaps, or deterioration. Poor insulation means your heating element works overtime, burning through energy like there’s no tomorrow. Look for thermal barriers that might’ve shifted or compressed over time. They’re your chocolate’s best friend when it comes to energy conservation. Peek inside access panels if you can and inspect the insulation material for damage. Sometimes it’s just loose, sometimes it’s genuinely shot. Either way, addressing insulation problems prevents temperature swings that’ll wreck your batches.
Calibration Issues and How to Fix Them
Once you’ve got your insulation sorted, there’s another sneaky culprit lurking behind those temperature swings: a miscalibrated thermometer. Your machine might actually be holding temperature just fine, but your sensor’s telling you lies. Not cool, literally.
Start with sensor calibration by checking your thermometer against a reliable reference. Use an ice bath and boiling water test, pretty straightforward stuff. If there’s a gap between what your sensor reads and reality, you’ve found your problem.
Next up is probe alignment. Make sure your temperature probe sits properly in the chocolate, not touching the machine’s walls or sitting too shallow. Poor positioning throws everything off, creating false readings that’ll drive you bonkers and mess with your tempering results.
Maintenance Tips to Prevent Temperature Loss
To keep your tempering machine running smoothly and maintaining consistent temperatures, you’ll want to stay on top of a few key maintenance tasks. Start by cleaning your heating elements regularly, since buildup and residue can mess with heat distribution, and don’t skip inspecting your seals and gaskets for wear or damage because even tiny leaks’ll cause temperature swings faster than you can say “seized chocolate.” Finally, make it a yearly habit to calibrate your temperature sensors, which honestly takes just a bit of time but saves you from a whole lot of tempering headaches down the road.
Clean Heating Elements Regularly
Regular maintenance of your heating elements is absolutely essential if you want to keep your chocolate tempering machine running smoothly. Over time, mineral deposits and element buildup accumulate on your heating coils, which prevents them from transferring heat effectively. You’ll notice your machine struggling to maintain temperature, and honestly, that’s your cue to act.
Grab a soft brush or cloth and gently clean around the heating elements. For stubborn scale removal, use a mixture of white vinegar and water, dabbing it carefully on affected areas. Don’t use harsh scrubbers that’ll damage the elements. A little preventative cleaning every few weeks keeps everything working like it should, saving you from expensive repairs later.
Inspect Seals and Gaskets
While you’re tackling those heating elements, don’t overlook what might be quietly stealing your temperature stability—worn seals and gaskets. These little rubber components work harder than you’d think, keeping heat locked inside where it belongs. Over time, they deteriorate and let precious warmth escape, making your machine chase temperatures it can’t quite reach.
| Issue | Solution |
|---|---|
| Visible cracks | Gasket replacement needed |
| Hardened rubber | Replace immediately |
| Heat leaks | Seal inspection required |
| Temperature drops | Check all seals |
| Worn edges | Schedule replacement |
Your seal inspection should happen every few months. Look for cracks, hardening, or discoloration around the chamber. If something looks sketchy, don’t wait—gasket replacement is cheap insurance against bigger problems. You’ll notice the difference pretty quick once you’ve got fresh seals installed.
Calibrate Temperature Sensors Annually
Keeping your temperature sensors accurate is where a lot of chocolate temperers trip up, and honestly, it’s the sneakiest culprit behind inconsistent results. Your machine can’t hold proper temperature if it’s reading wrong numbers. That’s why establishing a sensor recalibration schedule matters so much.
Here’s what you should do:
- Schedule annual calibration checks with certified technicians
- Use traceable calibration standards for accuracy verification
- Document all calibration dates and results carefully
- Compare readings against known reference points regularly
- Replace sensors showing drift or inconsistency issues
Think of it this way: your sensors are like the eyes of your tempering machine. When they’re off, everything else suffers. Annual maintenance keeps your chocolate flowing smoothly and your batches consistent.
When to Clean Your Machine’s Internal Components
You’ll want to clean your machine’s internal components more often than you might think, especially if you’re running it regularly. A solid sanitation schedule keeps things running smoothly and prevents chocolate buildup from messing with your temperature readings. Think of it like this: dirty parts can’t perform their best, and that directly affects your machine’s ability to hold steady temps.
Aim for a deep clean every month, focusing on component sterilization of those hard-to-reach areas where cocoa butter likes to hide. If you’re using your machine daily, bump that up to every two weeks. Don’t overlook the heating elements and thermostats either, since residue there causes major temperature fluctuations. Your machine’ll thank you with more consistent results and fewer headaches down the road.
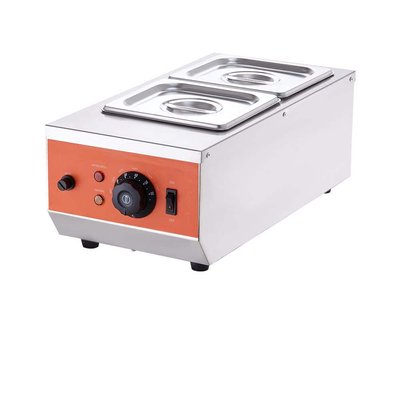
Upgrading or Replacing Your Tempering Machine
Eventually, even the best tempering machine reaches the end of its useful life, and knowing when to upgrade or replace it can save you a lot of frustration. If you’re constantly battling temperature issues despite regular maintenance, it might be time to ponder moving on.
Here’s what to think about:
- Repeated repairs that cost nearly as much as a new machine
- Automation integration with your production line for smoother operations
- Energy efficiency improvements that’ll lower your utility bills
- Outdated technology that can’t keep up with modern demands
- Warranty coverage on newer models for peace of mind
Newer machines offer better temperature stability and reliability. You’ll appreciate the improved performance, and honestly, the stress relief alone is worth it.
Frequently Asked Questions
What Chocolate Type Requires the Most Precise Temperature Control During Tempering?
White chocolate requires the most precise temperature control you’ll encounter during tempering. You’ll need to maintain exact heat levels because ruby chocolate demands equally strict precision, making both challenging for your equipment to manage consistently.
How Does Ambient Room Temperature Affect My Chocolate Tempering Machine’s Performance?
Your room’s temperature directly impacts your machine’s heating efficiency and stability. High ambient humidity and poor air circulation force your tempering machine to work harder, causing temperature fluctuations and inconsistent chocolate quality throughout operation.
Can I Use a Tempering Machine for Non-Chocolate Products Like Coatings?
Yes, you can use your tempering machine for alternative coatings and non-food applications. However, you’ll need to verify temperature compatibility and make certain the machine’s materials won’t react with your specific coating. Always check manufacturer guidelines first.
What’s the Average Lifespan of a Chocolate Tempering Machine Before Replacement?
Your chocolate tempering machine typically lasts 5-10 years with proper maintenance. Watch for replacement indicators like inconsistent temperatures, heating element failures, or worn components that can’t be repaired cost-effectively.
How Do I Know if My Machine’s Temperature Sensor Needs Professional Recalibration?
You’ll notice sensor drift when your machine’s temperature readings don’t match an external thermometer. Check your calibration log for inconsistencies. If readings vary by more than two degrees, you’ll need professional recalibration.
Conclusion
You’ve got this. Whether it’s a wonky thermostat, a crusty heating element, or just some buildup playing tricks on you, most temperature problems aren’t permanent. Run through those diagnostics, give your machine some TLC, and you’ll be tempering like a pro again. Still acting up? Time to upgrade. Your chocolate—and your sanity—will thank you.