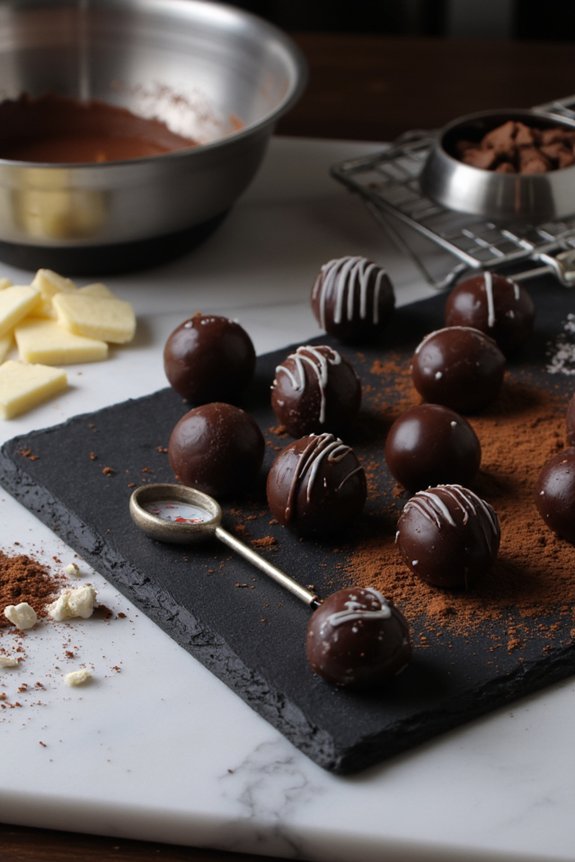
You’ve tempered your chocolate perfectly, but then those annoying white streaks show up. What gives? Well, it’s not mold or spoilage, so don’t panic. Your cocoa butter’s just getting a little too comfortable and migrating around on the surface. Temperature swings, humidity, or even just sitting in a drafty spot can cause this. The good news? It’s totally fixable, and understanding why it happens is the first step to keeping your chocolate looking glossy and professional.
Key Takeaways
- White streaks result from cocoa butter crystals migrating to the surface and recrystallizing into unstable forms.
- Temperature fluctuations during storage cause cocoa butter crystal restructuring, triggering bloom formation on chocolate surfaces.
- Improper tempering—failing to maintain steady heat and cool gradually—creates unstable crystal structures prone to bloom.
- Humidity above 50–60% causes sugar bloom when moisture dissolves internal crystals, which recrystallize on the surface.
- Store chocolate in airtight containers at 60–70°F away from drafts, sunlight, and humidity sources to prevent streaks.

Understanding Chocolate Bloom: What It Really Is
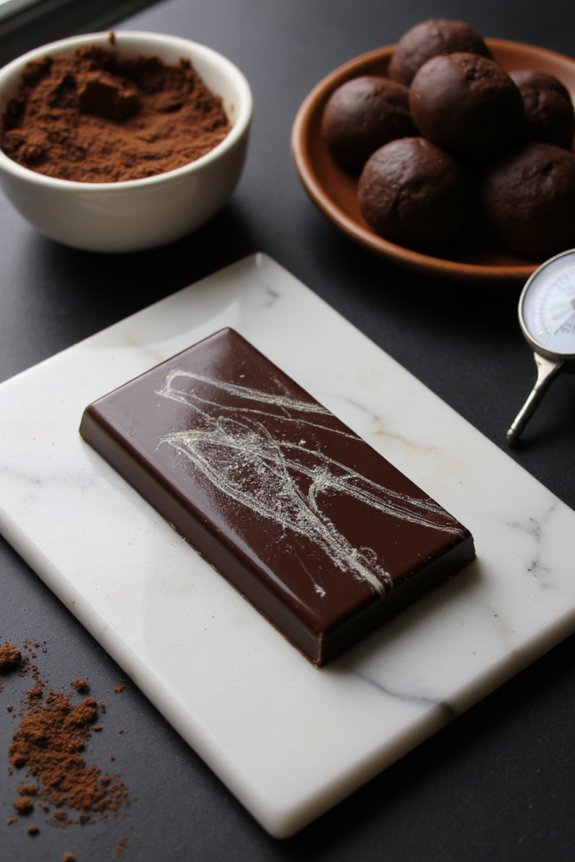
When you pull a chocolate bar from your pantry and notice those white streaks coating the surface, you’ve probably wondered what’s going on. That’s chocolate bloom, and it’s actually pretty fascinating from a chocolate chemistry perspective. Basically, the cocoa butter in your chocolate is shifting around. Temperature changes cause the fat crystals to rearrange, rising to the surface and creating those visual indicators we all recognize.
Here’s the thing: bloom isn’t actually harmful. Your chocolate’s still totally safe to eat. It just looks kinda gross, right? The white coating forms when cocoa butter melts slightly and then recrystallizes in a different pattern. Think of it like your chocolate getting a temporary makeover it didn’t ask for. Understanding this chemistry helps you prevent it from happening in the first place.
The Science Behind Fat Bloom Formation
Fat bloom actually happens through a pretty straightforward process, even though it might seem mysterious at first. You’re dealing with cocoa butter molecules that are basically playing musical chairs inside your chocolate. Here’s what’s going down:
* Crystal nucleation starts when cocoa butter crystals begin forming unstably
- Polymorphic shifts occur as these crystals shift into different structural forms
- Fat molecules migrate toward the chocolate’s surface over time
- They recrystallize into that white, powdery coating you’ve seen
- Water vapor moves from humid air into your chocolate’s cocoa butter layer
- Humidity gradients create pressure differences that drive this process forward
- Sugar crystals dissolve as moisture seeps through, then recrystallize on the surface
- The whole thing happens gradually, so you don’t notice until it’s too late
- Ambient humidity fluctuations cause cocoa butter to behave unpredictably, triggering bloom
- Temperature shifts between day and night create stress on chocolate’s crystalline structure
- Poor ventilation control allows moisture to settle on your chocolate’s surface
- Inconsistent conditions accelerate fat migration to the top layer
- Maintain steady heat during the entire tempering process
- Use a reliable thermometer, not just your gut feeling
- Keep your workspace away from drafts and direct sunlight
- Cool your chocolate gradually, not suddenly
- Use a reliable thermometer to monitor chocolate temperature precisely
- Work with proper tempering equipment like a melanger or tempering machine
- Maintain correct viscosity control by adjusting heat gradually
- Cool your chocolate to the right temperature before molding
When you temper chocolate improperly, you’re not giving those cocoa butter crystals the right foundation to settle into their most stable form. Temperature fluctuations and storage conditions aggravate the situation. Eventually, the unstable crystals transform and float upward, creating those annoying white streaks. It’s frustrating, but it’s totally preventable with proper technique.
How Sugar Bloom Develops in Humid Conditions
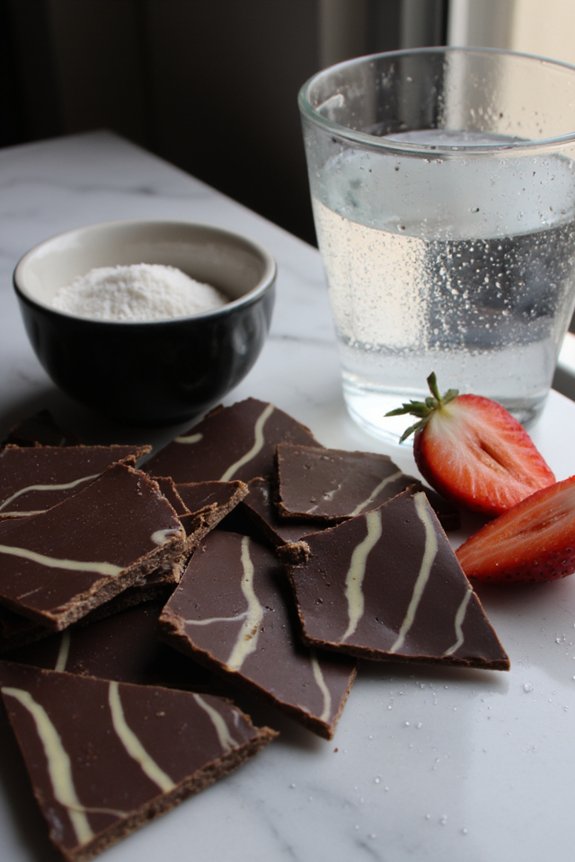
When humidity creeps up, your chocolate’s sugar can actually absorb moisture from the air and migrate to the surface, leaving those frustrating white streaks behind. You’ll want to store your chocolate in cool, dry conditions, ideally below 50% humidity, because sugar bloom thrives when moisture gets the chance to seep in and dissolve those crystals from within. Keeping your stash sealed in airtight containers with maybe a silica packet or two will go a long way in keeping your tempered chocolate looking as pristine as the day you made it. Choosing equipment made from food-grade 304 stainless steel can also help maintain optimal storage and melting conditions by resisting corrosion and ensuring a hygienic chocolate-handling environment.


Moisture Migration Process
Imagine your beautifully tempered chocolate sitting in a humid kitchen, and suddenly those white streaks start creeping across the surface like uninvited guests. Here’s what’s actually happening behind the scenes with moisture migration:
Your chocolate’s basically sweating in the humidity. The cocoa butter doesn’t absorb water directly, but moisture vapor sneaks in through microscopic gaps. As it travels inward then back outward, it carries dissolved sugar along for the ride. That sugar crystallizes differently when it resurfaces, creating those annoying white streaks that make your chocolate look kinda rough.
Prevention During Storage
You’ve probably noticed that storing chocolate in humid conditions is basically asking for trouble, and preventing sugar bloom during storage comes down to controlling your environment before it becomes a problem. Keep your ambient humidity low, ideally between 50 and 60 percent. Use airtight containers to seal out moisture because even small amounts of humidity can trigger sugar bloom over time. Store your chocolate in a cool, dry place away from temperature fluctuations. Those plastic tubs with tight-fitting lids? They’re your best friends here. Avoid storing chocolate near kitchens or bathrooms where steam hangs around. Think of it like creating a protective bubble around your chocolate, keeping the moisture demons at bay. Simple strategy, big payoff. Using airtight containers is a proven method in cookware and pantry storage to preserve freshness and prevent unwanted moisture from affecting sensitive foods.
Temperature Fluctuations and Their Impact on Chocolate
You’ve probably noticed that your chocolate doesn’t stay perfect when you move it from the fridge to your warm kitchen—that’s because temperature swings mess with the cocoa butter crystals that give tempered chocolate its snap and shine. When you’re storing your chocolate, you’ll want to keep things steady and cool, since those crystals are pretty finicky about what temperature they like, and bouncing between hot and cold basically scrambles them into creating those annoying white streaks. Getting your storage spot dialed in, maintaining that consistent melting point, and keeping those crystals stable is really the difference between chocolate that looks restaurant-quality and chocolate that looks like it survived a road trip in someone’s car.
Storage Environment Control Matters
Temperature swings in your storage space are basically chocolate’s worst enemy, and they’re probably happening more often than you realize. Your kitchen isn’t a stable environment. That’s where things get tricky.
Here’s what you’re up against:
You’ve gotta keep your storage spot cool, dark, and steady. Aim for around 65-70°F with low humidity levels. Invest in a small humidifier or dehumidifier if needed. Proper storage conditions aren’t just nice-to-have—they’re essential for preventing those frustrating white streaks from ruining your tempered chocolate. Just like when selecting a storage environment control for food dehydrators, maintaining consistent temperature and humidity is crucial to preserve the quality and appearance of your chocolate.
Cocoa Butter Crystal Destabilization
When your chocolate gets bounced around between different temperatures, its cocoa butter crystals basically throw a tantrum. You see, cocoa polymorphism is the fancy term for how cocoa butter can form different crystal structures depending on conditions. When temperature swings happen, your chocolate undergoes unwanted crystal restructuring. The stable crystals you worked so hard to create start transforming into unstable ones. This process creates those annoying white streaks you’re seeing. It’s like your chocolate’s molecular structure is literally melting down and reorganizing itself into the wrong configuration. The cocoa butter molecules shift around, breaking apart your perfectly tempered structure and forming bloom instead. Think of it as crystal chaos, really, where heat and cold become enemies to your chocolate’s appearance and texture.

Melting Point Consistency Requirements
Keeping your chocolate at a consistent melting point is basically the golden rule if you want to avoid those white streaks we just talked about. Temperature uniformity is vital here, and honestly, it’s easier said than done. When your chocolate bounces between different temps, you’re basically inviting cocoa butter to do its own thing, which creates that annoying bloom.
Here’s what you need to focus on:
Your melting consistency depends on hitting those precise temperature ranges. Even a few degrees off can mess everything up. Stay focused and your chocolate’ll thank you with that gorgeous, streak-free shine you’re after. Investing in a sous vide immersion circulator can help maintain precise temperature control for consistent results during chocolate tempering.
Storage Solutions to Prevent White Streaks
Beyond just storing your chocolate in a dark cupboard, you’ve got to think strategically about where and how you’re keeping it if you want to dodge those pesky white streaks. Temperature stability is your best friend here. Store your chocolate in airtight containers to shield it from humidity and temperature fluctuations that cause bloom. Opaque packaging works wonders too, blocking light that can accelerate the process.
Keep things cool and consistent, ideally between 60-70°F. Avoid the kitchen where ovens and stovetops create heat chaos. Your pantry or a cool closet beats the fridge every time, since refrigerators introduce moisture when you open and close ’em. Think of it like chocolate’s personal climate control system, and you’ll keep those white streaks from showing up uninvited. For even more control over storage temperature, consider using a precision temperature kettle, which can help maintain a stable environment if you need to gently rewarm chocolate for tempering without risking bloom.
Proper Tempering Techniques for a Flawless Finish
If you’ve nailed your storage game but still end up with those disappointing white streaks, it’s time to master the art of tempering. Getting this right means understanding your tempering equipment and nailing viscosity control, which honestly isn’t as complicated as it sounds.
Here’s what you’ll want focus on:
The trick is patience. You’re not rushing this process. Slowly bringing your chocolate to precise temperatures creates that glossy, snap-worthy finish you’re after. When you get viscosity control down, those white streaks disappear and you’ll finally get the flawless chocolate that makes you proud.
Troubleshooting: Fixing Bloom in Already-Made Chocolate
So you’ve got a batch of chocolate that’s already sporting those telltale white streaks, and you’re wondering if all hope is lost. Good news—you’re not completely doomed. If you’re dealing with reversible bloom, there’s actually stuff you can do. Surface remediation is your friend here, and it’s way easier than you’d think.
| Method | Best For | Results |
|---|---|---|
| Gentle remelting | Large batches | Quick recovery |
| Cocoa butter brushing | Smaller pieces | Professional look |
| Tempering again | Partial bloom | Perfect finish |
| Air circulation | Prevention mode | Future protection |
| Controlled heating | Stubborn streaks | Usually effective |
You can gently reheat your chocolate or brush on cocoa butter to restore that glossy appearance. Sometimes just improving airflow around your storage area prevents future problems. It’s not rocket science, just patience and the right approach.
Frequently Asked Questions
Can I Still Eat Chocolate With White Streaks on It?
Yes, you can still eat chocolate with white streaks. It’s safe to eat, though the streaks indicate fat bloom, which affects visual quality. The taste and texture remain fine despite the appearance.
How Long Does It Take for Bloom to Appear on Chocolate?
You’ll typically see bloom appear within a few days to weeks, depending on environmental triggers like temperature fluctuations and humidity levels. Warmer conditions accelerate the timeframe estimates considerably.
Does Bloom Affect the Taste of Chocolate?
Bloom doesn’t directly alter your chocolate’s flavor, but it does create texture changes that affect flavor perception. You’ll notice a grainier mouthfeel, which can make your chocolate taste less smooth and appetizing overall.
Can I Prevent Bloom on Homemade Chocolate Without Tempering?
You can’t fully prevent bloom without tempering, but you’ll reduce it through hand tempering techniques and ingredient adjustments like adding cocoa butter or lecithin to stabilize your chocolate’s crystalline structure.
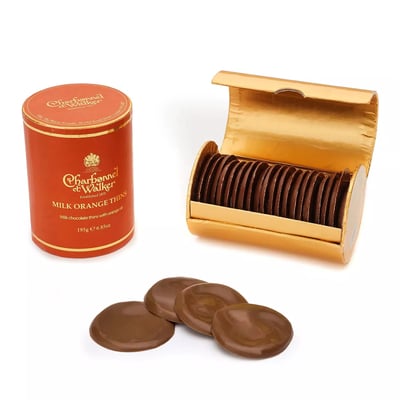
Is Bloom More Common in Dark Chocolate or Milk Chocolate?
You’ll find bloom’s more common in milk chocolate because its higher cocoa butter and sugar content make it prone to sugar migration. Dark chocolate’s lower sugar levels provide you better protection against bloom formation.
Conclusion
So here’s the thing: those white streaks aren’t ruining your chocolate, they’re just telling you something went wrong with storage or tempering. You’ve got options though. Keep your chocolate cool and dry, nail your tempering technique, and you’ll avoid the whole mess. And if you’ve already got bloom? No worries. A quick remelt fixes it right up. Your chocolate’s still perfectly good to eat.