most people lose food processor attachments within six months of buying the machine. Yep, they vanish into kitchen junk drawers, never to be seen again. But here’s the thing—organizing those blades and discs doesn’t have to be complicated or tedious. With the right strategy, you’ll actually know what you’ve got and where to find it.
Key Takeaways
- Inventory all attachments, note usage frequency, and document functions in a spreadsheet for easy reference.
- Select appropriately-sized containers with protective compartments, matching storage to collection size and kitchen layout.
- Use blade covers, separate sharp items, and employ child-lockable containers to prevent cuts and injuries.
- Organize by category using color-coded labels, vertical stacking, and designated spots for each attachment type.
- Rinse immediately after use, air-dry completely before storage, and perform weekly deep cleaning to prevent rust.


Assess Your Current Collection
Before you can organize those food processor attachments gathering dust in your kitchen, you’ve got to figure out what you’re actually working with. Seriously. Pull everything out and lay it on your counter like you’re conducting an inventory audit of your own kitchen gadgetry.
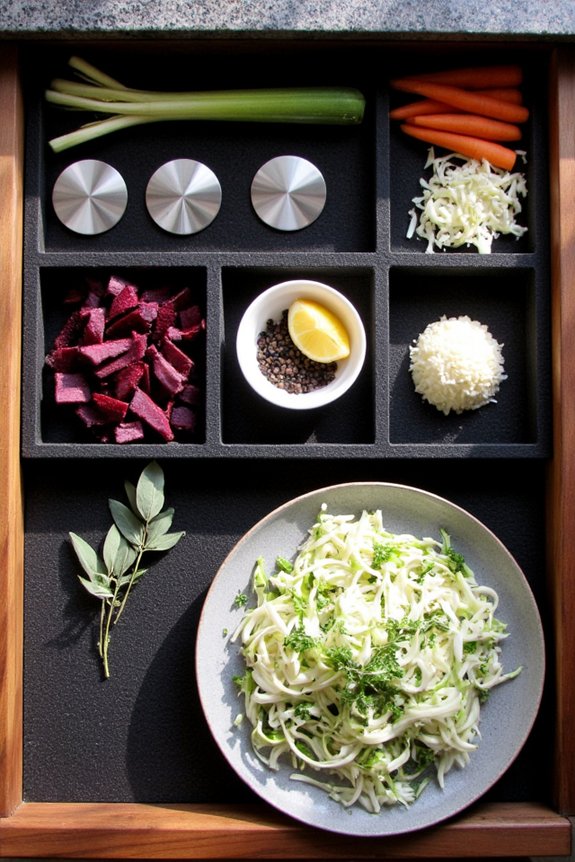
Look at each blade, disc, and shredder attachment. Which ones do you actually use? That’s where usage tracking comes in handy. Be honest with yourself—if you haven’t touched that julienne disc since 2019, it’s probably safe to say it’s not essential. Group similar items together and check for missing pieces or lids.
You might be surprised at what you’ve accumulated. Some attachments are probably hiding parts you forgot existed. This assessment phase? It’s vital. You can’t organize what you don’t know you have.
When sorting your collection, pay close attention to the types of blades and discs you own, as different processors offer reversible discs, chopping blades, and shredding/slicing attachments that affect both versatility and how you should organize them.
Choose the Right Storage Container
Now that you’ve got a handle on what you’re working with, it’s time to find the perfect home for all those blades and discs—and yeah, choosing the right container is way more important than you’d think. You’ll want to take into account size and capacity so everything actually fits without playing food processor Tetris, plus decide whether a drawer setup or cabinet storage makes more sense for your kitchen layout, and don’t forget about those protective compartments that keep your fingers (and countertops) safe from accidental blade encounters. The right container transforms your attachments from a chaotic jumble into an organized system that’ll make you feel like a kitchen pro every time you reach for what you need. When selecting a storage solution, consider options that have removable components for easy cleaning and maintenance, similar to the best electric slicers, so your setup stays hygienic and hassle-free.
Size and Capacity Matters
Once you’ve gathered all your food processor blades, discs, and whisks, you’ll quickly realize that shoving them into a junk drawer isn’t exactly a winning strategy. Your container’s size and capacity matter big time. You need room for everything without cramming it all together like sardines. Think about portion sizes of your attachments and set realistic capacity limits for your storage solution.
| Container Type | Best For | Capacity | Price |
|---|---|---|---|
| Drawer Divider | Small collections | 8-12 pieces | $10-20 |
| Plastic Bin | Medium sets | 15-20 pieces | $15-30 |
| Custom Organizer | Large collections | 25+ pieces | $30-50 |
| Magnetic Strip | Blades only | 6-8 pieces | $8-15 |
Pick something that won’t strain or overflow. Trust me, your sanity depends on it. When choosing storage, consider platform material durability to ensure your container stands up to repeated use and doesn’t damage your attachments.

Drawer Versus Cabinet Storage
Your container’s locked and loaded, but here’s the real question: where’s it actually going to live? Drawers offer convenient access right at your fingertips, though you’ll want to assess drawer depth carefully—shallow drawers might cramped your larger discs. Cabinets give you more flexibility with vertical stacking and hidden storage that keeps things outta sight. Here’s the thing: cabinet airflow matters because moisture can damage those metal blades if they’re trapped in a dark, damp space. You want circulation. Drawers work great if you’ve got the depth for everything, but cabinets? They’re your MVP for protecting attachments long-term. Think about your kitchen layout, your usage habits, and honestly, how often you’ll actually grab these things. Pick whichever spot makes you wanna use your processor more. When considering storage, remember that proper maintenance and airflow are key factors in preserving metal attachments, just as they are for cast iron cookware.
Protective Compartments for Safety
Since those razor-sharp blades’ll slice through your fingers faster than you can say “ouch,” you’ve gotta think seriously about how you’re storing ’em. Blade covers are your best friend here—seriously, don’t skip ’em. Look for containers with dedicated compartments that keep each attachment separated and protected. Individual slots prevent those gnarly edges from banging into other stuff or, worse, your hand when you’re reaching in. If you’ve got kids around, storage containers with child locks are absolutely essential. They’ll keep curious little hands from accidentally discovering why food processors are called “processors” the hard way. Choose stackable containers so everything fits neatly in your cabinet without creating a dangerous game of Jenga every time you need something. When organizing your attachments, consider removable blades because they make cleaning and storage much safer and more convenient.
Separate Blades From Discs
The first thing you’ll want to do is pile all those blades and discs together and sort them out like you’re organizing a deck of cards. Blade separation is vital because mixing sharp blades with flat discs is a recipe for disaster, trust me. Your fingers’ll thank you later.
Group your slicing discs in one spot. Stack your shredding discs nearby. Then, set those intimidating blades aside in their own little section. This disc sorting system keeps everything neat and prevents accidental cuts when you’re rummaging through your drawer at 7 a.m., desperately searching for the right attachment.
Use small containers or dividers to maintain these categories. Label them if you’re feeling fancy. This simple organization hack transforms your chaotic food processor collection into a well-oiled, injury-free machine.
Use Dividers and Compartments
Now that you’ve got your blades and discs sorted, it’s time to give them a proper home with dividers and compartments. This step transforms chaos into organization, and trust me, your future self’ll thank you. Here’s how to create the ultimate storage setup:
- Invest in a drawer organizer with adjustable compartment inserts that fit your storage space perfectly
- Use divider labels to clearly mark each section, so you’ll never wonder what goes where again
- Choose clear containers so you can see exactly what you’ve got without opening anything up
- Stack everything vertically when possible to maximize space and keep things visible
With these compartments in place, grabbing the right attachment becomes a breeze. No more digging through a tangled mess of metal. Your food processor setup’ll be smoother than ever.
Label Everything for Quick Identification
Once your compartments are all set up, you’ll want to make sure you can actually identify what’s hiding in each one—because let’s face it, all those blades start looking pretty much the same after a while. Color coded labels are your best friend here. Grab some bright stickers or a label maker and mark each attachment clearly. You might use red for slicing discs, blue for shredding, green for chopping blades. Quick reference tags work wonders too—especially if you jot down what each piece does. Honestly, a five-second label saves you from that frustrating game of “what attachment is this?” while your ingredients sit there waiting. Your future self will thank you when you’re cooking, not playing detective in your storage containers.


Store Attachments Vertically When Possible
If you’ve ever knocked over a drawer full of flat attachments and watched them cascade onto your kitchen floor like some kind of blade avalanche, you’ll appreciate this game-changing strategy.
Storing your food processor pieces vertically transforms chaos into order. Here’s why you’ll love this approach:
* Vertical racks keep everything visible and accessible without that annoying digging around
- Upright bins maximize your cabinet space while preventing scratches and damage
- Easy retrieval means you’ll actually use all those attachments you forgot you owned
- No more mysterious blade-related injuries when reaching to the back
- Store blades separately in a dedicated container or pouch so they’re not mingling with your other attachments
- Use safety signage on your storage area—a simple “Sharp!” label prevents dangerous surprises
- Consider blade disposal carefully; don’t just toss them in the trash where someone might get hurt
- Keep them away from kids and pets who might not understand the danger
- Install child safe locks on cabinets where you store attachments
- Use high shelving that’s genuinely out of reach, not just “sort of” high
- Keep a seperate container specifically labeled for sharp pieces
- Store blades in their original cases whenever possible
- Schedule audits of your attachment collection quarterly to catch any stragglers
- Track your progress by noting which tools you actually use versus dust collectors
- Return items to their designated spots immediately after washing and drying
- Reassess your system if it’s not working and adjust accordingly
- Rinse immediately after use while residue’s still wet and easier to remove
- Skip the dishwasher for delicate blades; hand wash instead
- Use warm water and minimal soap for soap free drying that prevents water spots
- Air dry completely before storing to avoid moisture buildup and rust
- Check storage spots monthly for dust buildup and any sneaky moisture creeping in
- Use space saving hacks like drawer dividers or hanging organizers to maximize your cabinet real estate
- Control humidity levels by storing attachments in a cool, dry place away from steam and moisture
- Inspect each piece before storing to catch any residue or corrosion early
Think of it like filing cabinets for your kitchen. Each attachment gets its own spot, standing proud and ready for action. You’ll spend less time searching and more time creating culinary masterpeices. Your future self will thank you for this surprisingly simple but brilliant organizational move.
Keep Safety in Mind During Storage
When you’re organizing those sharp blades and spinning discs, safety’s gotta be your top priority—trust me, nobody wants a surprise trip to the emergency room. You’ll want to secure your attachments in a way that prevents them from shifting around or falling out, because a tumbling blade is basically a kitchen ninja you didn’t ask for. And if there’s kids in your house, make sure your storage spot is locked up tighter than Fort Knox, so curious little hands can’t accidentally turn your food processor into a dangerous playground.
Sharp Blades Require Caution
Your food processor’s blades are basically tiny ninjas—incredibly skilled at their job, but you don’t want them catching you off guard. These sharp attachments demand respect, and honestly, a little bit of caution goes a long way.
Here’s how to keep your fingers intact:
Your hands’ll thank you for being thoughtful about this. Sharp blades are incredible tools, but they’re only awesome when they’re handled responsibly and stored smartly.
Secure Storage Prevents Accidents
Beyond keeping those ninja blades tucked away safely, there’s a whole storage strategy that’ll protect you from accidents waiting to happen. Think about kitchen hazard awareness—those sharp discs don’t belong just floating around your cabinets where curious hands might grab ’em. You’ll want to establish storage access restrictions by designating a specific drawer or container exclusively for food processor parts. Keep everything in one spot, clearly labeled, so nobody’s rummaging through random drawers. Consider using blade guards or protective sleeves; they’re like tiny shields for your fingers. Store heavier attachments on lower shelves to prevent them from toppling onto someone’s head. A little organization now means way fewer trips to the ER later. Your future self will thank you!
Child-Proof Your Storage Area
If you’ve got little ones running around your kitchen, it’s time to think like a toddler and lock down those food processor blades like they’re treasure. Those sharp discs aren’t toys, and curious fingers shouldn’t go anywhere near them.
Here’s how to keep your storage area kiddo-proof:
Think about your storage from a pint-sized perspective. Can a determined three-year-old figure it out? If yes, you’re not done yet. Your future self will thank you when you’re not dealing with preventable accidents. Safty first, always.
Create an Inventory System
Keeping track of all those food processor blades, discs, and whisks is where things get real—and honestly, it’s easier than you’d think. Start with basic accessory tracking by listing every attachment you own. Snap photos of each piece and jot down what it does. You’ll want to note purchase dates too. Why? Warranty logging matters, especially if something breaks unexpectedly. Store that info in a simple spreadsheet or even a notebook tucked near your processor. Include where each attachment lives in your storage setup. This way, you’ll never wonder again if you actually own that citrus juicer disc or if you’re just imagining it. Plus, when something needs replacing, you’ve got the warranty deatails right their—no hunting around.
Maintain Your Organization Over Time

Your organizational system won’t maintain itself, so you’ll want to check in on it regularly—maybe once a month or whenever you use your processor frequently. Think of it like tending a garden—neglect it and weeds will take over. Here’s how to keep things running smoothly:
Regular maintenance prevents chaos from sneaking back in. You’ll feel way more satisfied knowing exactly where everything is. Plus, you’ll spend less time hunting for that one shredding disc and more time making delicious food. Stay on top of it!
Implement a Regular Cleaning Schedule
You’ll want to stick to a daily rinse protocol right after use, because dried-on food is basically cement, and nobody’s got time for that battle later. Then tackle a weekly deep cleaning where you actually scrub down those crevices and let your attachments soak, plus check your storage setup to make sure everything’s staying dry and organized so nothing gets moldy or mysteriously sticky. Think of it like brushing your teeth versus going to the dentist, except way less painful and your food processor will actually thank you for it.
Daily Rinse Protocol
Most food processor enthusiasts don’t realize that a quick daily rinse is the difference between attachments that last for years and ones that get gunked up and neglected in the back of a cabinet.
Here’s your straightforward routine:
Don’t overthink this. Spend two minutes rinsing your discs and blades right after cooking, and you’ll avoid that nasty dried-on gunk that makes cleaning feel like torture. Your future self will thank you. Seriously. These little habits transform your food processor from kitchen hero to reliable workhorse for decades.
Weekly Deep Cleaning
While daily rinsing keeps things tidy, a weekly deep clean is where the real magic happens—it’s your chance to tackle the gunk that sneaks past a quick wash and keeps those attachments performing like they’re brand new. Your deep sanitize routine should include soaking those blades and discs in hot, soapy water for fifteen minutes. Don’t skip the crevices where food particles love to hide. Odor control treatments work wonders too, so consider running attachments through a vinegar soak if they’re smelling funky. Here’s what you’re fighting against:
| Problem | Solution |
|---|---|
| Stubborn buildup | Soak and scrub |
| Lingering smells | Vinegar treatment |
| Bacterial growth | Hot water sanitize |
| Dried residue | Soft brush scrub |
You’ll be amazed at how fresh everything feels afterward. Your food processor will thank you!
Storage Maintenance Best Practices
Once you’ve got your deep cleaning routine down, the real secret to keeping those food processor attachments in tip-top shape is staying consistent with your storage maintenance. You’re not done yet, my friend!
Here’s what’ll keep everything fresh:
Think of it like brushing your teeth. You wouldn’t skip it for weeks, right? Same logic applies here. Consistency prevents headaches and keeps your attachments performing like champions for years to come.
Frequently Asked Questions
How Often Should I Replace Worn or Damaged Food Processor Blades and Discs?
You should replace worn or damaged food processor blades and discs immediately when you notice dullness or chips. Regular blade inspection prevents poor performance and safety hazards. Replace frequency depends on usage—inspect monthly for heavy users.
Can I Store Food Processor Attachments in the Dishwasher Safely?
Yes, you can if they’re dishwasher safe. Hand wash delicate blades instead—they’re like fine china. Use delicate cycles to prevent plastic warping and detergent residue buildup that dulls cutting edges.
What’s the Best Way to Organize Attachments if I Have Limited Storage Space?
You’ll maximize limited space by using vertical racks or hanging pockets designed for kitchen storage. These solutions keep your attachments accessible while taking up minimal drawer or cabinet room, organizing everything efficiently.
How Do I Prevent Rust or Corrosion on Metal Blades During Storage?
You’ll want to keep oiled your metal blades with a light coat after each wash—think of it like maintaining a horse’s tack. Store them in a dry spot with silica gel packets to absorb moisture and prevent corrosion effectively.
Should I Store Attachments Separately From the Main Food Processor Unit?
Yes, you should store attachments separately from the main unit. Use a dedicated container with a labeling system to organize each blade and disc. This prevents damage, makes them easier to find, and keeps your food processor base protected.
Conclusion
You’ve conquered the chaos! Your collection’s now clearly categorized, carefully contained, and consistently clean. You’re no longer lost looking for that slicing disc you swear you saw somewhere. These simple storage steps save you serious stress, making meal prep practically painless. Plus, you’ve prevented perilous cuts and kept your kitchen gear in great condition. Your food processor’s finally functioning at its finest—now go forth and process with pride!