a solid storage game plan. Before the real cold arrives, you’ve gotta prep that thing right. Want to know the one mistake that’ll cost you? Keep reading.
Key Takeaways
- Clean and sanitize your cooler thoroughly, then dry completely before winter storage to prevent mold and bacteria growth.
- Store your cooler indoors in a dry, temperature-stable location like a garage or basement away from direct sunlight.
- Remove and store all hardware separately in labeled containers to prevent rust, freezing damage, and loss of small parts.
- Apply silicone conditioner to gaskets and seals to keep them flexible and functional throughout cold storage months.
- Use insulating wraps and UV-protective covers to shield your cooler from freeze-thaw cycles and temperature fluctuations during winter.


Clean Your Cooler Thoroughly Before Storage

Before you tuck that cooler away for the season, you’ve got to clean it out—and I mean really clean it. Start by rinsing out any lingering debris, old ice, or mystery gunk that’s been lurking in there. Wipe down the interior walls thoroughly. Don’t skip the corners—that’s where grime loves to hide and throw a party.
Next, you’ll want to sanitize seals where bacteria and mold can sneakily build up over winter. Use a mixture of warm water and mild bleach, or grab some white vinegar if you prefer going natural. It’s not glamorous work, but your cooler’ll thank you come spring.
Finally, deodorize interior surfaces with baking soda. Sprinkle it generously, let it sit overnight, then wipe clean. Your cooler’ll be fresh and ready for hibernation.
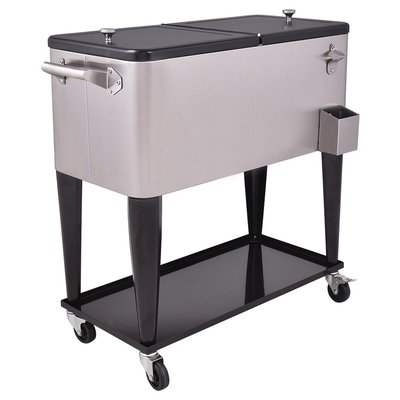
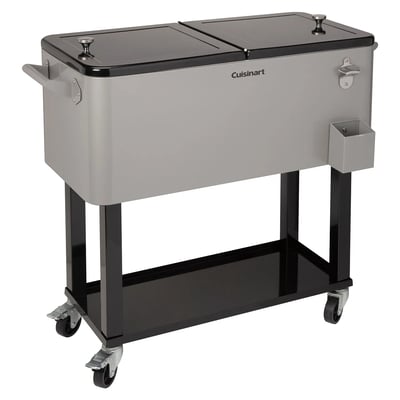
Many coolers, especially those with heavy-duty construction, require special attention to cleaning seams, wheels, and built-in accessories like bottle openers before storage, as these features can harbor moisture and lead to rust or mold if neglected.
Dry Every Surface Completely
Once you’ve sanitized and deodorized your cooler, moisture is the enemy—and you’ll want to eliminate every last drop before storage. Grab some clean towels and wipe down the interior and exterior thoroughly. Don’t miss the corners or crevices where water likes to hide like a sneaky little troublemaker.
Next, crack open that lid and let air circulation do its thing. Position your cooler in a spot with good ventilation, ideally away from direct ultraviolet protection needs—basically, find a shaded area indoors. You could also leave it in your garage or basement for a few days to air dry completely.
Here’s the real kicker: even tiny amounts of lingering moisture can cause mold and mildew to throw a party inside your cooler. That’s definately not the winter welcome you want come spring. For best results, make sure to store unit dry in a clean, well-ventilated space to extend its lifespan and maintain hygiene.
Remove and Store Removable Parts

Now that you’ve dried everything off, it’s time to tackle those removable parts that’ll only cause trouble if you leave ’em in there. You’ll want to drain and empty every last drop from compartments and spigots, because sitting water is basically an open invite for mold and mildew to throw a party in your cooler during those freezing months. Round up all your hardware—hinges, latches, handles, whatever comes loose—and stash it in clearly labeled containers so you’re not playing detective next spring trying to figure out where that mysterious screw belongs. While you’re organizing, consider the warranty length of any cooler accessories you remove, as proper storage helps protect your investment and ensures everything works when you set up again next season.
Drain and Empty Completely
To keep your cooler in tip-top shape through the cold months, you’ve gotta drain out every last drop of water and empty it completely. Seriously, this step’s essential. Any leftover liquid will freeze, expand, and potentially crack your cooler’s walls like an ice sculpture gone wrong.
Start by locating that drain plug at the bottom, then let gravity do the heavy lifting. Check your check valve too, making sure it’s not clogged or stuck. Once you’ve emptied everything, leave the lid open for a bit. This helps with the thaw cycle if any moisture remains hiding inside.
Wipe down the interior with a dry cloth. Remove any forgotten snacks or debris lurking in corners. Your cooler’ll thank you come spring when it’s ready for action again.
For long-term storage, consider how removable parts and dishwasher-safe components can make cleaning and maintenance even easier, just like the best deep fryers on the market.
Organize Hardware in Containers
After you’ve got your cooler squeaky clean and bone dry, it’s time to wrangle all those little removable bits before they scatter like lost socks in the dryer. Grab your drain plug, hinges, and any other detachable hardware and corral them into stackable bins. Seriously, these tiny pieces vanish faster than ice cream on a hot day. Label containers clearly so you’re not hunting through mystery boxes come spring. Use something like “Cooler Hardware—Winter 2024” or whatever keeps you organized. Stack those bins neatly in your storage area. Trust me, future you will be incredibly grateful when you’re not tearing your hair out searching for that one mysteriously missing hinge. Organization now equals zero frustration later. If you want your stored items to last as long as cast iron cookware longevity, take a moment to ensure all hardware is completely dry before sealing it in containers.
Choose the Right Storage Location
When it comes to finding the perfect spot for your cooler’s winter hibernation, you’ve got to think like you’re protecting treasure—because honestly, you kind of are. Your garage corner is ideal. It’s dry, temperature-stable, and keeps your cooler safe from harsh elements. A shaded patio works too, though you’ll want proper covering. Avoid direct sunlight and areas where water pools during freeze-thaw cycles. Basements are fantastic if you’ve got ’em. Stay away from unheated spaces where temperatures fluxuate wildly—that’s rough on plastic and seals. Rodent-prone areas? Nope. Choose somewhere accessible so you can occasionaly check on your cooler throughout winter. Think protected, think stable, think victory. Your cooler’s future self will thank you when spring rolls around.
Protect Your Cooler From the Elements
Now that you’ve found the perfect spot, it’s time to shield your cooler from Mother Nature’s winter wrath. You’ll want to protect it from moisture that can seep in and cause damage, prevent those brutal freeze-thaw cycles that crack plastic and metal alike, and keep it out of direct sunlight, which—believe it or not—can still fade and degrade your cooler even in the cold months when you’d think the sun’s got nothing left to give.
Shield From Moisture Damage
Moisture’s your cooler’s worst enemy during those long winter months, so you’ve gotta take steps to keep water and humidity from sneaking in and wreaking havoc. Think of it as giving your cooler a protective shield against the elements.
Here’s what you need to do:
- Apply a moisture barrier to seal any cracks or crevices where water might sneak through
- Toss in desiccant packets inside your cooler to absorb any lingering dampness
- Leave the lid cracked open slightly when storing indoors to allow air circulation
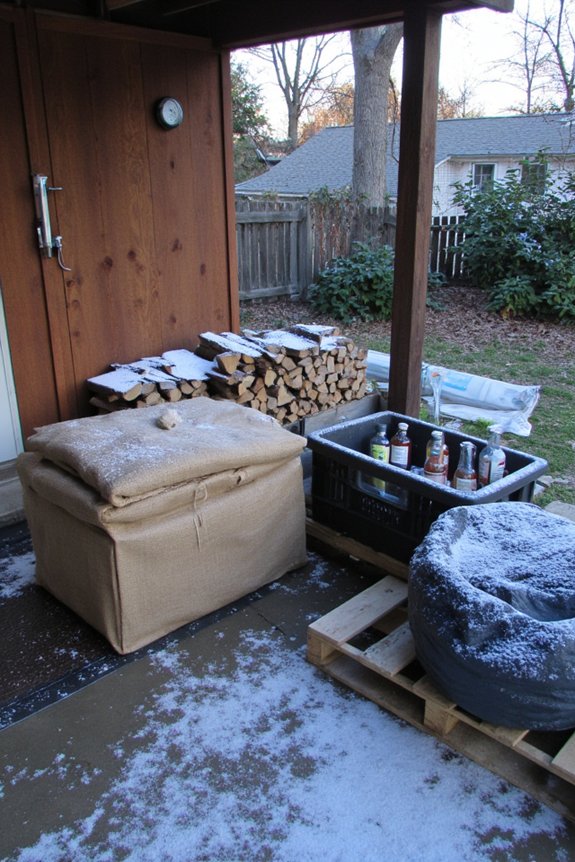
- Store it on a raised platform to keep it away from ground water and melting snow
Don’t let winter moisture turn your trusty cooler into a moldy mess. A little prevention now means your cooler’ll be ready to rock come spring!
Prevent Freeze-Thaw Cracking
Because water expands when it freezes—and your cooler’s gonna be sitting outside in subfreezing temps—you’ve got a real problem on your hands if you’re not careful. Thermal expansion can crack walls, hinges, and drainage plugs faster than you can say “ice damage.” It’s brutal stuff.
Here’s your game plan: drain every last drop of water inside and outside your cooler. Seriously. Even tiny puddles’ll wreck your investment. Then wrap everything up with quality insulating wraps designed for winter storage. These babies protect against the freeze-thaw cycle that happens when temperatures fluctuate.
| Temperature Range | Risk Level | Solution |
|---|---|---|
| Below 32°F | High | Drain completely |
| 20-32°F | Critical | Add insulating wraps |
| Above 32°F | Moderate | Store indoors if possible |
| Fluctuating temps | Extreme | Use thermal barriers |
Your cooler’ll thank you come spring.
Avoid Direct Sunlight Exposure
While your cooler’s been through the freeze-thaw gauntlet all winter, don’t think you’re in the clear just yet—UV rays are waiting to ruin your day the moment the sun comes back out. Sunlight isn’t just warm and fuzzy; it’s actually a silent destroyer of plastic and rubber components.
Here’s what you need to know about protecting your cooler from UV degradation:
- Store it in a shaded garage or shed away from direct sunlight
- Use a UV-protective cover if outdoor storage is your only option
- Keep it out of south-facing windows where temperature cycling intensifies damage
- Consider moving it periodically to prevent uneven fading and material breakdown
Think of your cooler like a vampire—sunlight’s its enemy. Those UV rays break down polymers and fade colors faster than you’d expect. Your cooler deserves better than becoming a sun-bleached relic.
Prepare Your Cooler for Spring Use
As winter finally loosens its icy grip, it’s time to dust off that cooler and breathe new life into it. Start with a thorough spring inspection checklist—check for cracks, mold, or funky odors that’ve accumulated during storage. Give it a good scrubbing with mild soap and water, then let it dry completely. Don’t forget your gasket conditioning plan! Those rubber seals need some love after months of cold. Wipe them down and apply a light silicone conditioner to keep them flexible and functional. Test your cooler’s lid seal to make sure it still closes tight. Replace any damaged hardware or hinges now, before grilling season hits full force. Your cooler’ll be ready to rock when warm weather finally arrives!
Frequently Asked Questions
Can I Store My Cooler Outdoors if I Don’t Have Indoor Space Available?
Yes, you can store your cooler outdoors using portable shelters for protection. Install vent covers to prevent moisture buildup and guarantee proper airflow. This setup shields your cooler from harsh winter elements while maintaining ventilation.
What Temperature Range Is Ideal for Storing a Cooler During Winter?
Your cooler’s restful season thrives between 32-50°F. You’ll find ideal temps in this range preserve insulation performance brilliantly. Avoid fluctuating temperatures; they’ll compromise your cooler’s structural integrity and material durability considerably.
Should I Leave the Cooler Lid Open or Closed While in Storage?
You should leave your cooler lid slightly ajar during winter storage. This allows proper airflow considerations while preventing moisture buildup inside. However, make sure it’s not wide open to avoid debris accumulation and moisture prevention issues.
How Often Should I Check on My Cooler During the Winter Months?
You’d think you don’t need to check it, but you’re wrong. Check your cooler monthly for seasonal maintenance and monthly inspections. You’ll catch damage, mold, or pest issues early, ensuring it’s ready when warm weather returns.
Will Storing a Cooler in Extreme Cold Damage Its Structural Integrity?
Yes, extreme cold can damage your cooler’s structural integrity. You’ll experience material brittleness and seal degradation, making your cooler prone to cracking and leaking when temperatures drop markedly.
Conclusion
You’ve totally got this! Here’s the thing: studies show that properly stored coolers last up to 40% longer than neglected ones. That’s huge, right? You’re not just protecting your investment—you’re setting yourself up for summers to come. Follow these steps now, and you’ll crack open that cooler come spring feeling like a total pro. Your future self’s gonna be grateful.